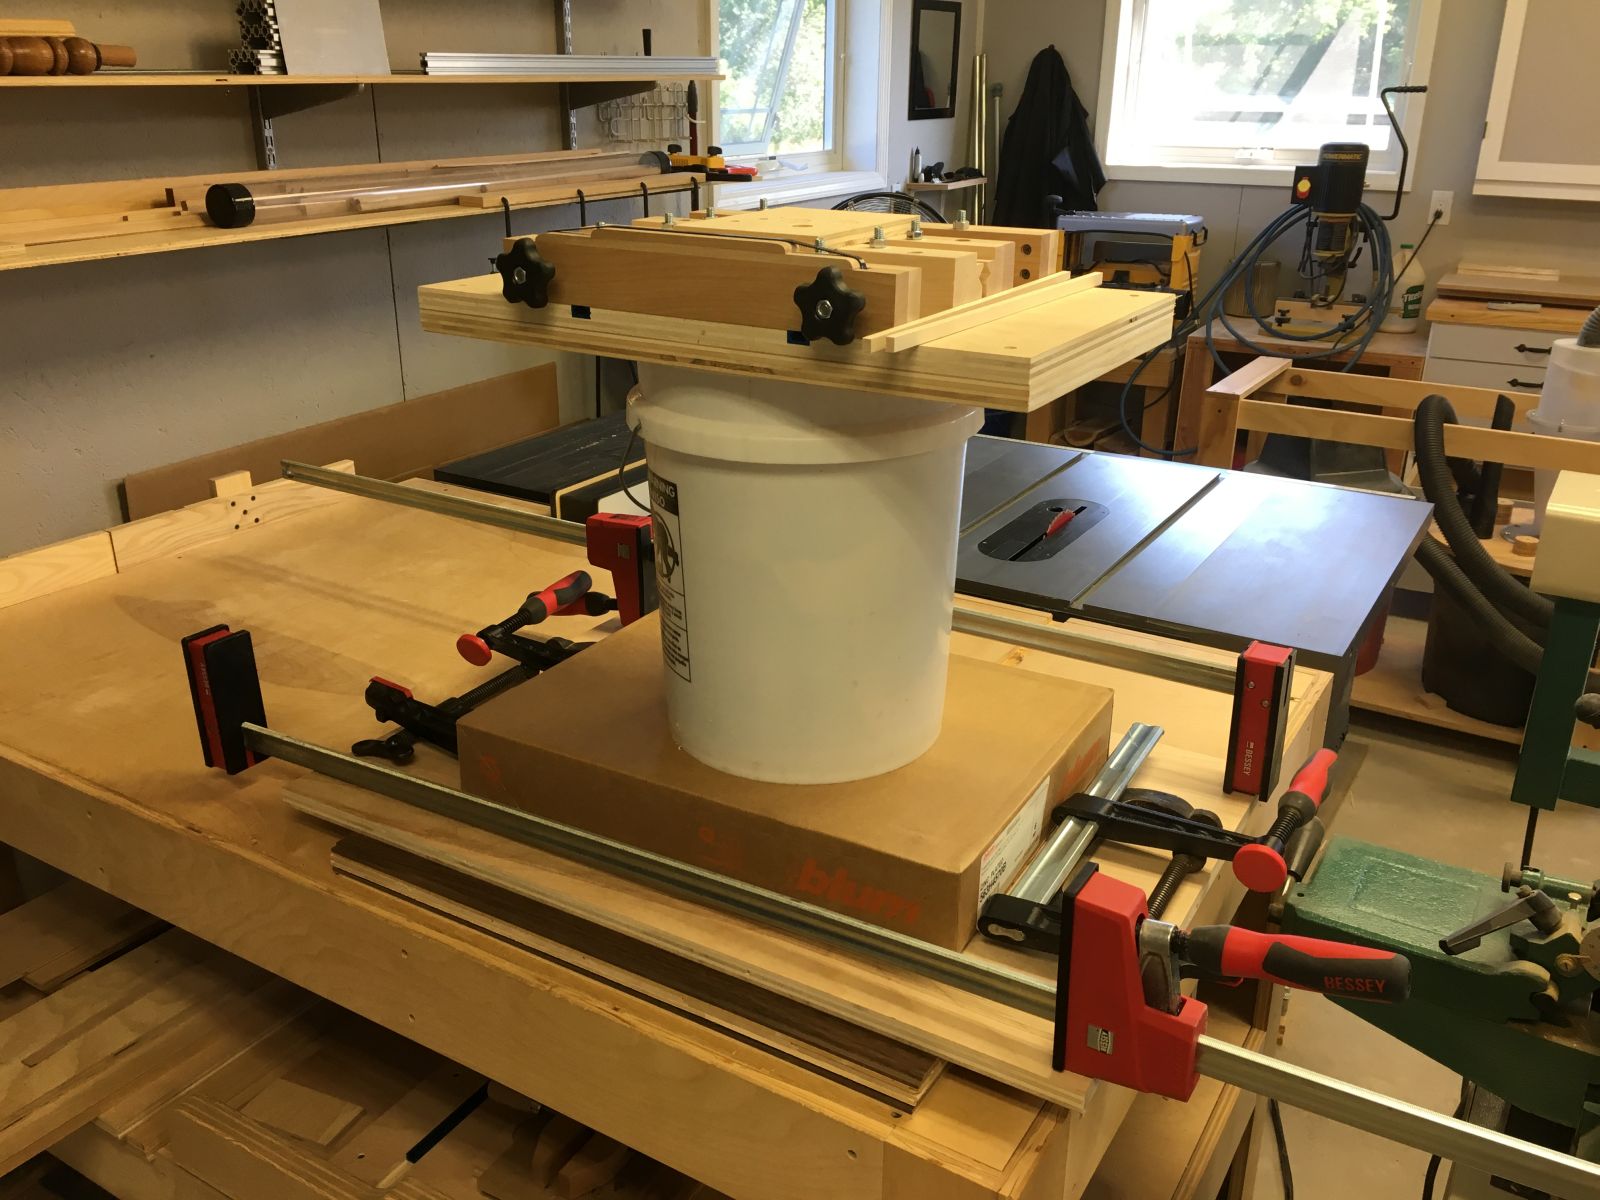
“I played it cool today, as my dad heart was bursting with happiness! #fathersonworkshopproject” is how I described this day in my workshop on social media recently. I love doing a joint project with a young person and hopefully passing along a little knowledge and some passion for working with wood. When that young person was my son, Kyle, it made this afternoon very special for me. Our project was for Kyle to create an ebony and titanium pen and pencil set for his friend and colleague back in San Francisco.
With a little direction, I was impressed at how quickly Kyle gained the necessary skills to produce a beautiful pen and pencil set that he could pass on with pride. For an example, Kyle’s hands told him of a subtle error in the setup of the pen blanks on the lathe’s mandrel, an error that my eyes did not see. He brought it to my attention, we made an adjustment to the setup, and the blanks ran perfectly true. Kyle experienced another common fact of shop life, when he turned the second set of pen blanks in about half the time it took him to turn the first set. Like Mr. Franke, my favorite band director used to say, “Repetition makes reputation!”
Kyle swapping out the jaws on the Nova G3 scroll chuck
Using the tailstock’s quill feed to drill 8mm holes in the ebony pen blanks
It’s always a good idea to process an extra set of pen blanks, especially when you have a plane to catch
Brass tubes affixed and trimmed in each pen blank
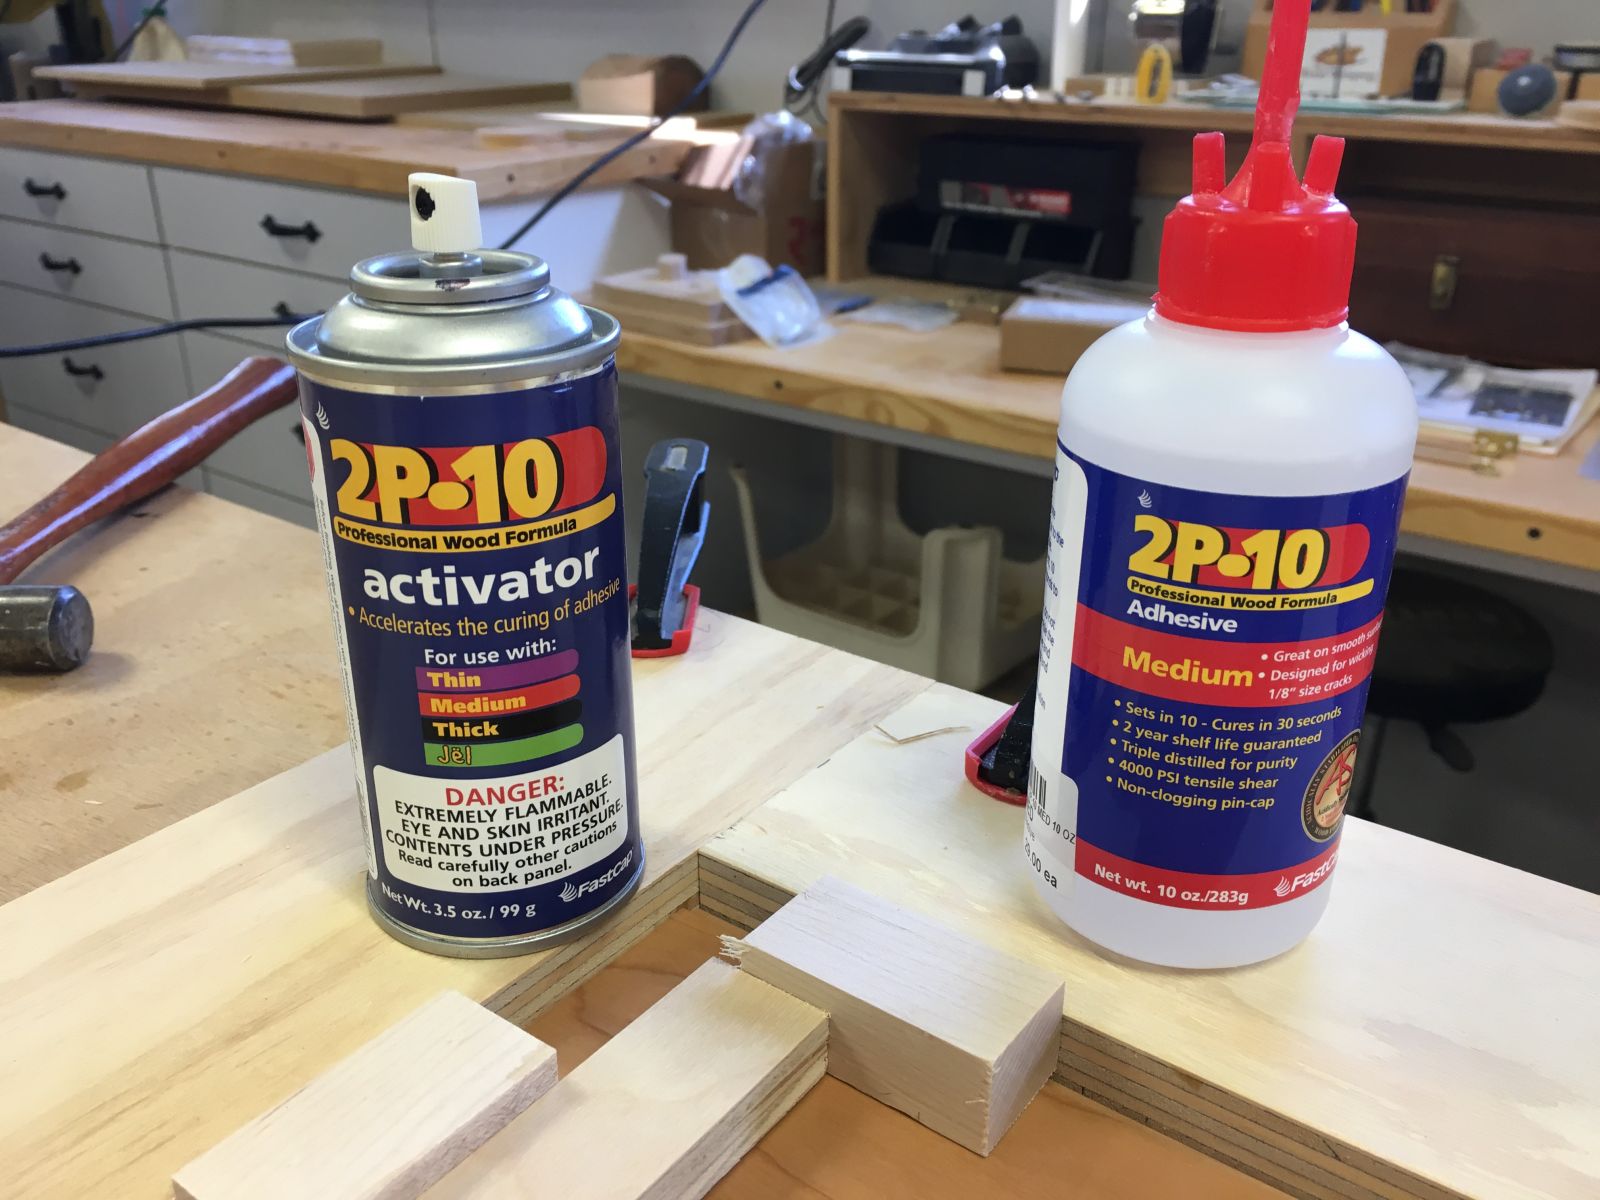
The brass tubes are glued in with CA glue
Using a carbide trimmer to trim and square the ends of each pen blank
Trimming the end grain requires a very light touch
Kyle using a spindle roughing gouge to turn the pen blanks from square to round
Body position is one of the seven key elements of wood turning
A sharp roughing gouge will turn these blanks to their final diameter, as determined by the bushings used to mount them on the mandrel
Getting close to finishing the turning portion of the project
After sanding through many grits, Kyle is applying Aussie Oil, a friction polish, at low speed
Friction generates heat that flashes off the friction polish’s alcohol solvent, leaving the pen blanks ready for assembly … after six coats are applied
Using the wood vise as a pen press for final assembly
The first component pressed into the lower pen barrel
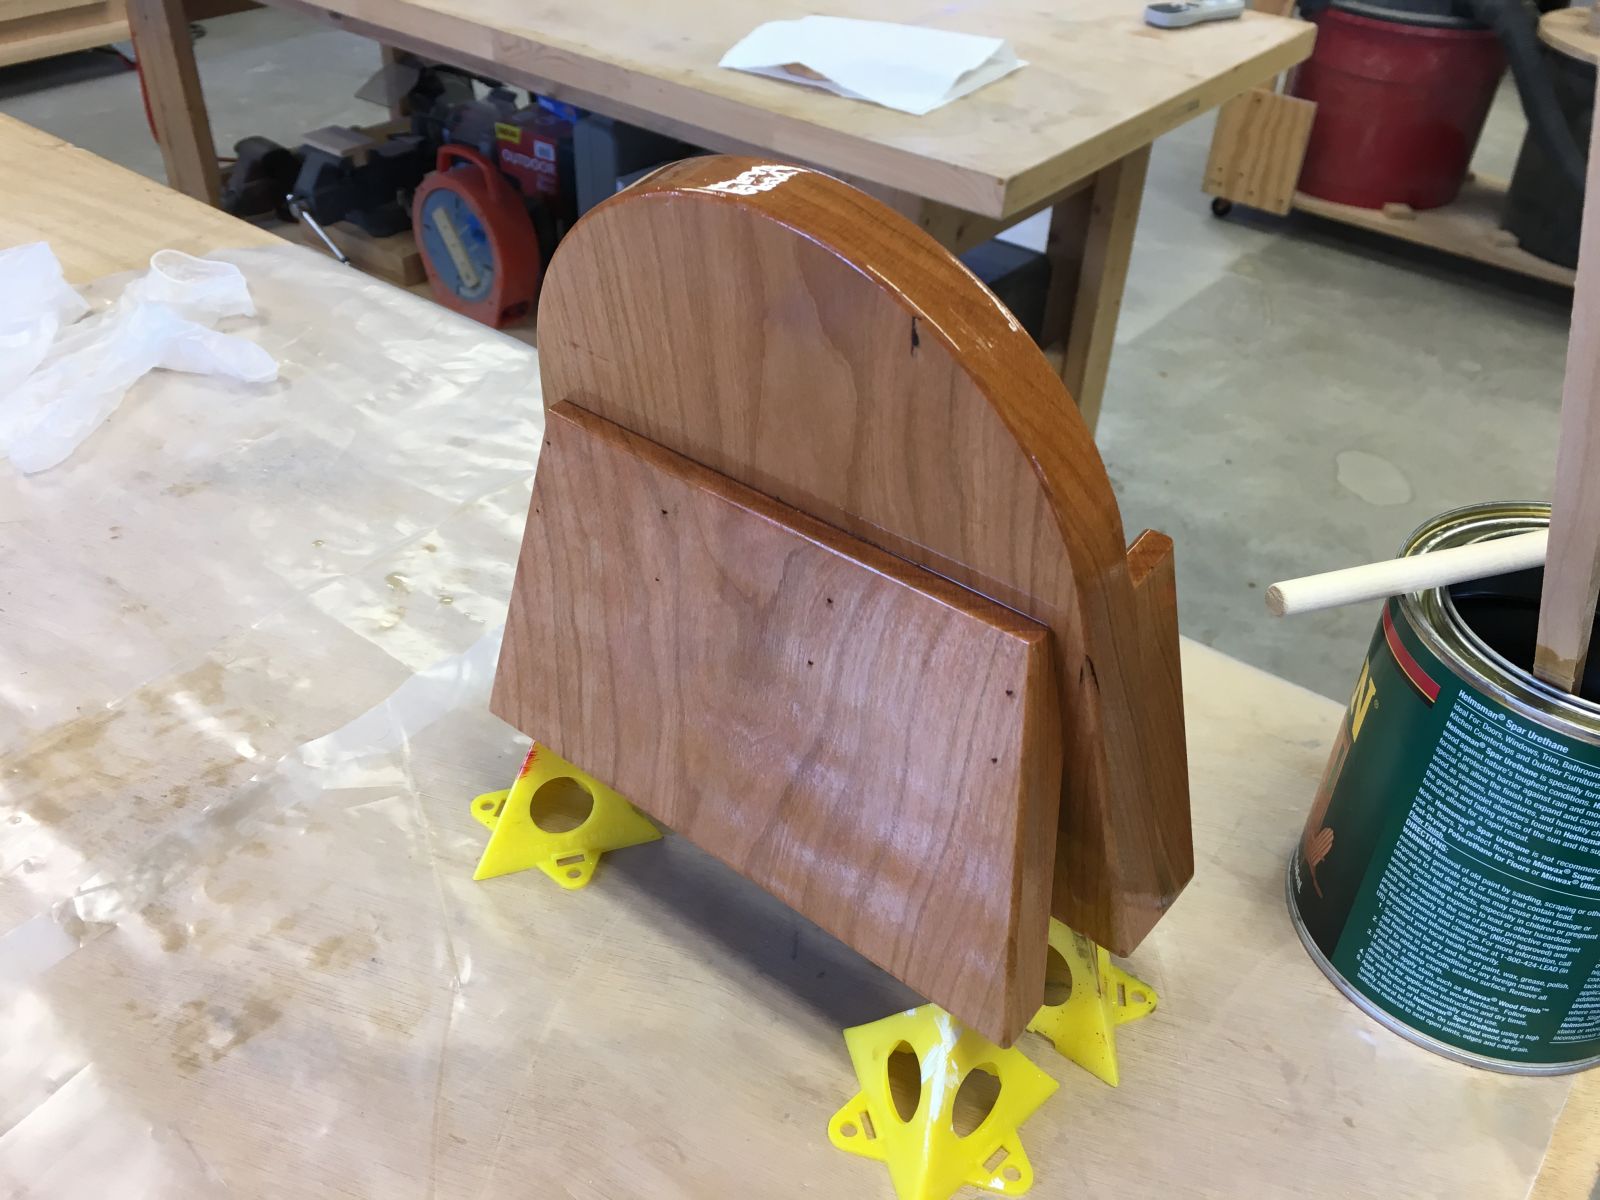
A beautiful ebony and titanium pen and pencil set, and the hands that made them!
The back up blanks we prepared were completed with gold pen components
This pen went to Mike Casey of Aberdeen Bikes and Outdoors, for the kindness he showed to Kyle during his visit over the Labor Day weekend
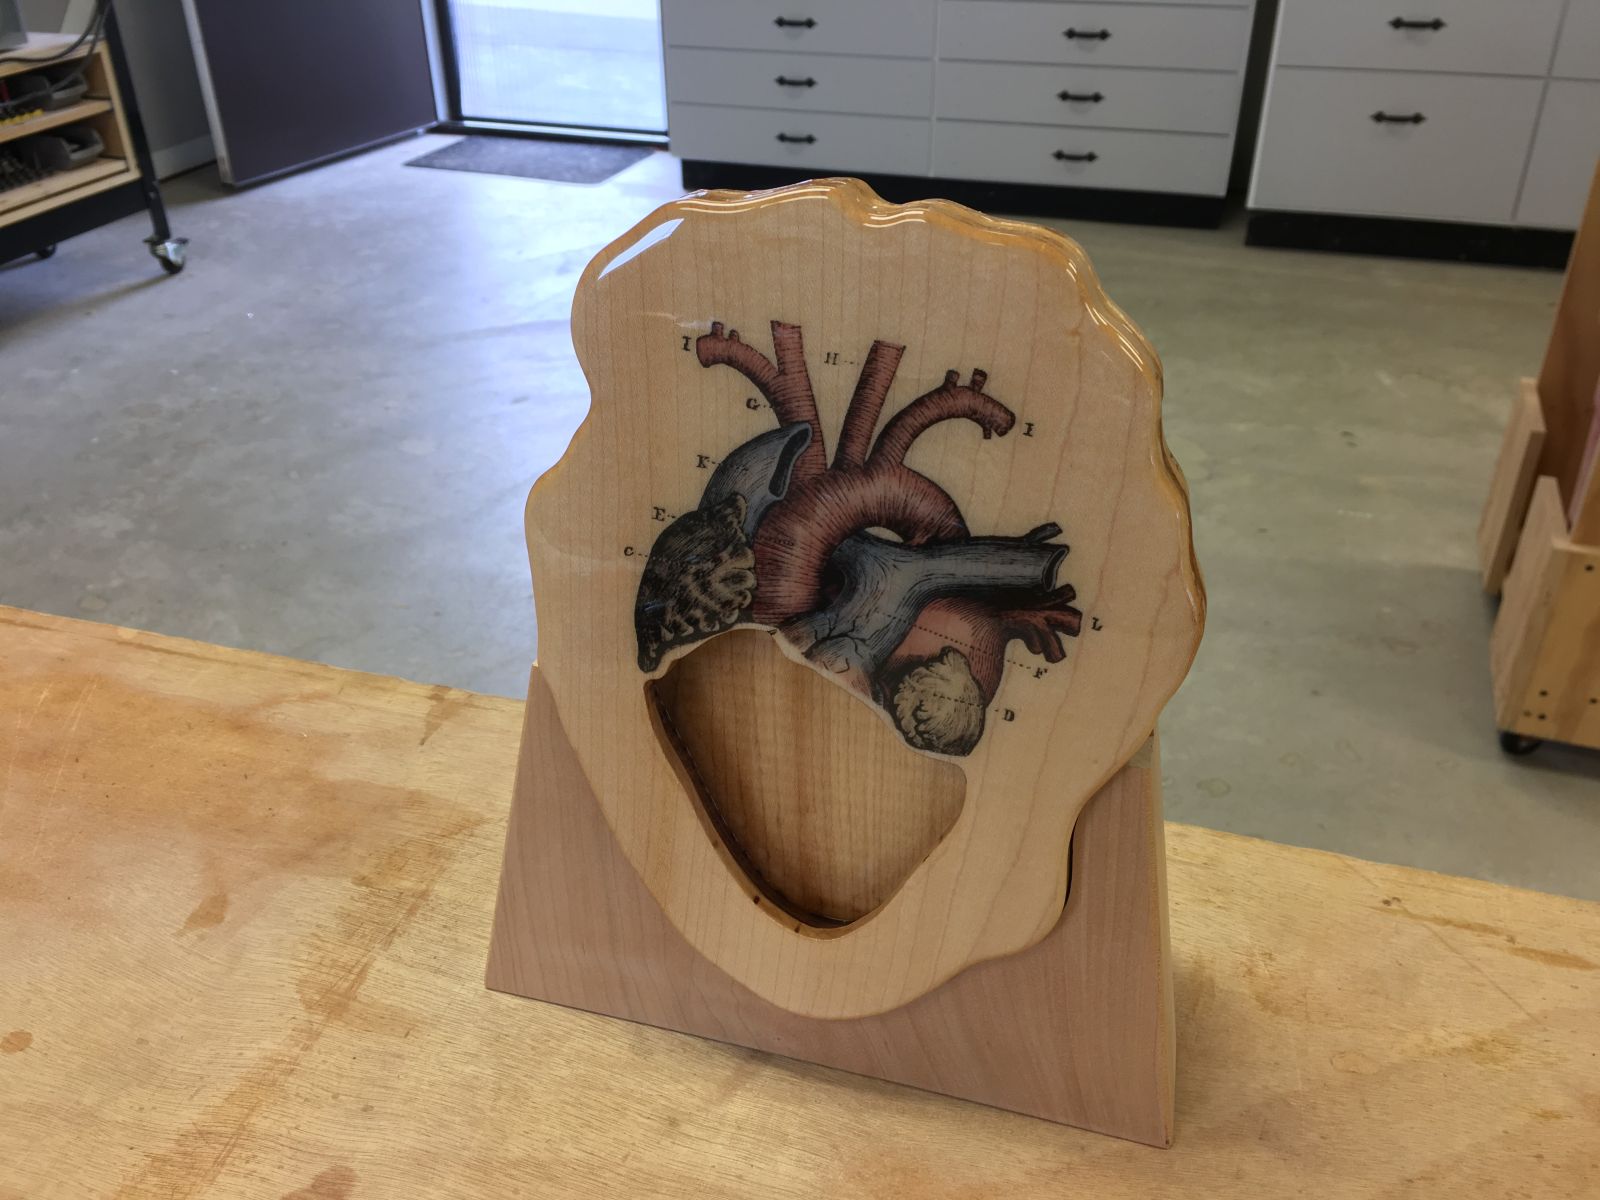
Based on a sacred heart pendant and unique display case she saw in Italy, my friend Stefanie asked me if I would consider making her a similar display case. After looking at a photograph of the display case she saw, I said, “Sure, that looks like a fun and interesting challenge!” Stefanie ordered a sacred heart pendant from a friend she made in Italy, and had it sent to me so I could size and design a display case around it.
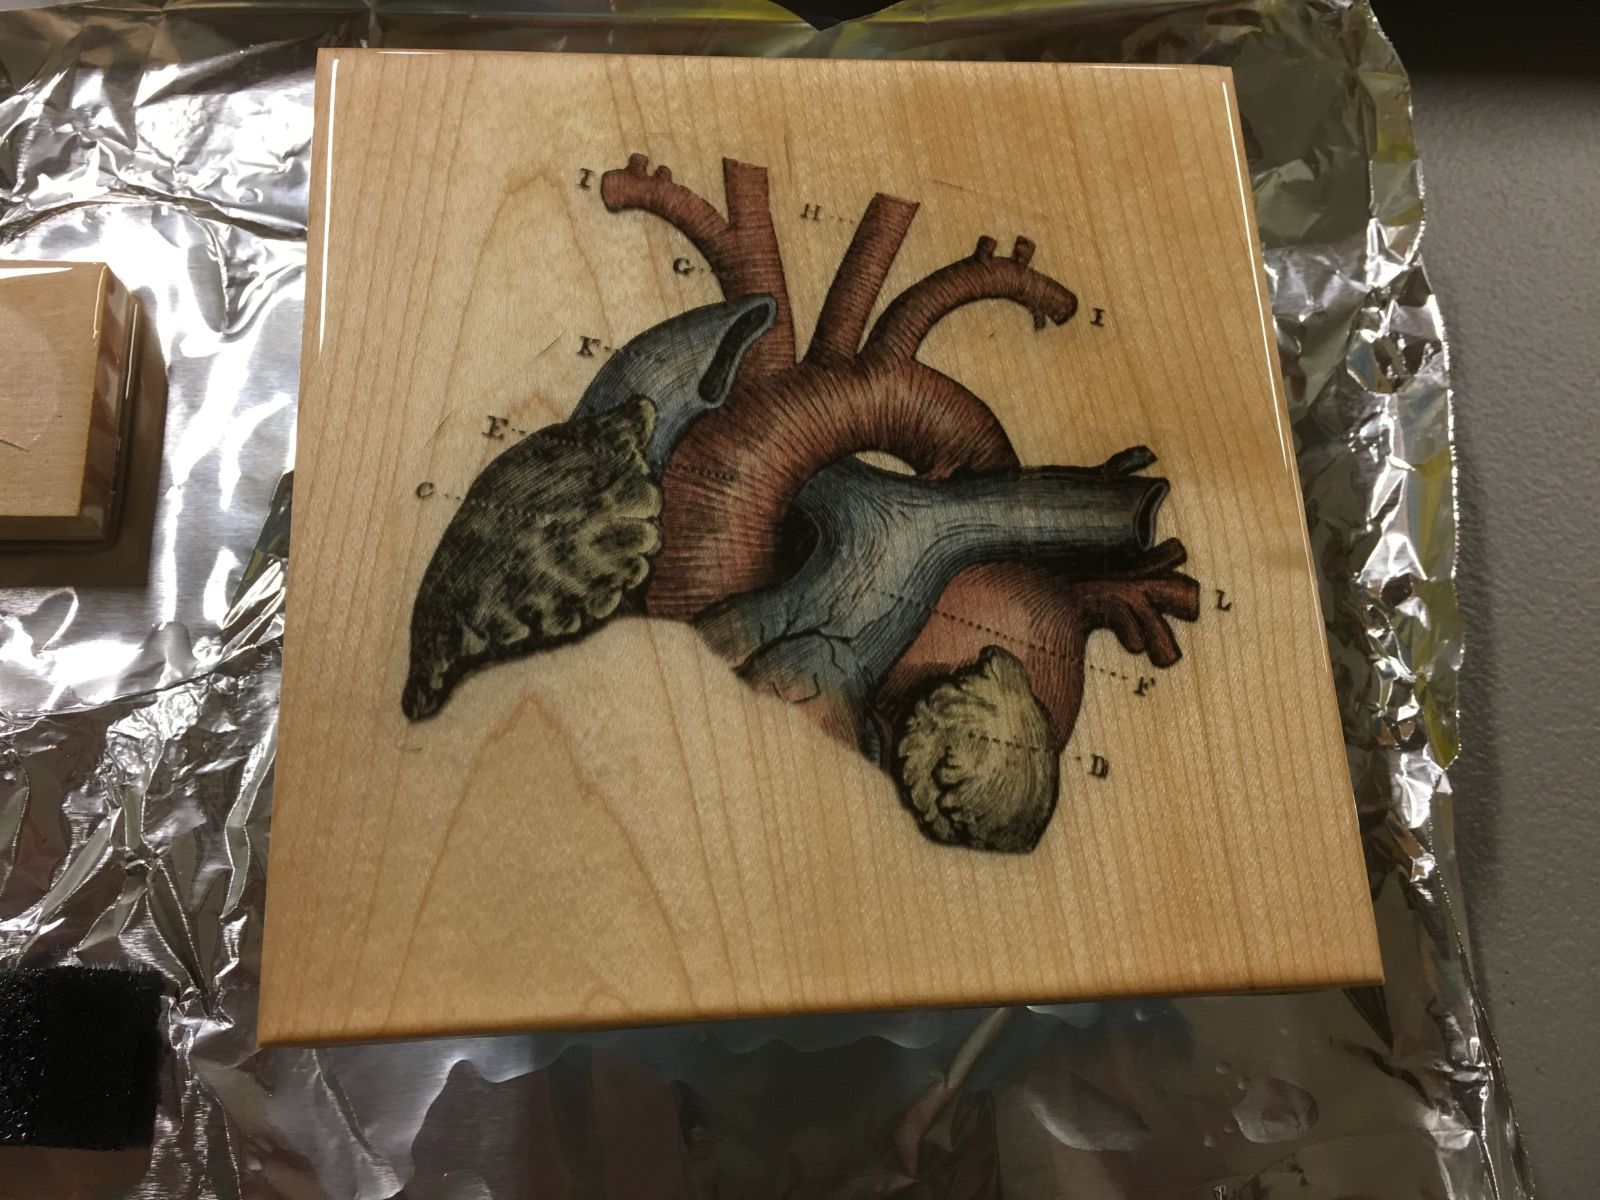
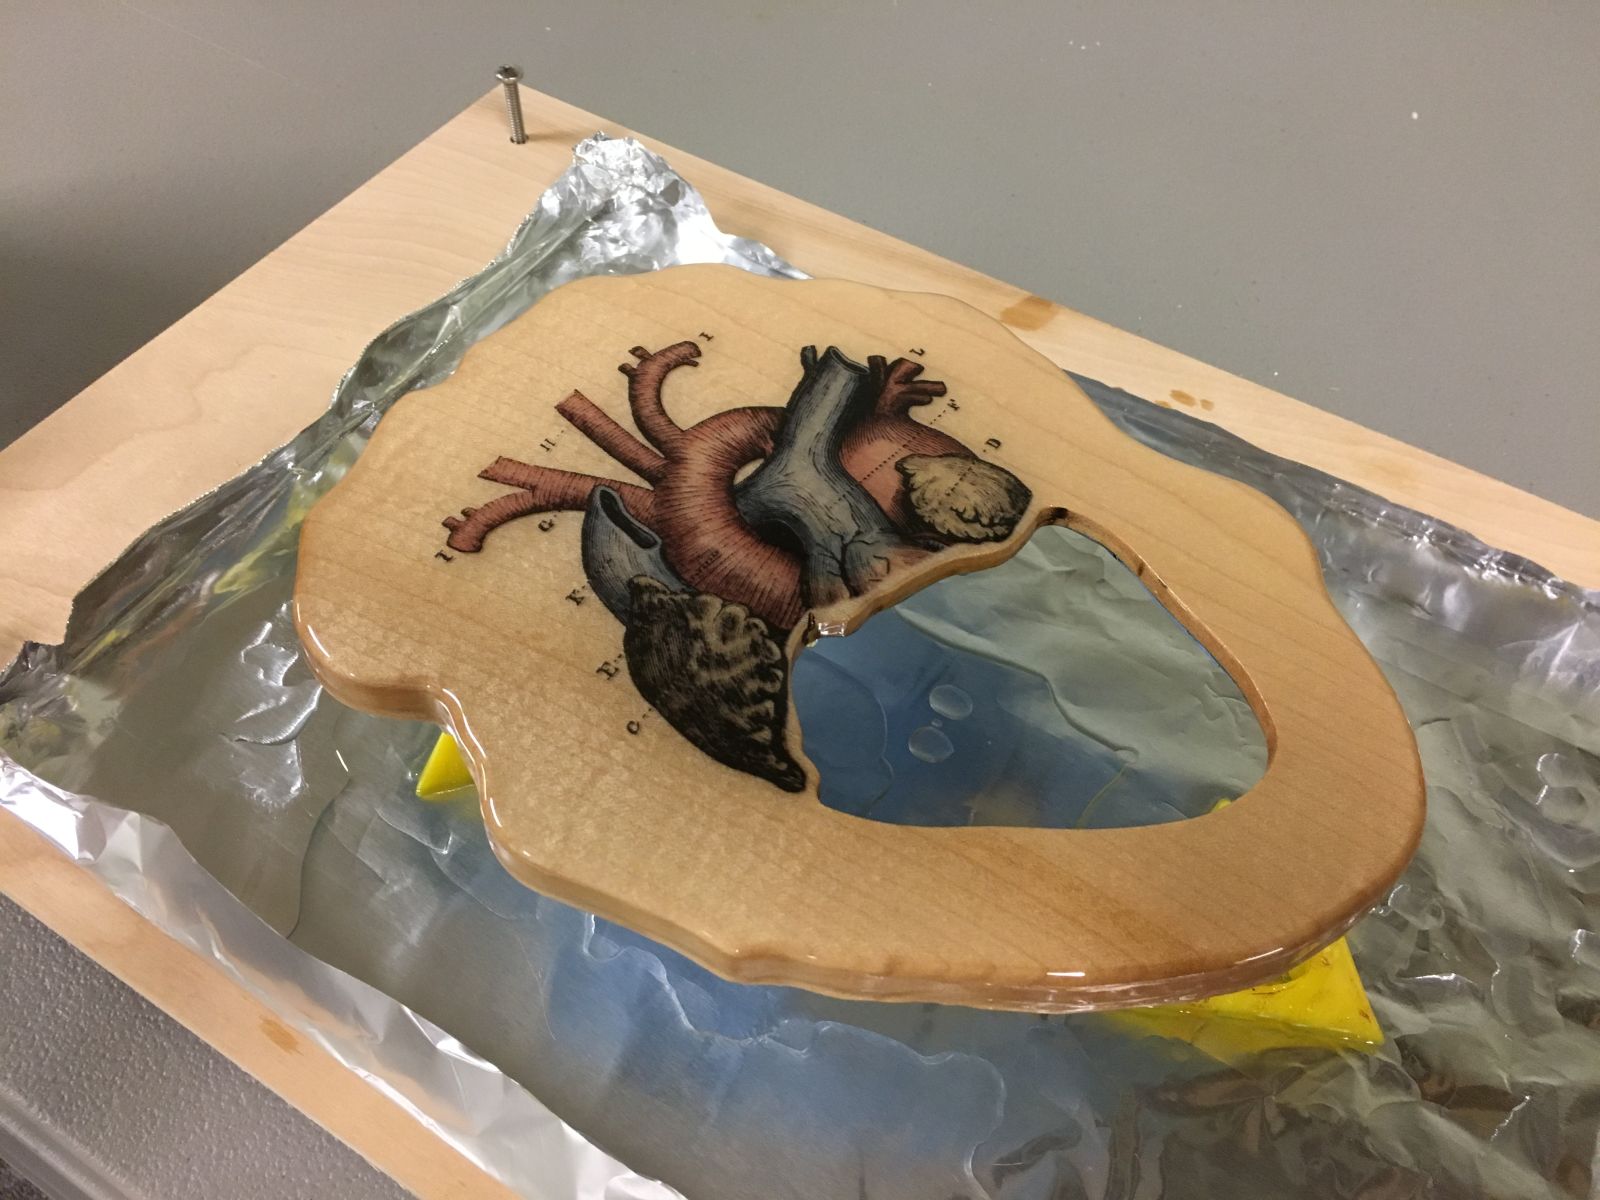
As a practicing veterinarian, one of the special features that attracted Stefanie’s attention originally was a hand-drawn graphic of an anatomical human heart featured on the front of the display case. After an extensive search of stock photographs and illustrations, I acquired a full-color illustration very similar to the graphic on the original display case. The design challenge then became finding the best method of applying the illustration to our version of the wooden case. My friends Joanna and Vince at CG Vinyl Studio suggested inkjet printing the illustration on printable vinyl, overlaminating it for protection, attaching it to the display case with a special spray adhesive, and finally coating the entire piece with clear, two-part epoxy resin.
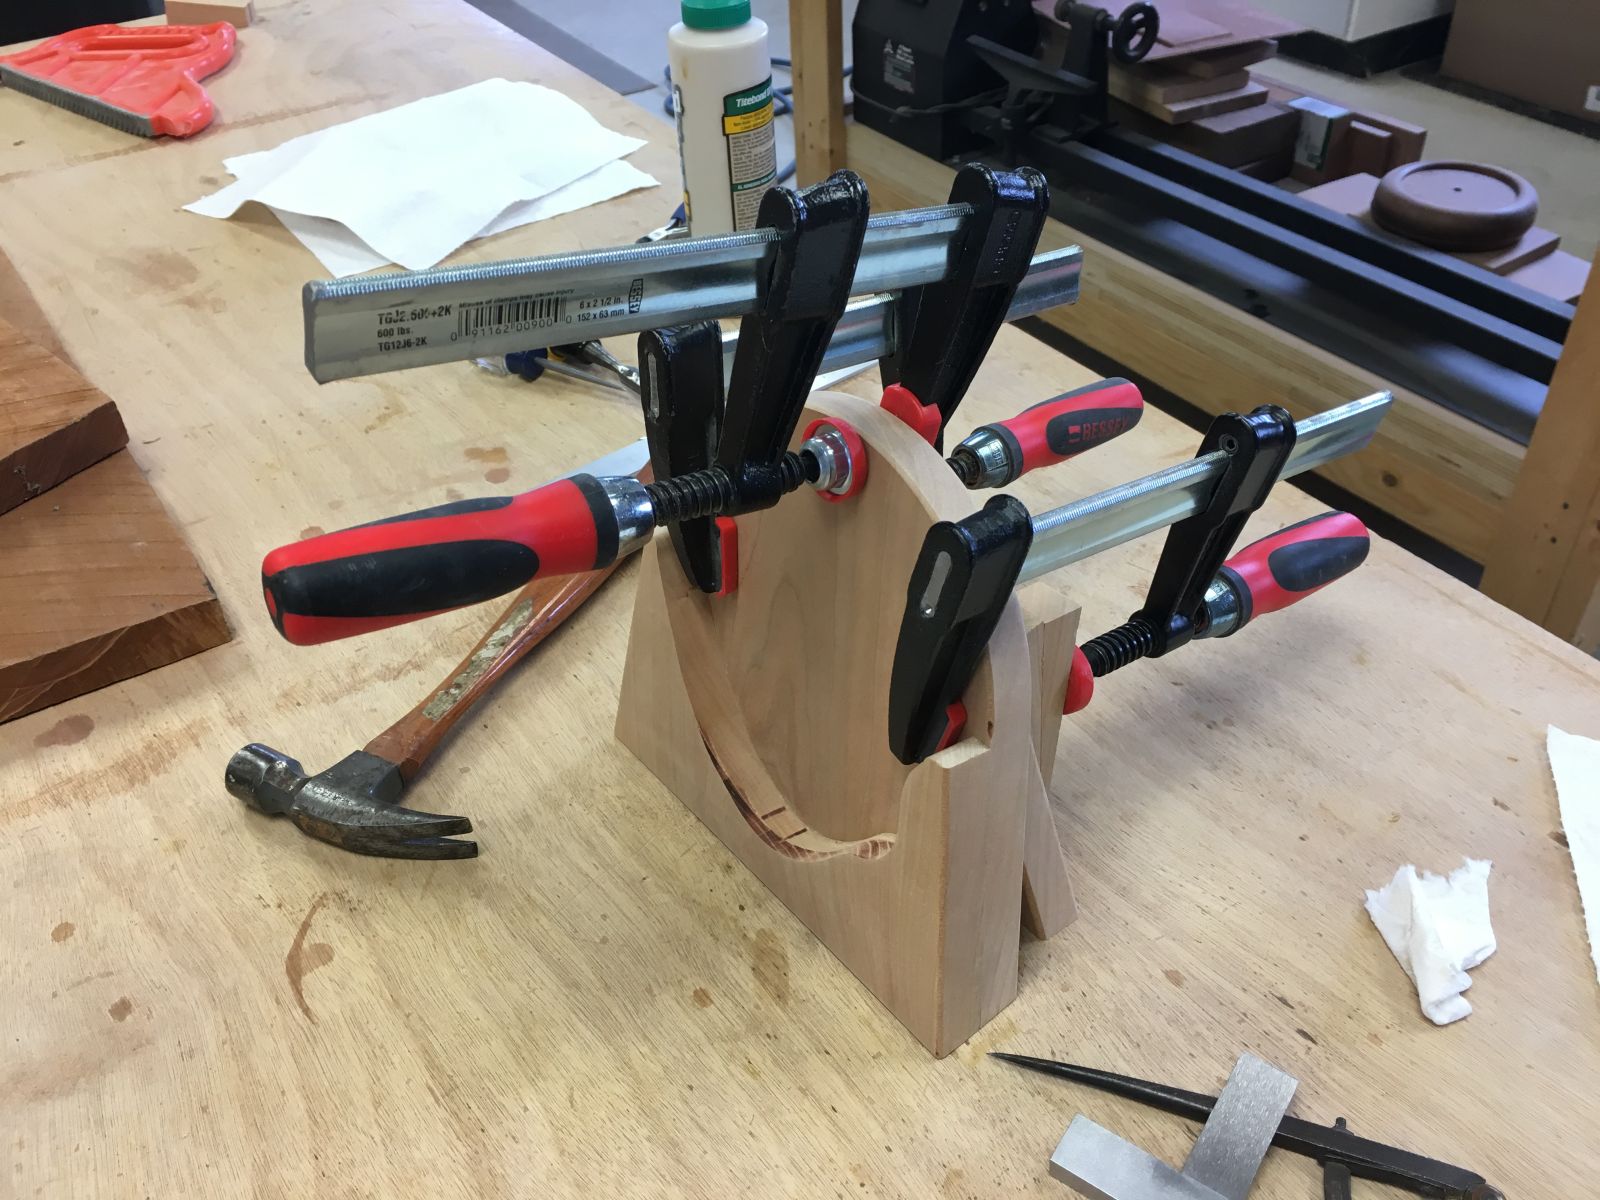
Next came the design challenge of tracing the outline of the display case and scaling it to Stefanie’s pendant. Once the tracings of both the display case and pendant were done in InkScape, I imported the vectors into SketchUp and designed a two-piece display case with a windowed display area and hidden recesses for storing the pendant’s chain. For ease of access, the two-piece case will be aligned with brass dowel pins and held together with four small magnetic catches.
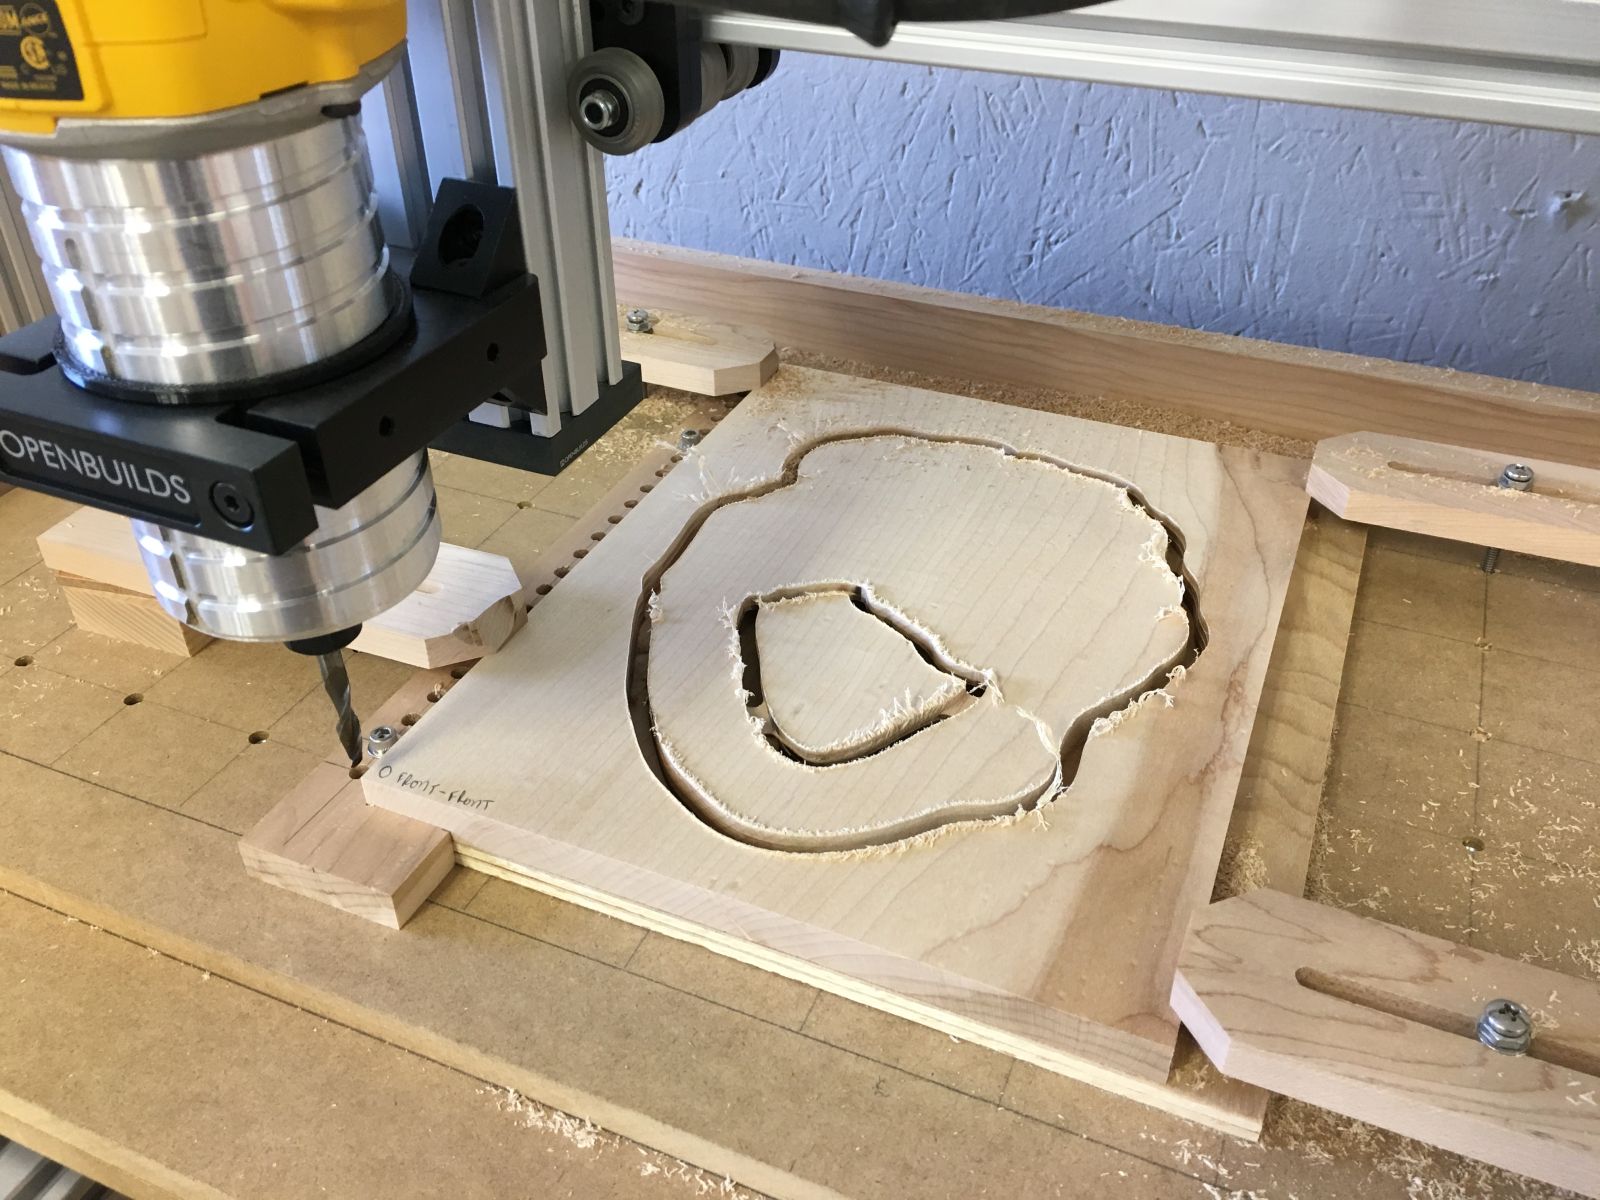
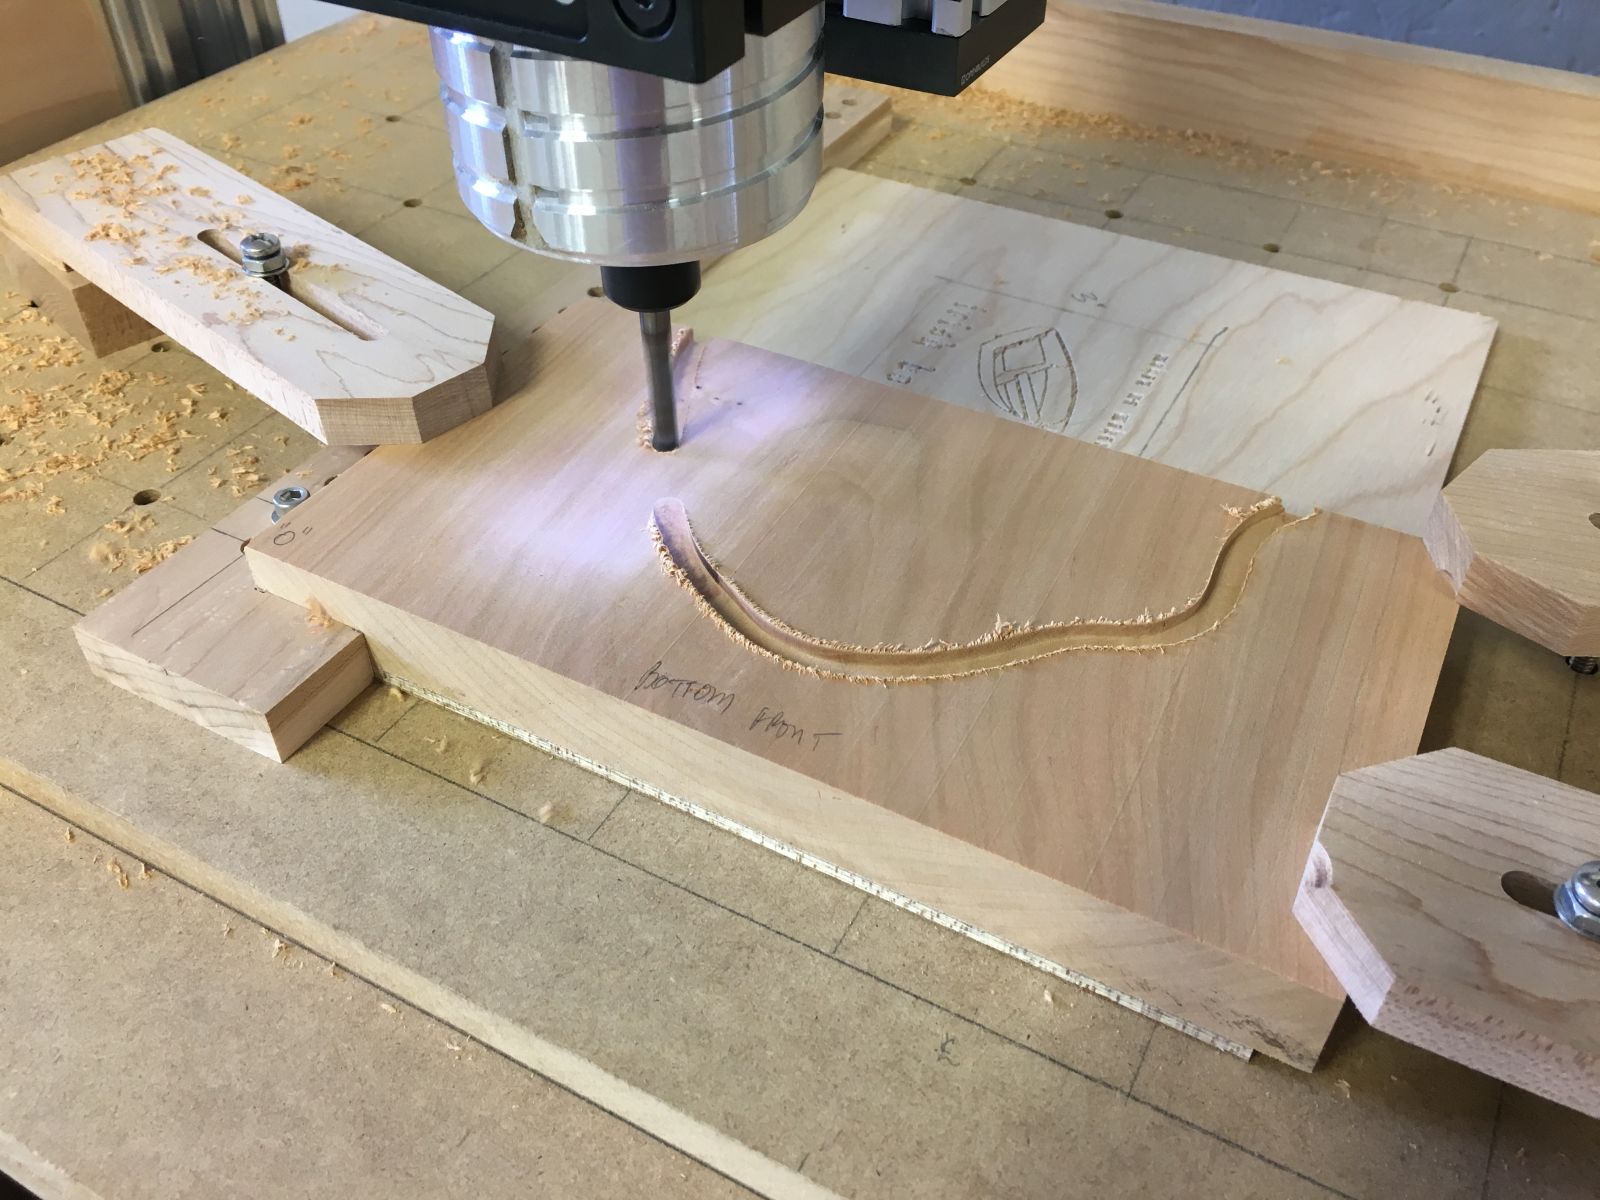
From SketchUp, I exported the 2D vector outlines of all features on the front and back of the case into Vectric’s VCarve Desktop CNC design program and G code post processor. Since the front of the case had features that had to be machined on both surfaces, this project was my first use of VCarve’s two-sided machining capabilities. Once the CNC designs were complete and G code routines were generated for each machining step, I build an indexing jig for the CNC router’s table, so that blanks for the front and back of the case could be repeatably positioned. With all this preparation, and the CNC router’s working axes zeroed at the blanks’ lower left “0” corner, it was easy to complete all the machining steps with a quarter-inch solid carbide up cutting end mill.
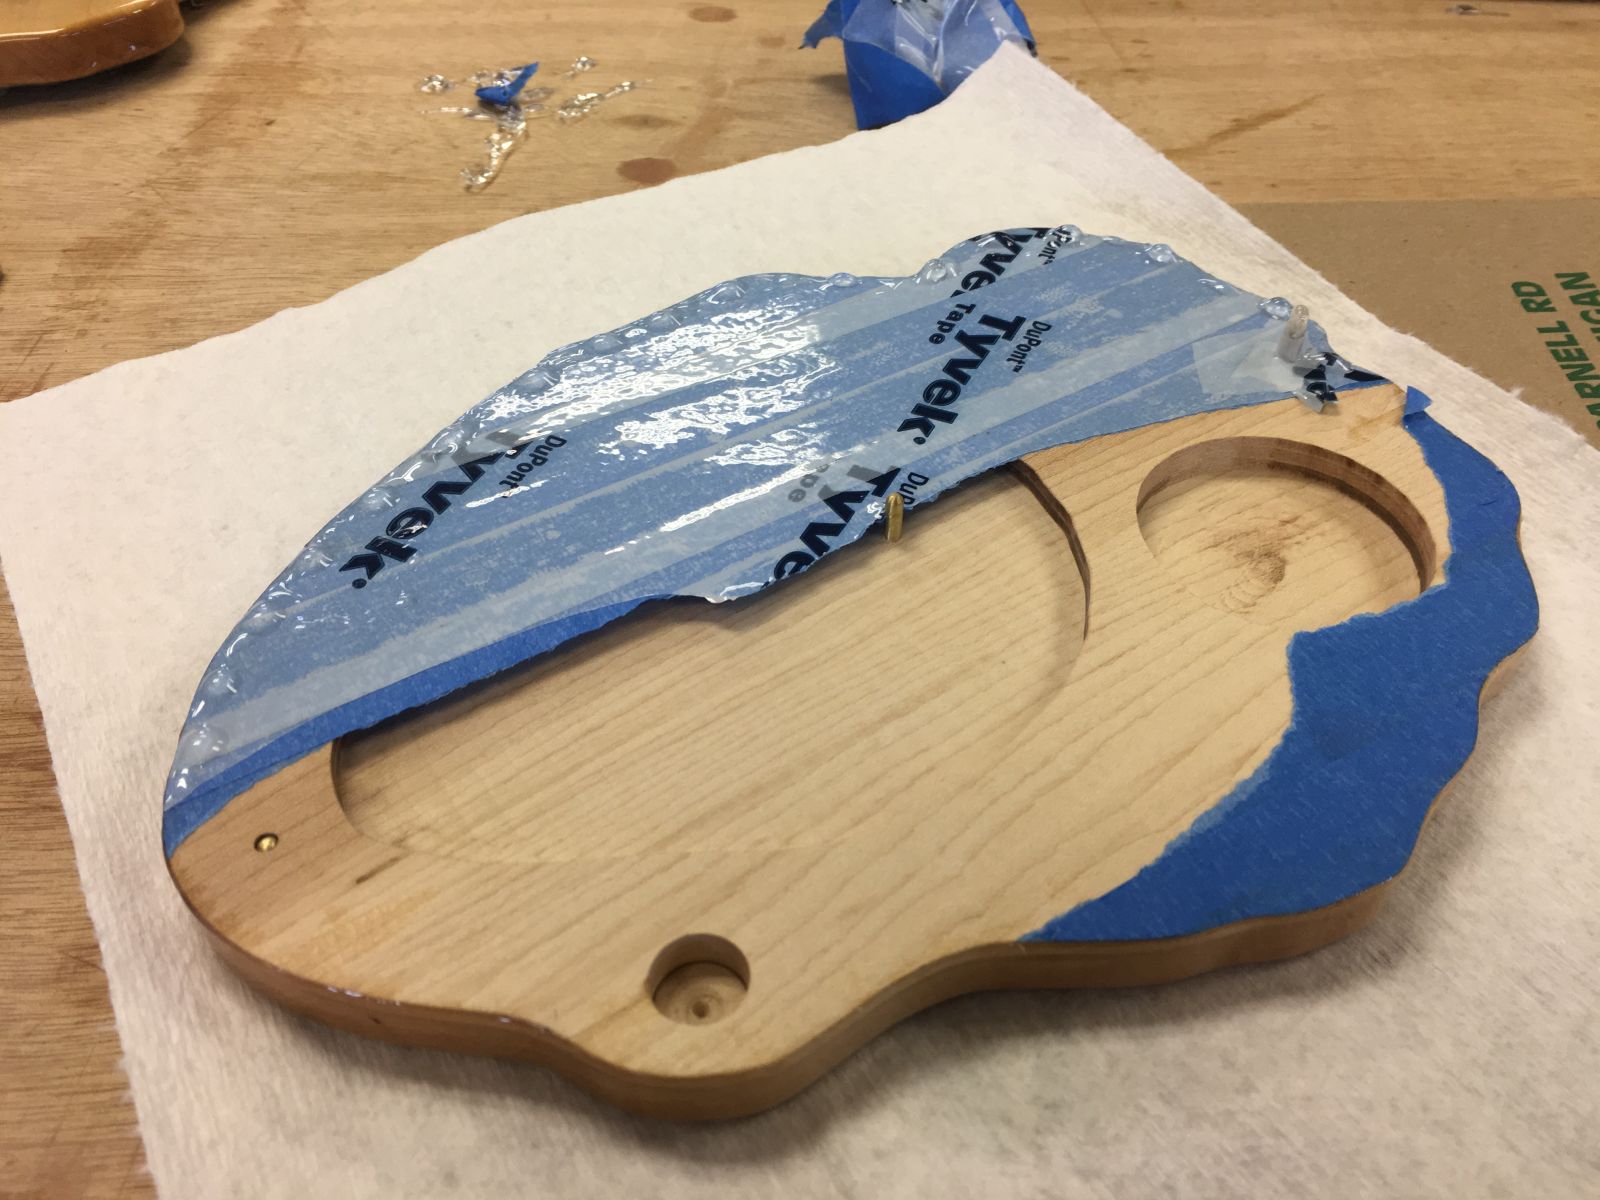
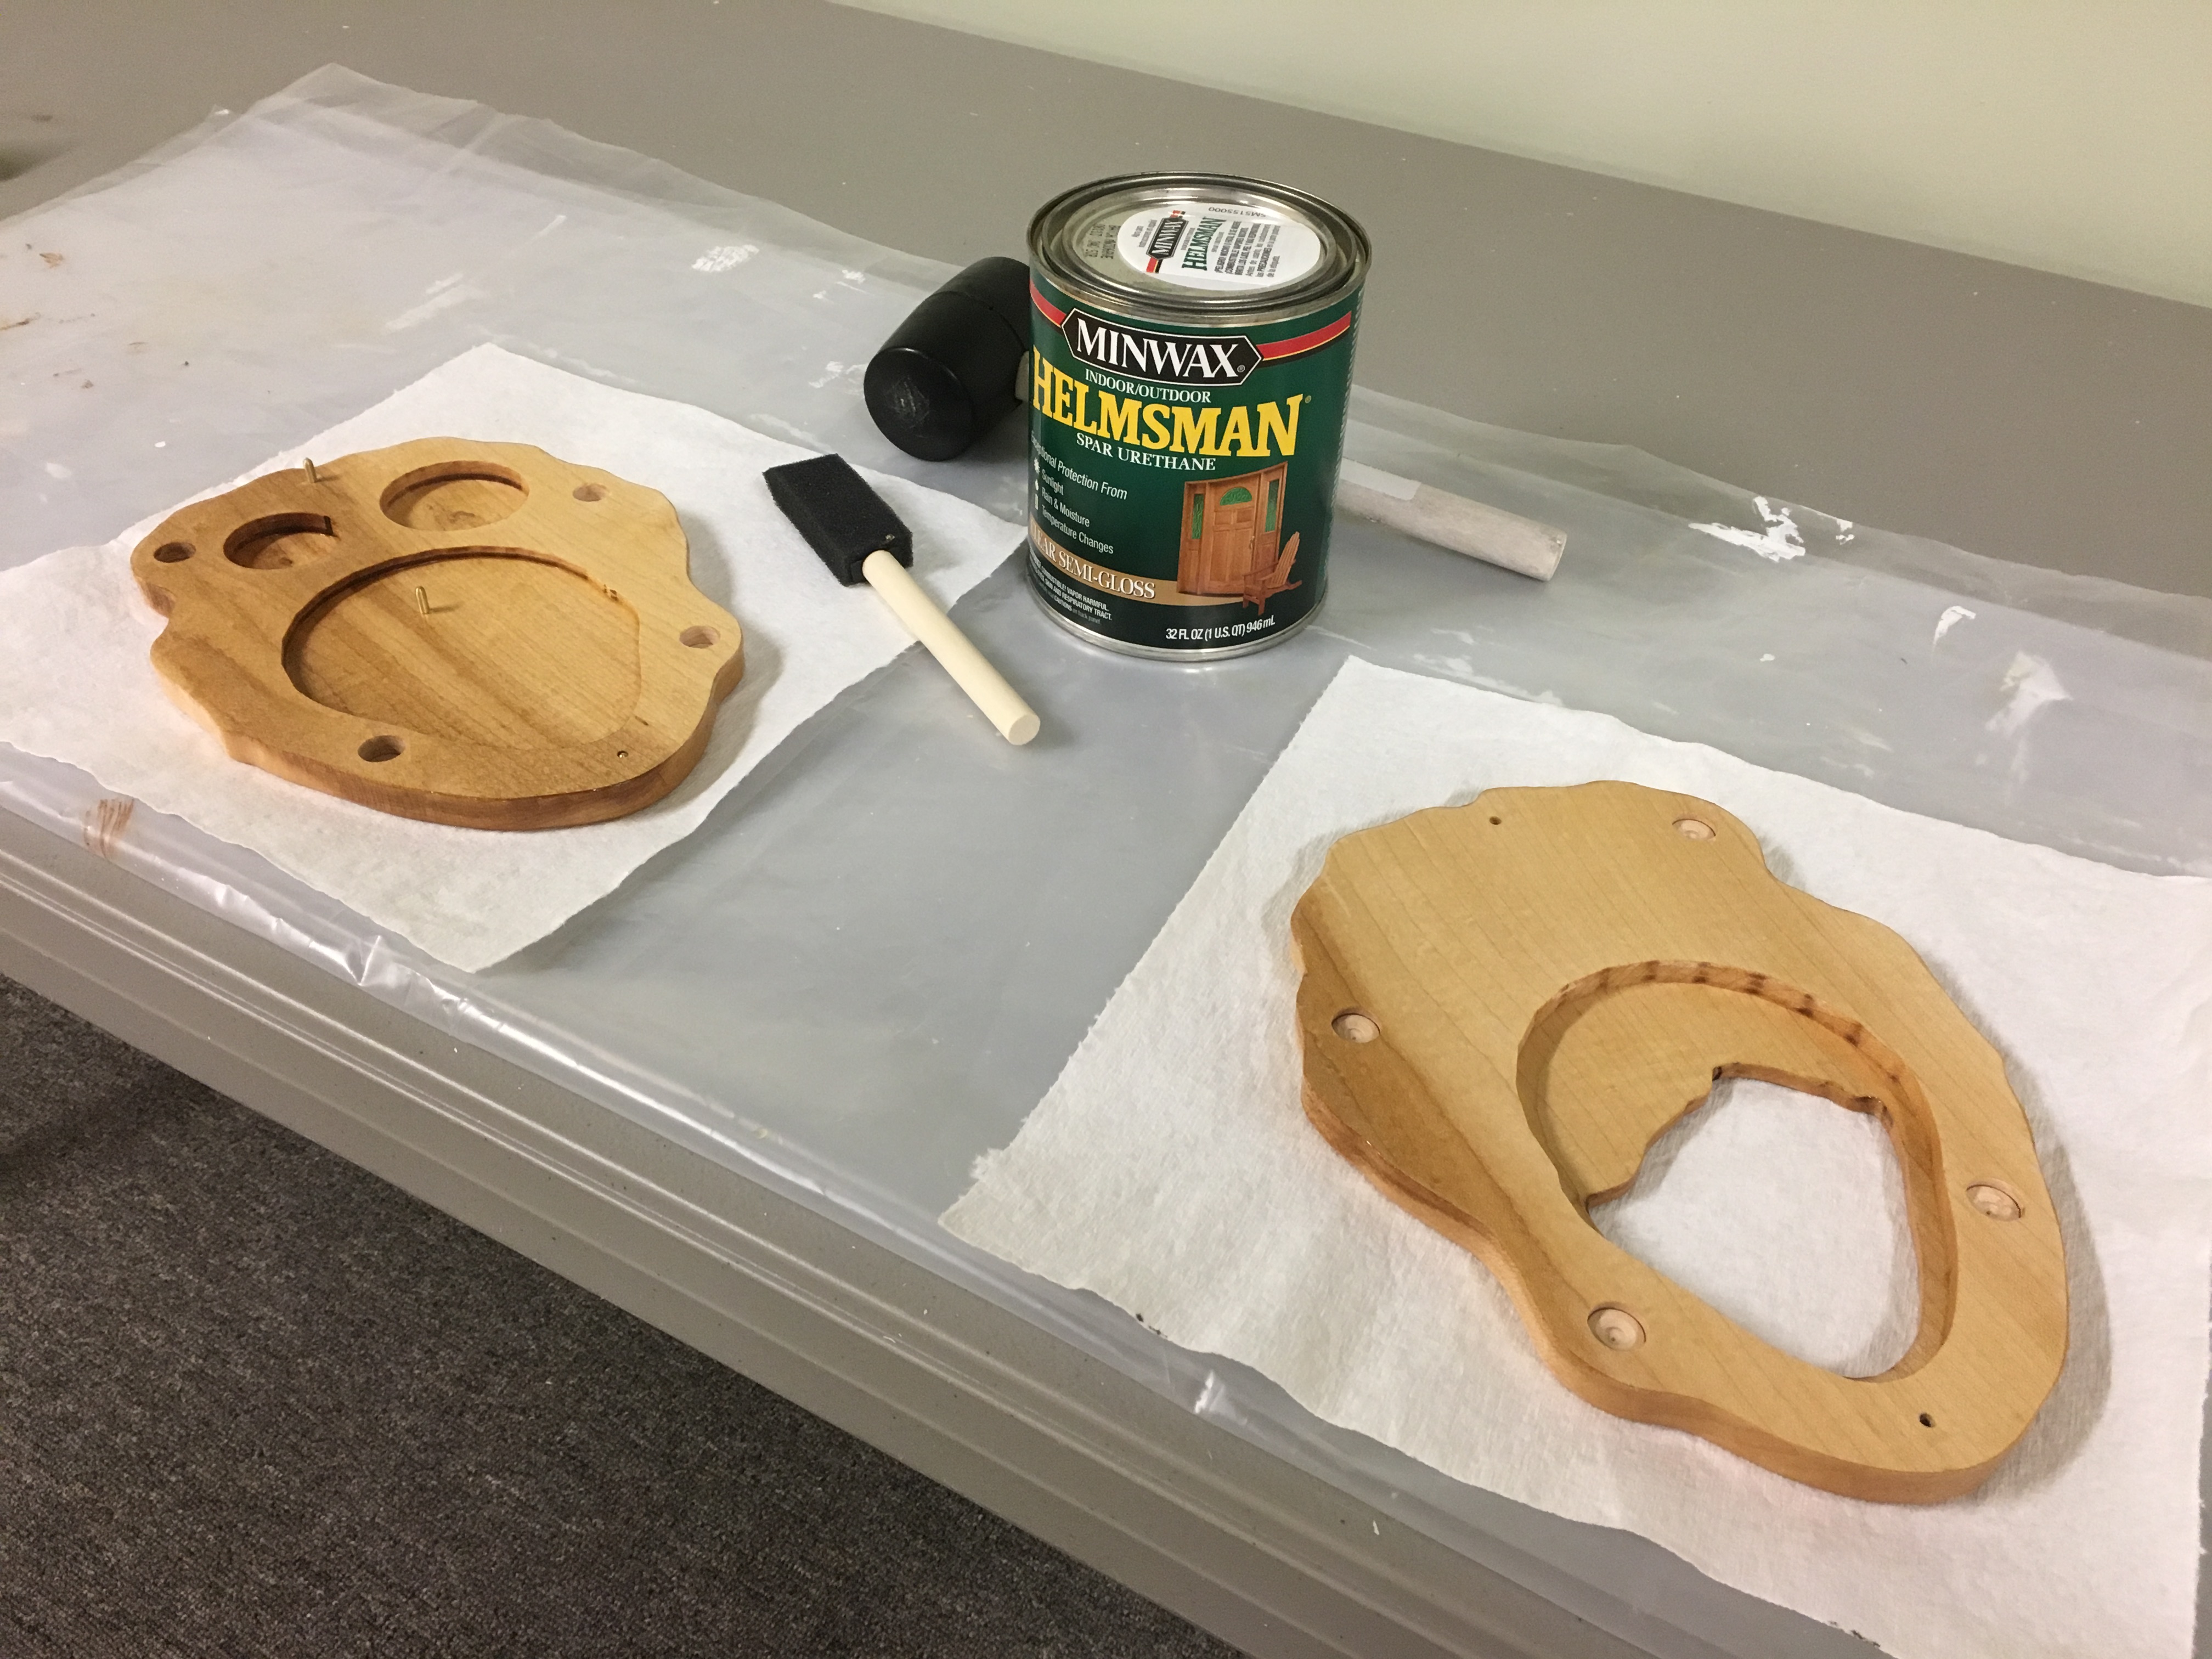
After completing some sanding and other details of the wooden components, it’s time to turn attention to the vinyl graphic attachment and finishing techniques. The modified heart graphic was printed on glossy inkjet-printable clear vinyl and a protective overlaminate film was added with a cold laminator. The inside surfaces of the back and front of the display case were masked with a layer of releaseable painter’s tape and a layer of nonporous Tyvek tape in preparation for coating with two coats of clear two-part epoxy. Once the first coat of epoxy was cured, the vinyl heart graphic was cut out with a fresh No. 11 blade and applied to the front of the display case. A second coat of epoxy embedded the graphic, rendering the clear areas nearly invisible. Two coats of spar urethane on the inside surfaces of the display case were applied and allowed to dry thoroughly.
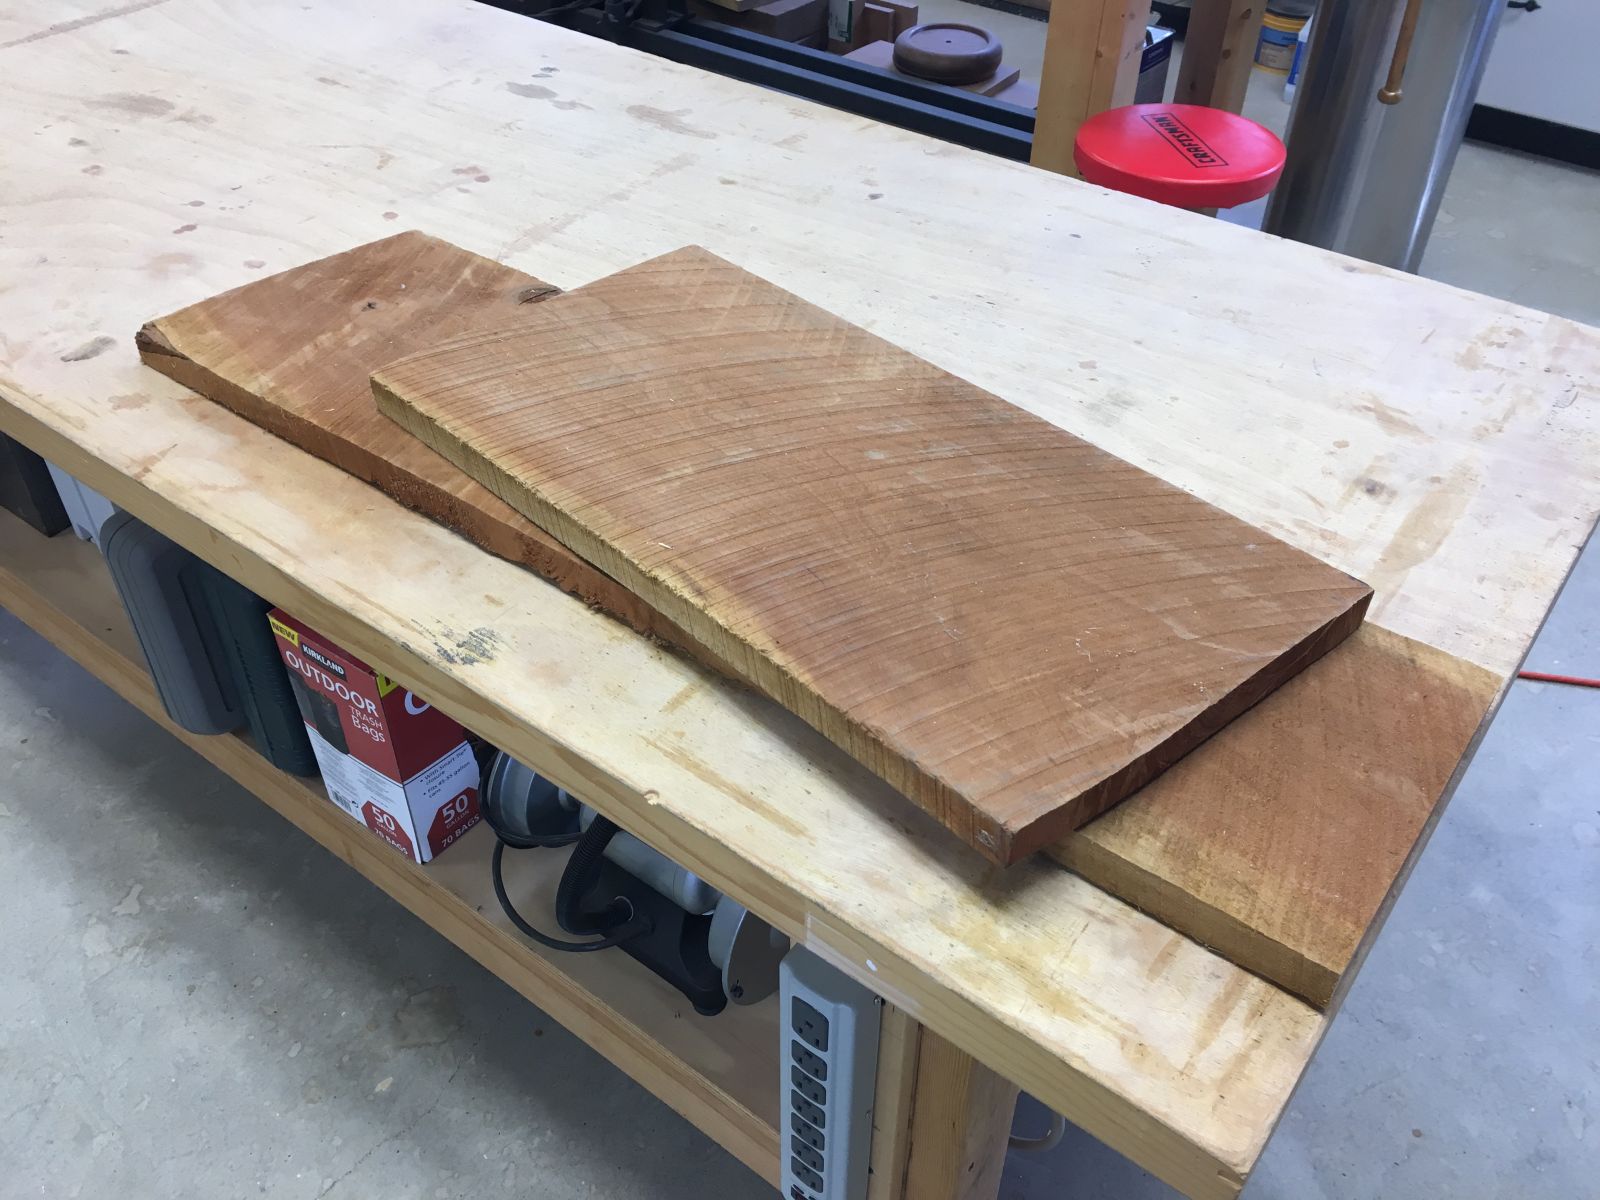
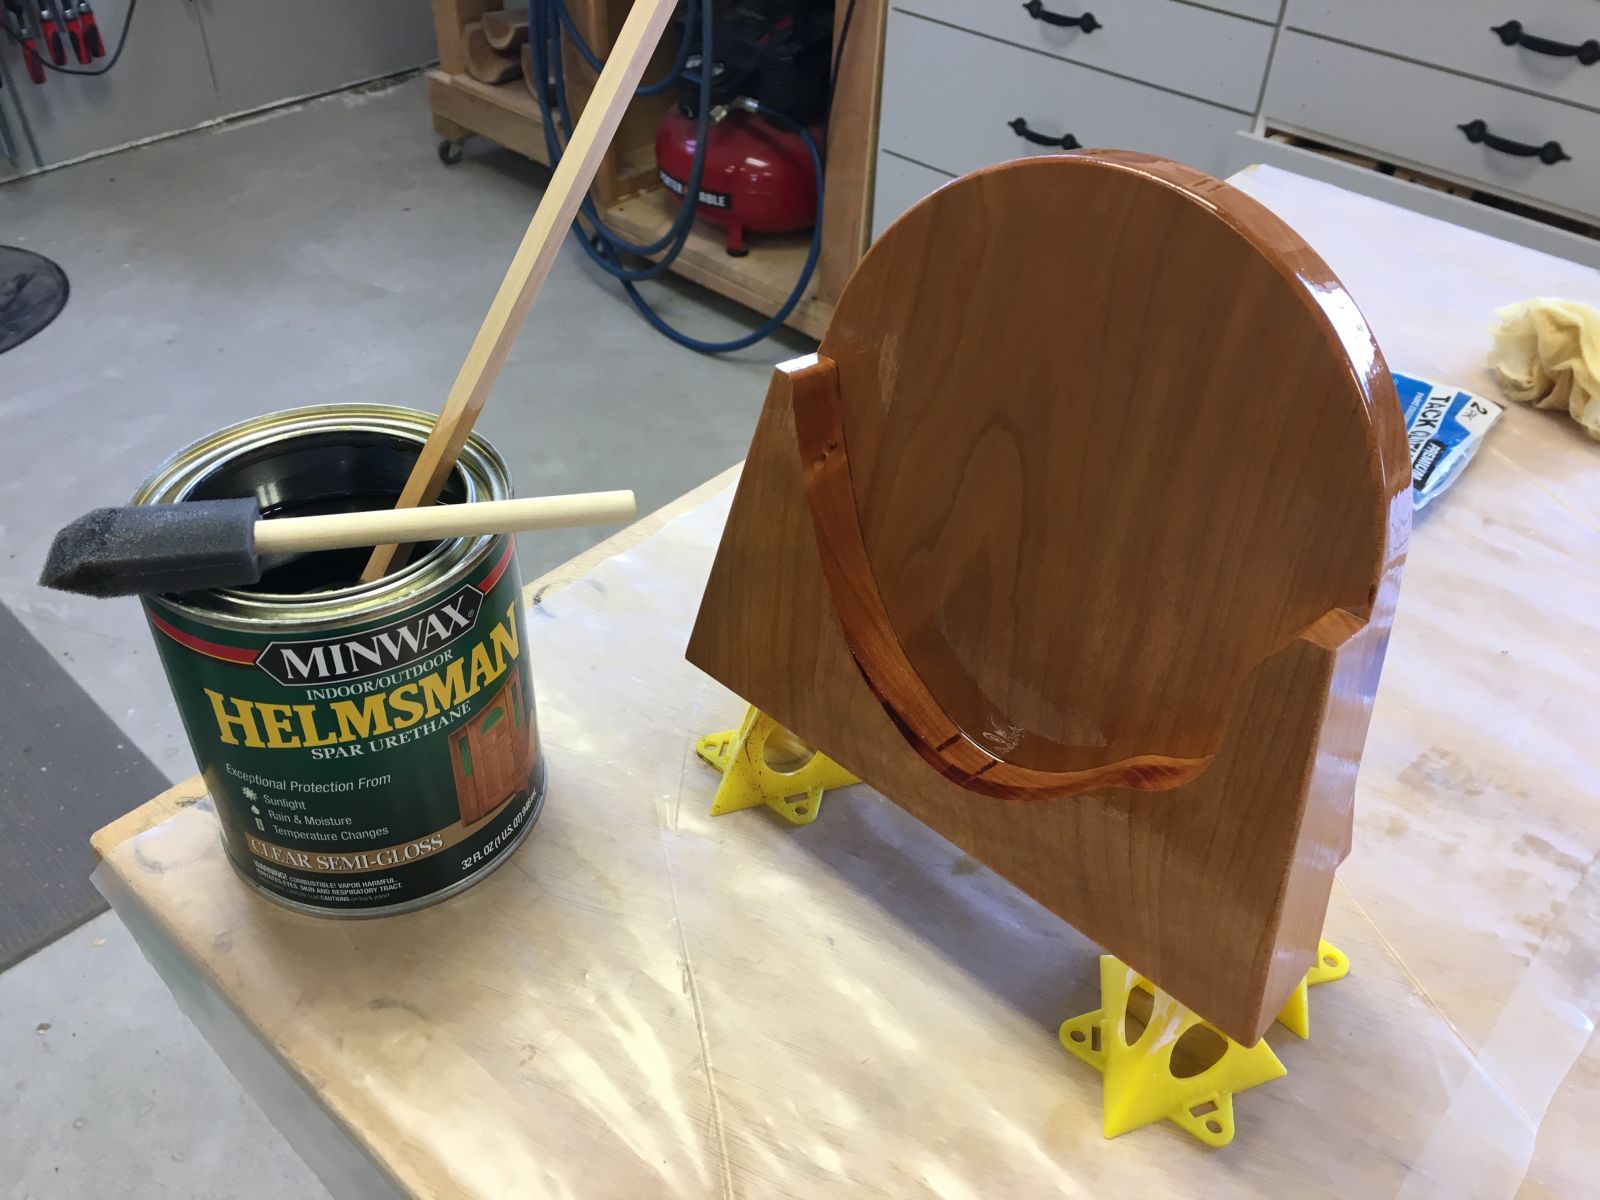
Cherry was selected to use in fabricating a desktop stand for the display case. A quick design in SketchUp and VCarve Desktop provided the data to build from. Two coats of spar urethane deepened the reddish hues of the cherry in a nice contrast to the light maple of the display case itself.
After magnets were epoxied in and the polycarbonate window was affixed with silicone, the last step was to flock the display case cavities and saddle of the display stand. Black Suede-Tex flocking was applied to the wet black adhesive with a very fancy (two cardboard tubes) Mini Flocker.
Based on sliding the magnets apart instead of pulling on them, opening and closing the display case is easy, but not obvious. I created this short YouTube video to provide a few tips:
This was a fun and challenging project that provided the opportunity to learn some new techniques and to buy a few new pieces of equipment. Thanks again, Stefanie, for allowing me to collaborate with you on this unique display case!
Here is a pictorial record of the project. Each picture is captioned with information about the step it represents.
Heart illustration, full color
Heart illustration, black and white
Heart illustration, muted colors
Heart illustration, sepia tone
Stefanie’s pendant arrives from Italy
The sacred heart pendant is very detailed
Hand flattening one of the maple blanks before planing to final thickness of just over one half inch each
Two maple blanks ready for some CNC work
Back of the front blank indexed to the jig
The CNC router zeroed at the lower left “0” corner
UCCNC control software sending the G code programming to the CNC router
Cutting the large pocked in the back of the front blank
The front of the front blank, with the window cut out. Three tabs keep the waste in place, to be cut out by hand
Milling the final outline of the front blank
Front of the back blank, with the large pocket milled
Cutting two circular pockets in the front of the back blank, for chain and other storage
Cutting the outline of the back
Back, complete, showing large and small pockets, and four magnetic catch locations
Back and front, with machining complete
Front and back, with a quick sand to remove fuzzies
Final sizing magnet catch washer pockets at the drill press
Flush fit with a Forstner bit
Magnet cup locations finalized
Cutting the polycarbonate window on the CNC router
Used the same profile as the large pocket in the maple front, offset slightly smaller
Polycarbonate window with protective film still in place, fit to pocket
Front view, with window temporarily in place
Back and front pieces, cut from the rectangular blanks
Making brass alignment pins from 1/8″ brass rod
Closeup of brass pin with bullet nose
Bullet nose shaped on brass alignment pin with a mill file, while spinning in the lathe
Pad drilling alignment holes in back and front pieces
Sanding the edges of back and front pieces pinned together, on the oscillating drum sander
Laying out copies of the muted color heart illustration in InkScape
Inkjet printing heart illustrations on clear glossy vinyl
Vinyl heart illustrations for testing, printed on HP and Canon printers
Mock up of magnet catches and alignment pin
Ready to apply 1.0 mil overlaminate with a Vevor cold laminator
The 1.0 mil overlaminate is super thin and difficult to handle
The cold laminator applied the overlaminate perfectly
Cutting out the finished vinyl graphics with a No. 11 blade and cutting mat
Painters tape and Tyvek on the bottom of maple samples for testing varnish and epoxy coatings
Using 3M Super 77 spray adhesive to affix a vinyl graphic sample with a pressure sensitive adhesive backing seems like overkill
Notes for various test pieces
The spray adhesive overspray leaves a textured surface around the applied graphic
Two maple samples to be coated with spar varnish prior to applying the vinyl graphics. The pencil marks are for practice aligning the graphic to the opening in the display case
Ready for epoxy coating a maple sample, prior to applying the vinyl graphic
Gram scale with 0.01 g resolution for mixing the two-part epoxy components by weight
Using enough epoxy to allow it to flow across the sample surface and self-level seems to be the key to a successful coating
The heat gun was ready to help eliminate any bubbles in the epoxy, but was not needed on this pour
Top portion of test graphic pealed back so the bottom edge can be used for alignment
Test graphic applied to maple sample with one coat of spar urethane and light sand at 320 grit. Pencil line is only for alignment practice
Test graphics applied to maple samples with one coat of spar urethane (L) and one coat of epoxy resin (R)
Ready to apply top coat of epoxy resin
Self-leveling dose of epoxy resin applied. Used foam brush to break surface tension at edges to allow epoxy resin to flow down the sides of the maple sample
Epoxy applied to graphic and maple sample with undercoat of spar urethane
Epoxy applied to graphic and maple sample with undercoat of epoxy resin. Note: Visible dark edges of test vinyl graphic are due to a bad trimming job on my part. I’ll do better on the final product!
Epoxy pouring setup, showing leveling board to allow even distribution of self-leveling epoxy resin
Locating the brass pin after having a custom silver jump ring fabricated by Jewelry Set In Stone
A plastic card with 1/8″ holes drilled in it used to protect the wood while cutting the brass pins with a small cutoff wheel in the Dremel tool
Dremel set up with the flexible extension
Brass pins flush on the back of the back
Sacred Heart pendant positioned in the display case
A layer of painter’s tape covered with a layer of Tyvek tape provides a releasable, impermeable barrier to the epoxy drips that cling to the bottom of the workpiece after the epoxy pour on the top surface
Trimming the mask with a No. 11 blade and cutting mat
Masking on the back of the front piece got a little involved
Front and back masked and ready for epoxy
First coat of epoxy on the back of the back shows a glass like surface
For the self-leveling epoxy to flow correctly, the workpiece has to be very level. A leveling board with adjustment screws in each corner works to fine tune the setup
Initial epoxy pour in the early stages of self-leveling
A foam brush is used to break the surface tension at the perimeters, so the epoxy will flow down the vertical sides
Marietta Wood Works logo vinyl graphic applied
Fine tuning the heart graphic trimming and positioning
The moment of truth … applying the heart logo
Successfully applied heart graphic, ready for second coat of epoxy
Heart graphic embedded with second coat of epoxy
The painter’s tape and Tyvek masking worked great as little cleanup was needed after the epoxy cured
Front and back halves with finished vinyl graphics and epoxy coatings
Two coats of spar urethane on the inside surfaces of the display case
Roughsawn cherry from my brother’s yard
CNC milling the contour of the display case to create a nice seat
A quick design of the stand in SketchUp made fabrication straightforward
Laying out the top curve to be cut on the bandsaw
Gluing up the three pieces that went into the stand design
First test of the stand and display case … it fits!
A couple of coats of spar urethane on the bare cherry wood deepened the natural reddish hues
A very light bead of silicone secured the polycarbonate window, still with the back layer of protective film here
4400 PSI two-part five-minute epoxy should hold the four magnets in place
Washers expoxied in place on the back of the front
Display stand masked and adhesive applied, ready for suede texture flocking
Flocked with the Mini Flocker
Masking the back off for flock application
Flocking adhesive applied
Back cavities with flocking applied to adhesive
After 24 hours to cure, the masking was removed to reveal a successful flocking job
Completed project ready to ship
Completed heart graphic detail
Sacred Heart pendant detail through the display case window
All packaged and ready to ship!
The original Sacred Heart Display Case
SketchUp model of our display case design. (The colors are not yet finalized.)
Exploded view of our display case design. (The colors are not yet finalized.)
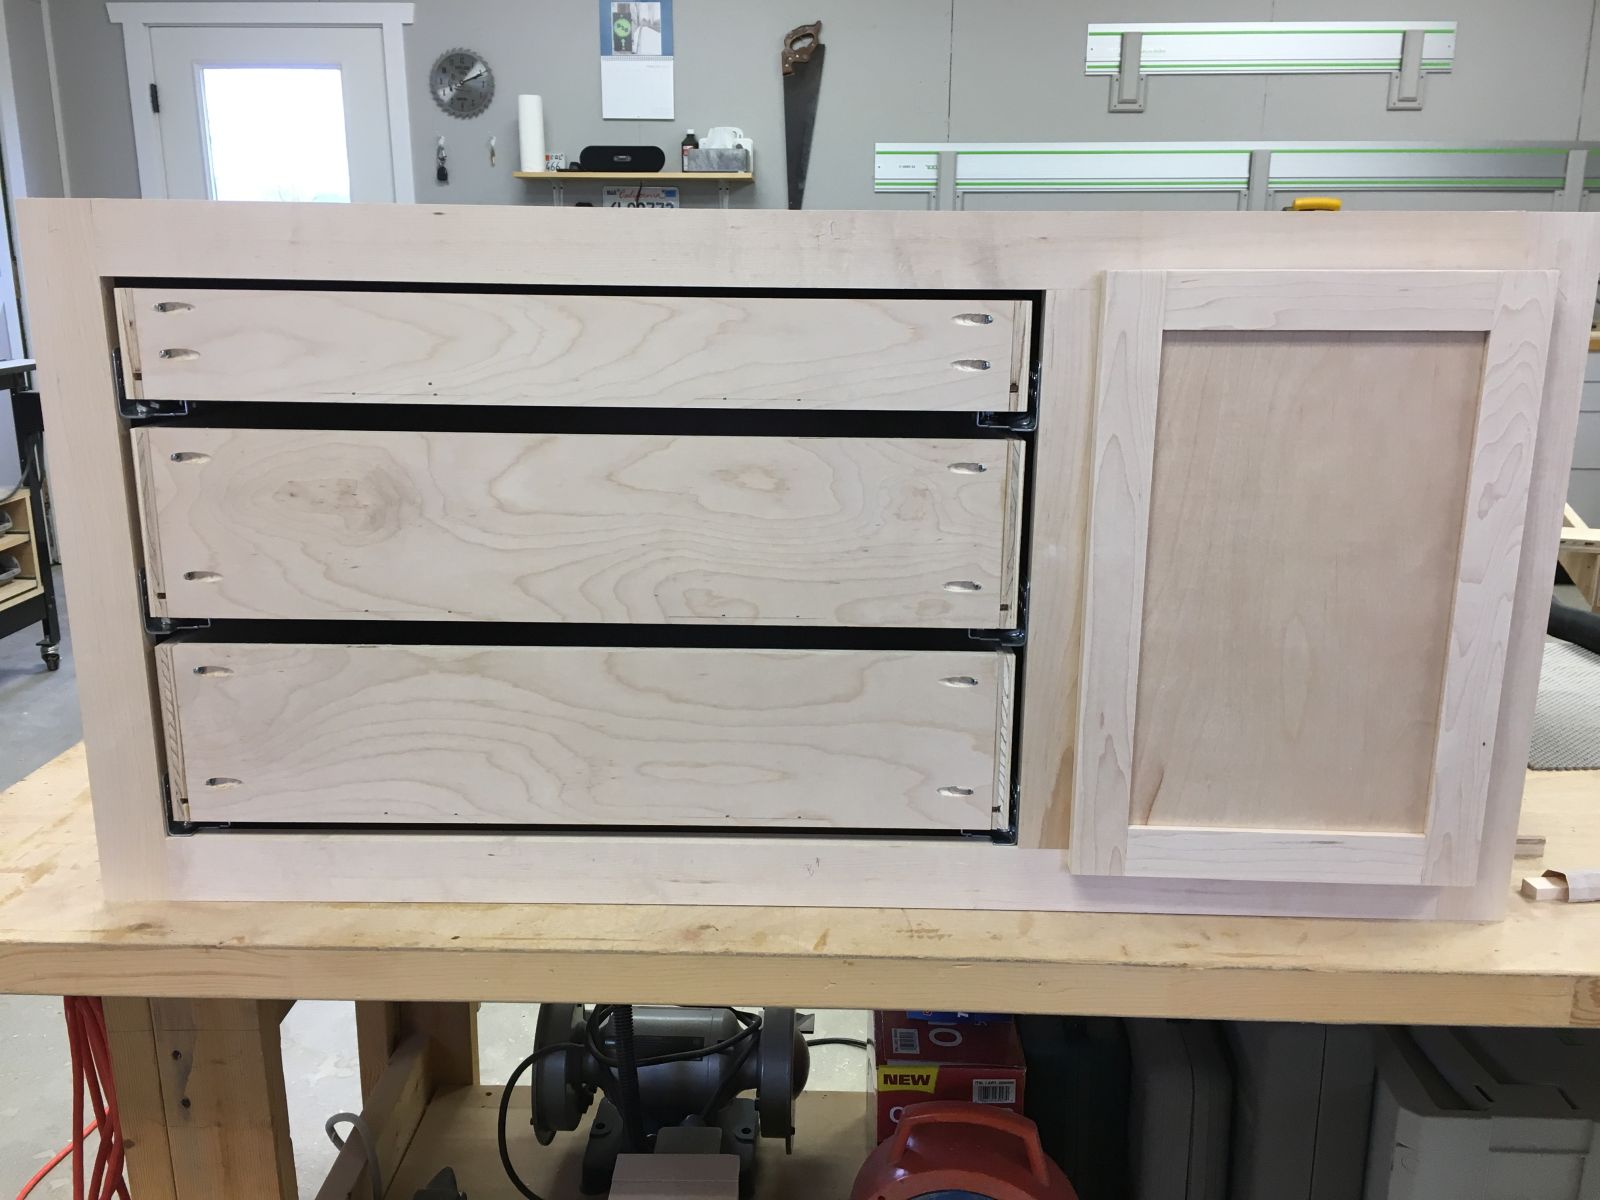
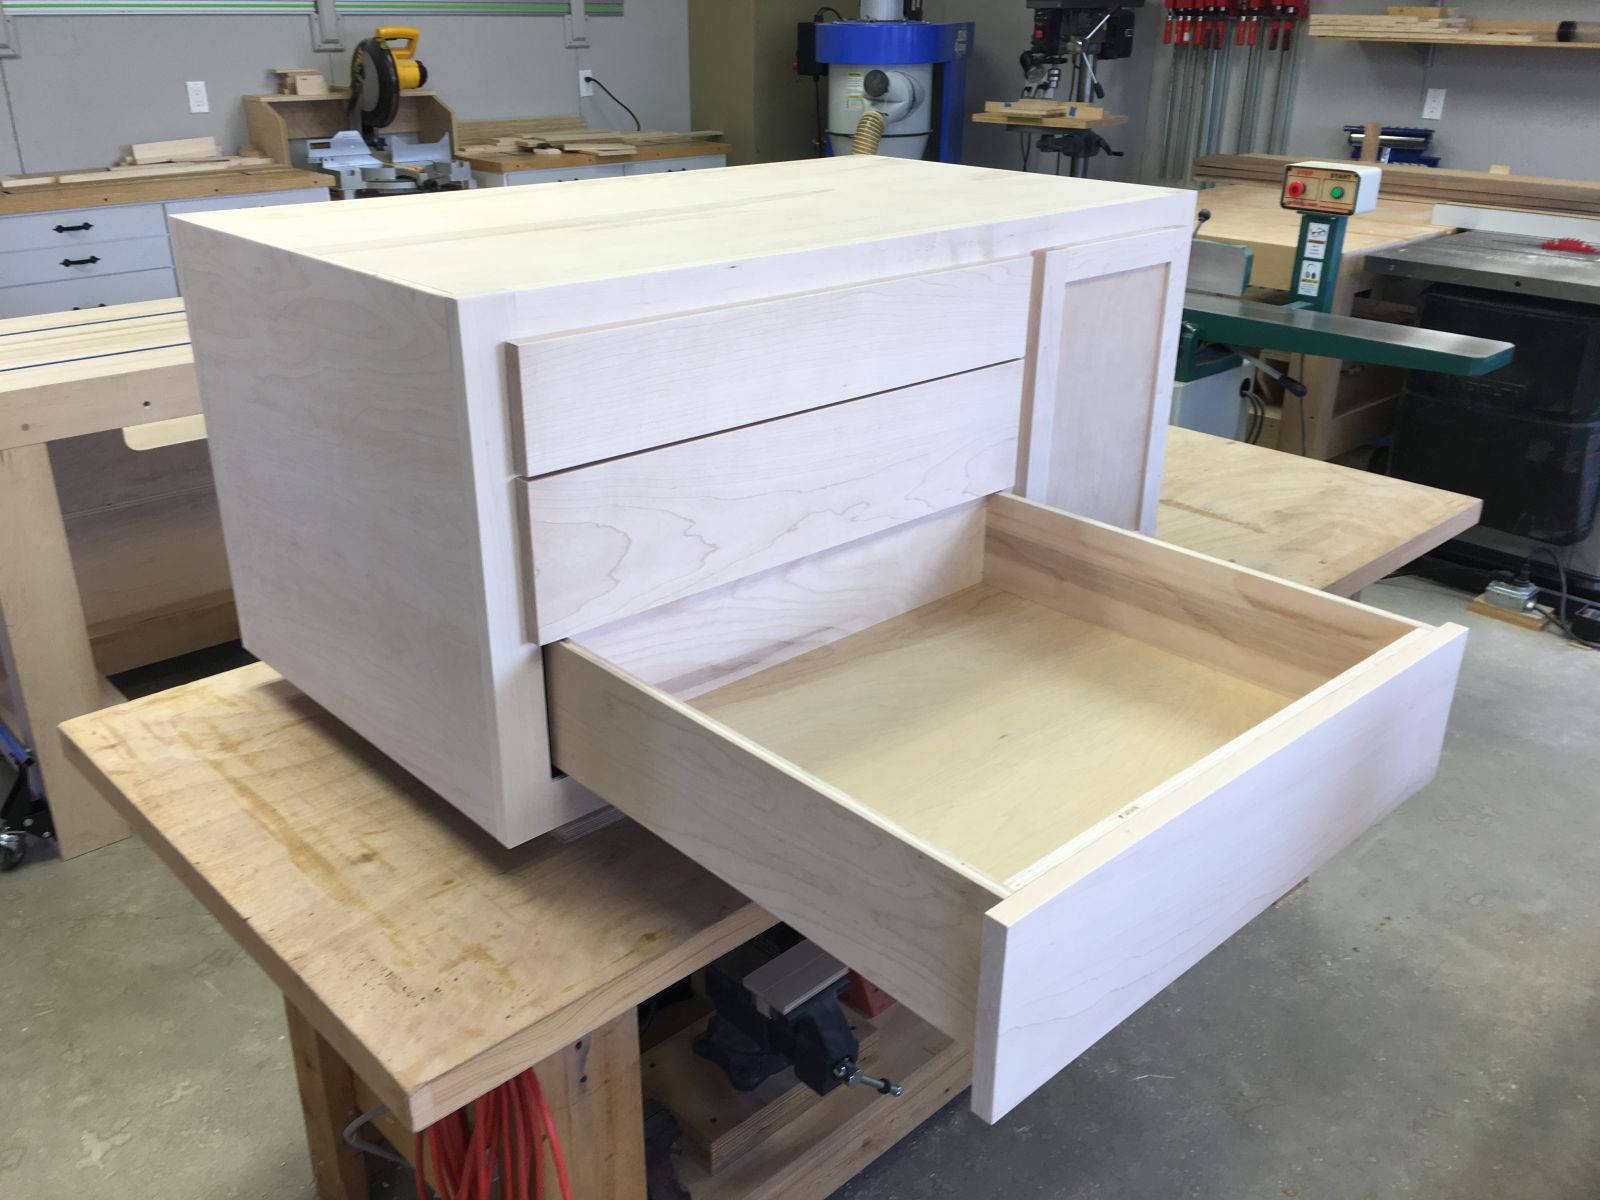
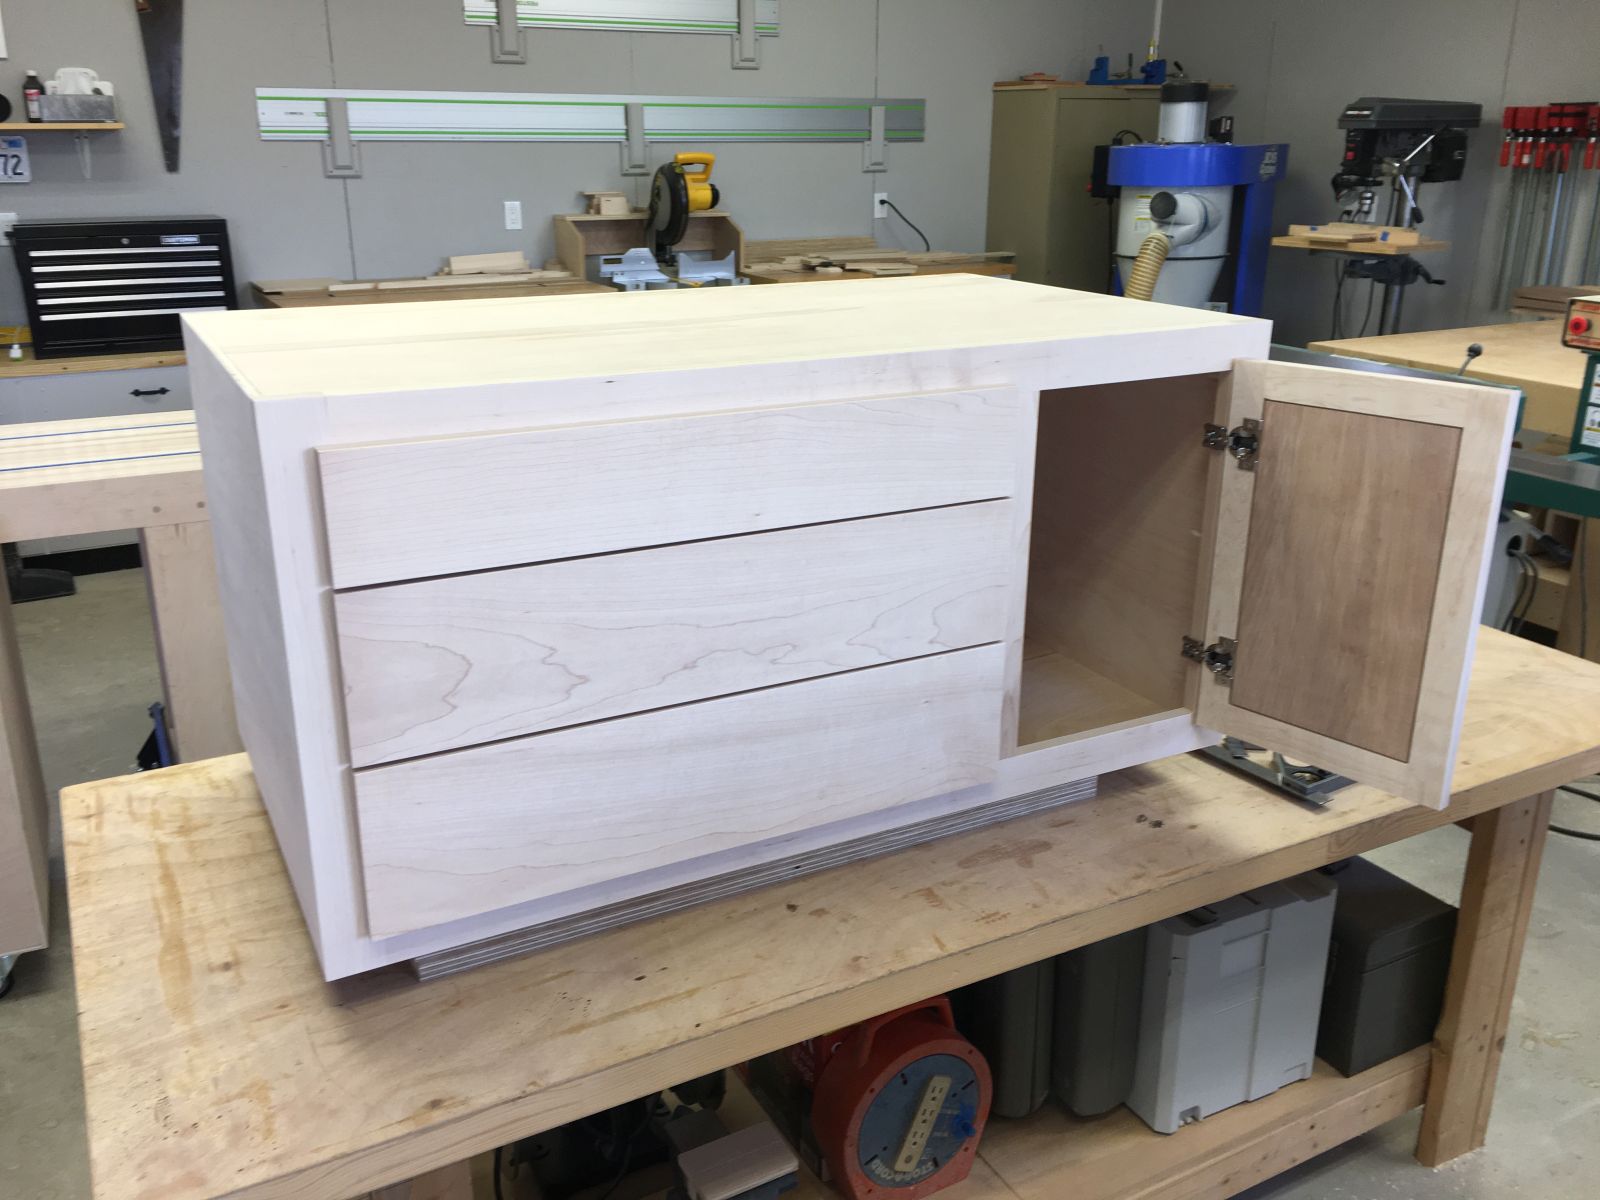
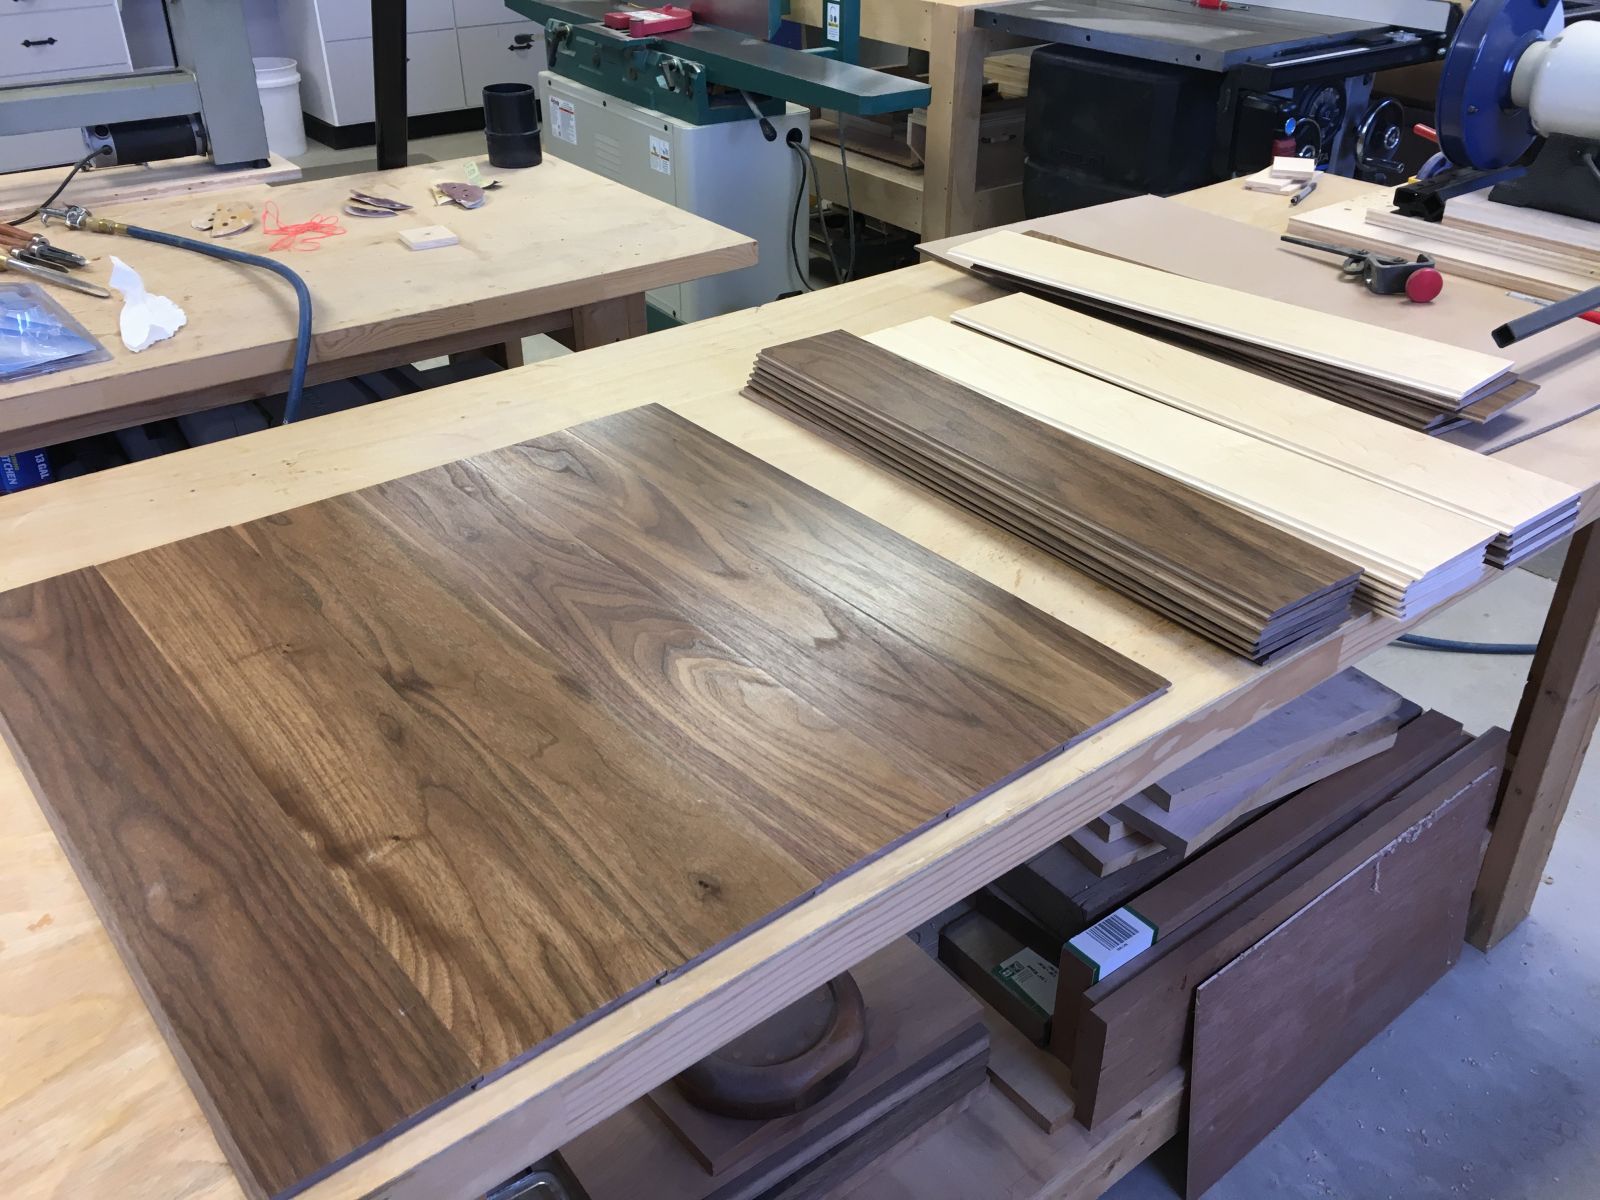
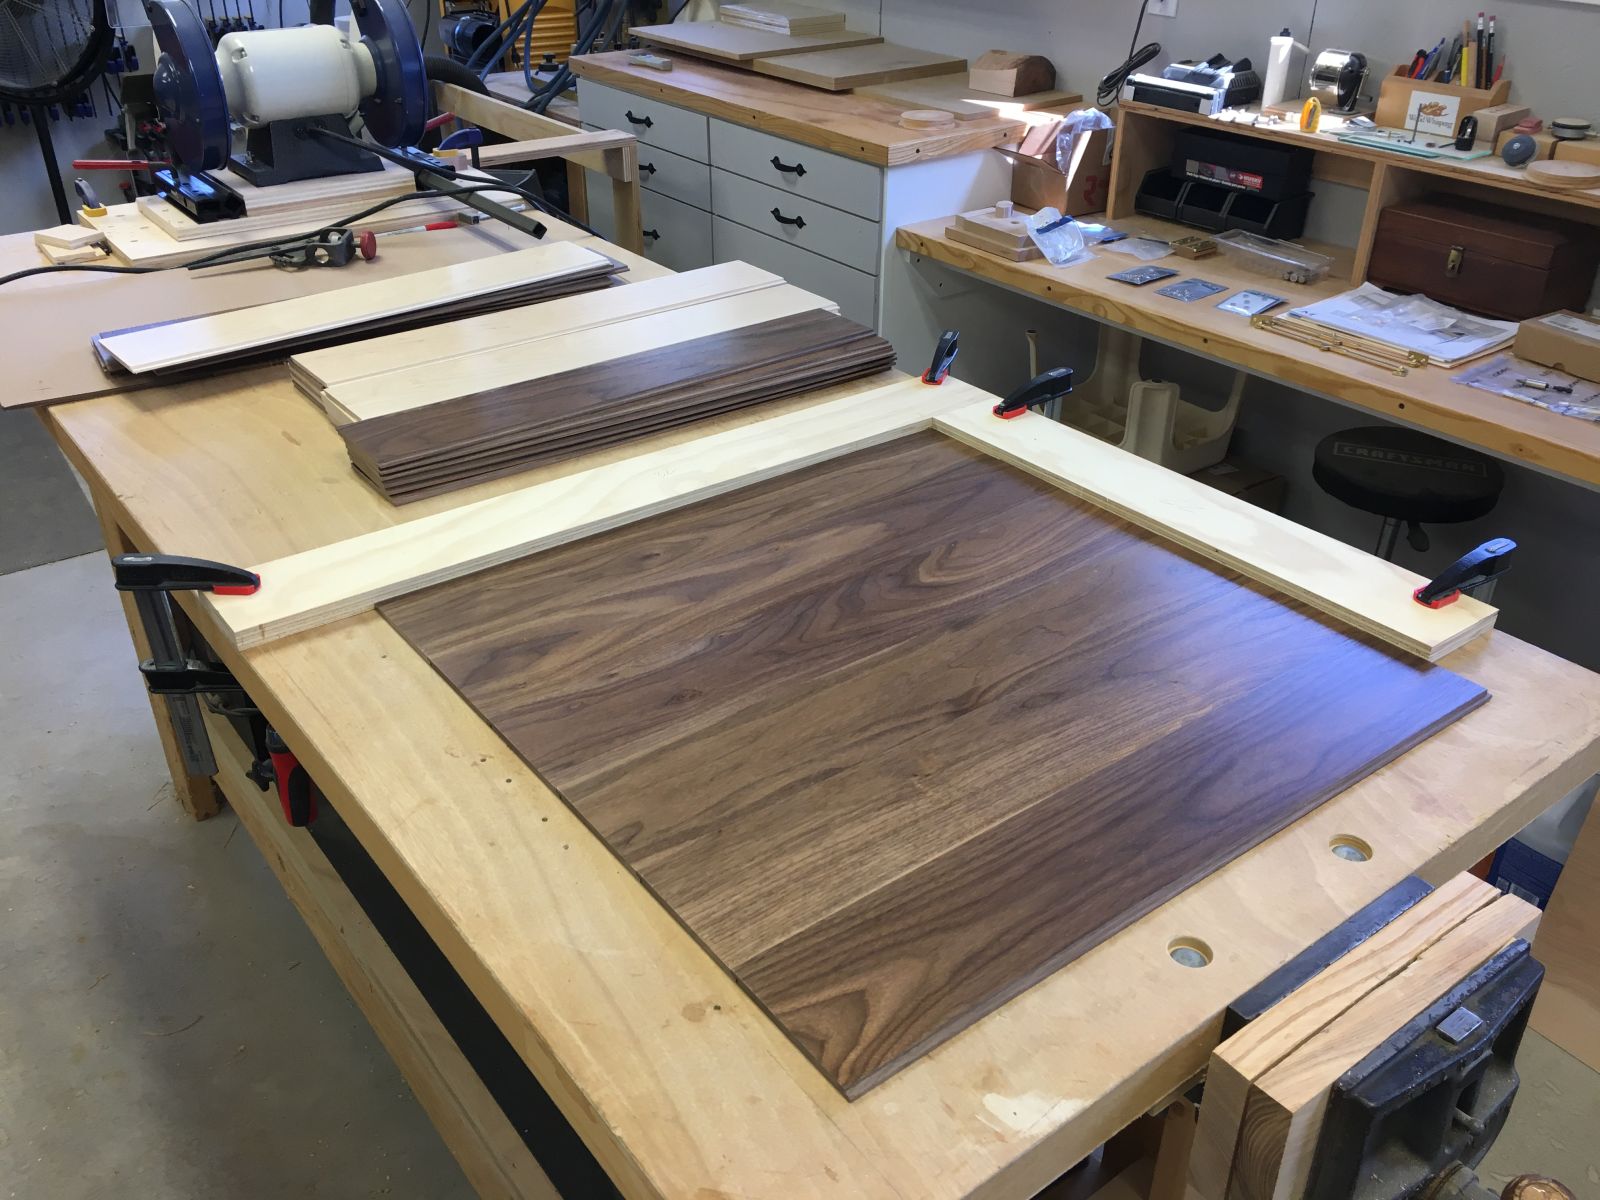
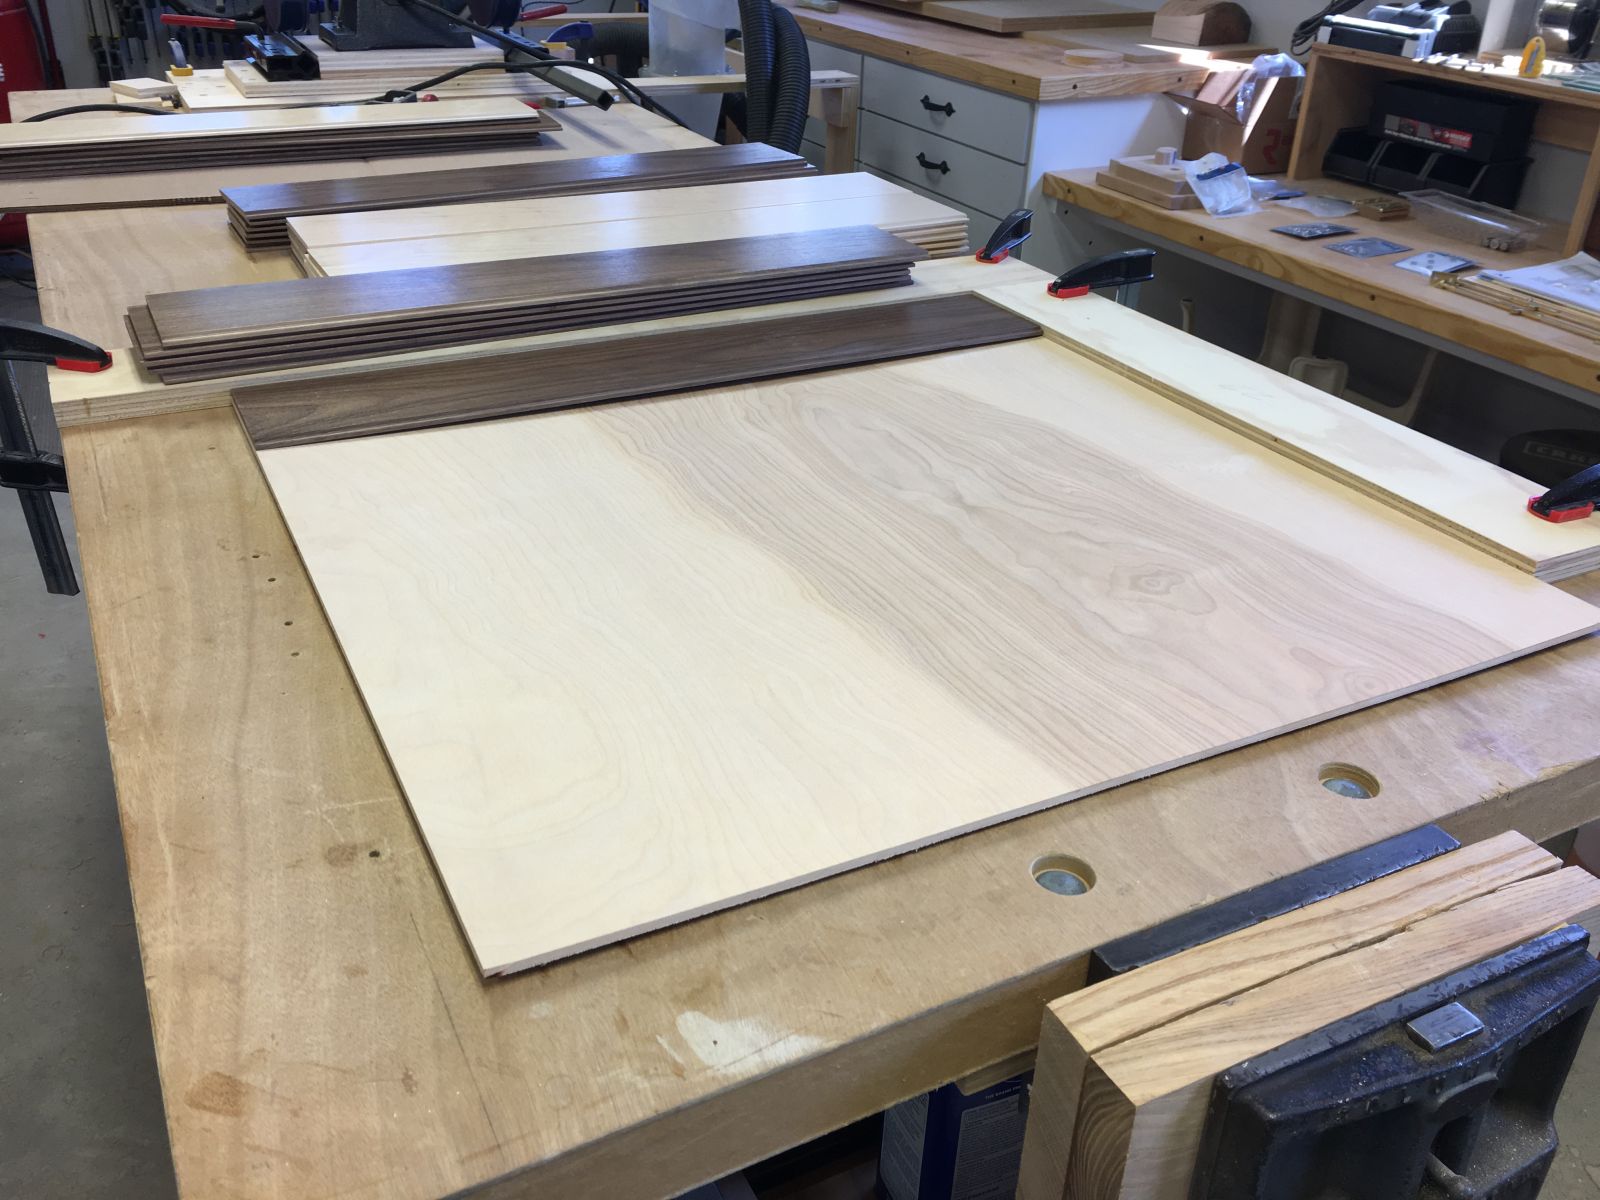
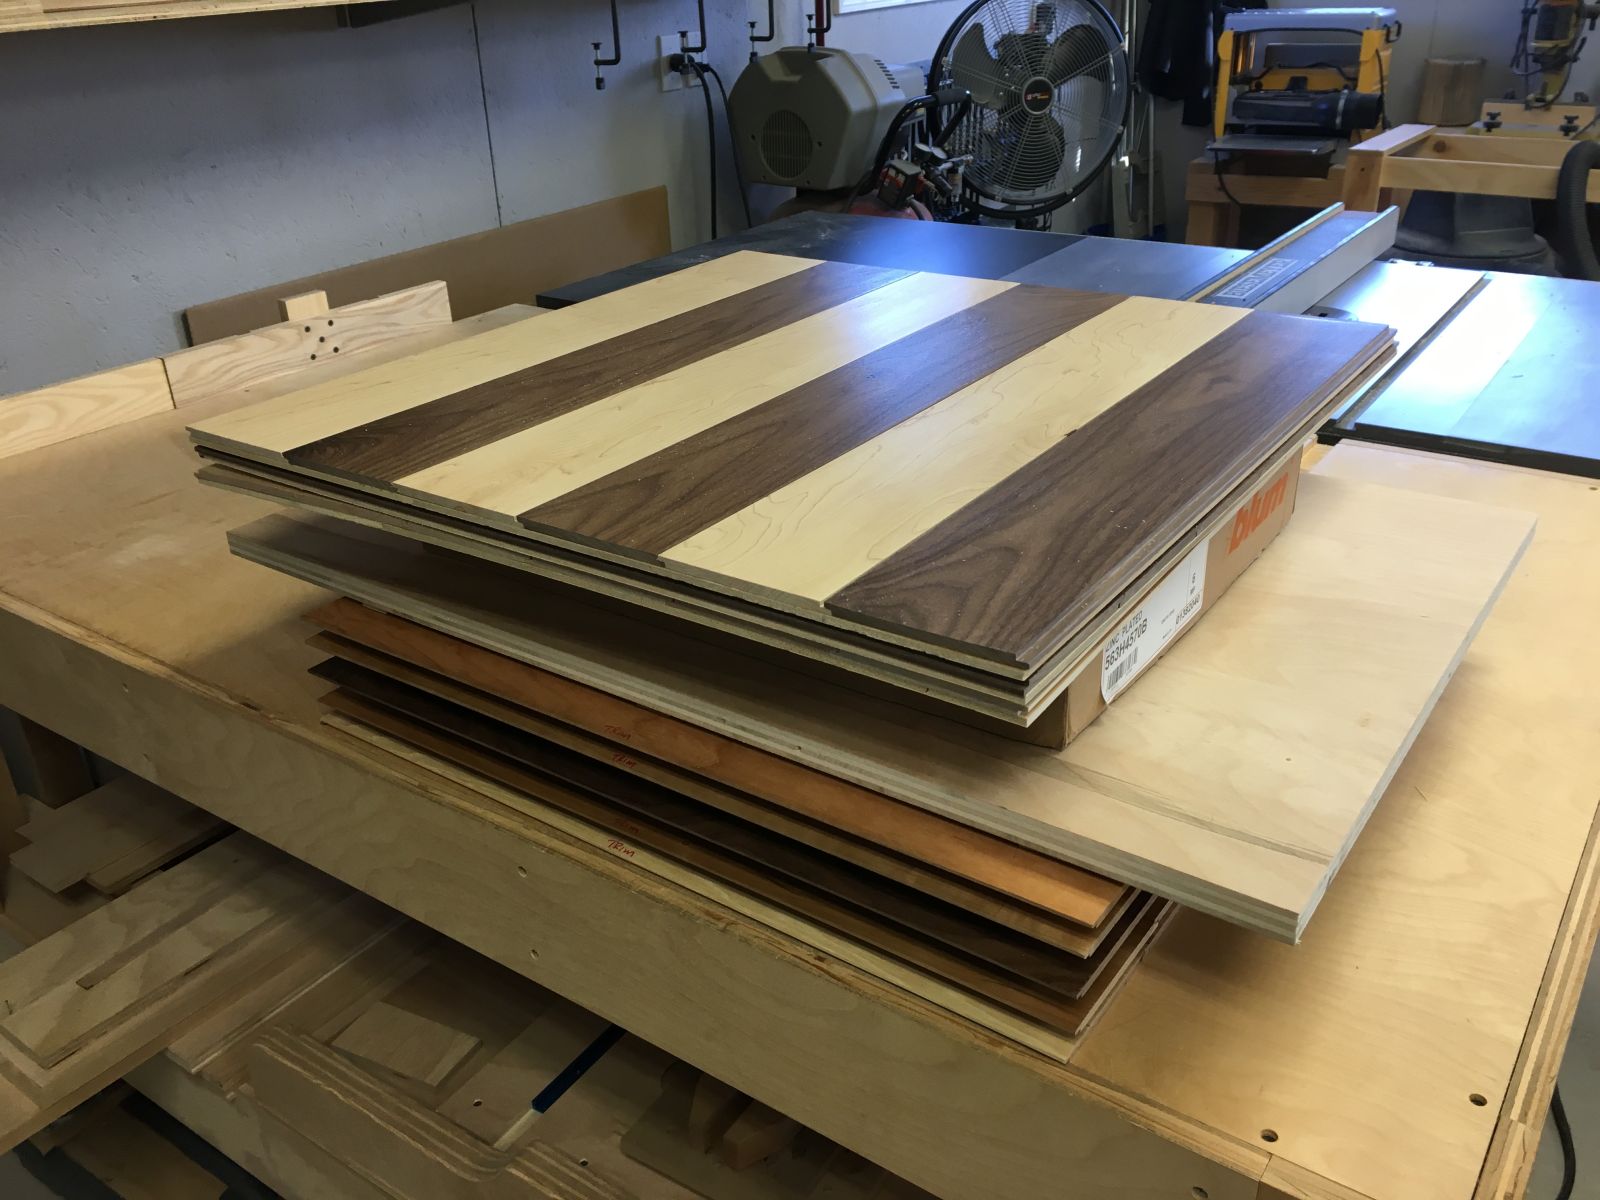
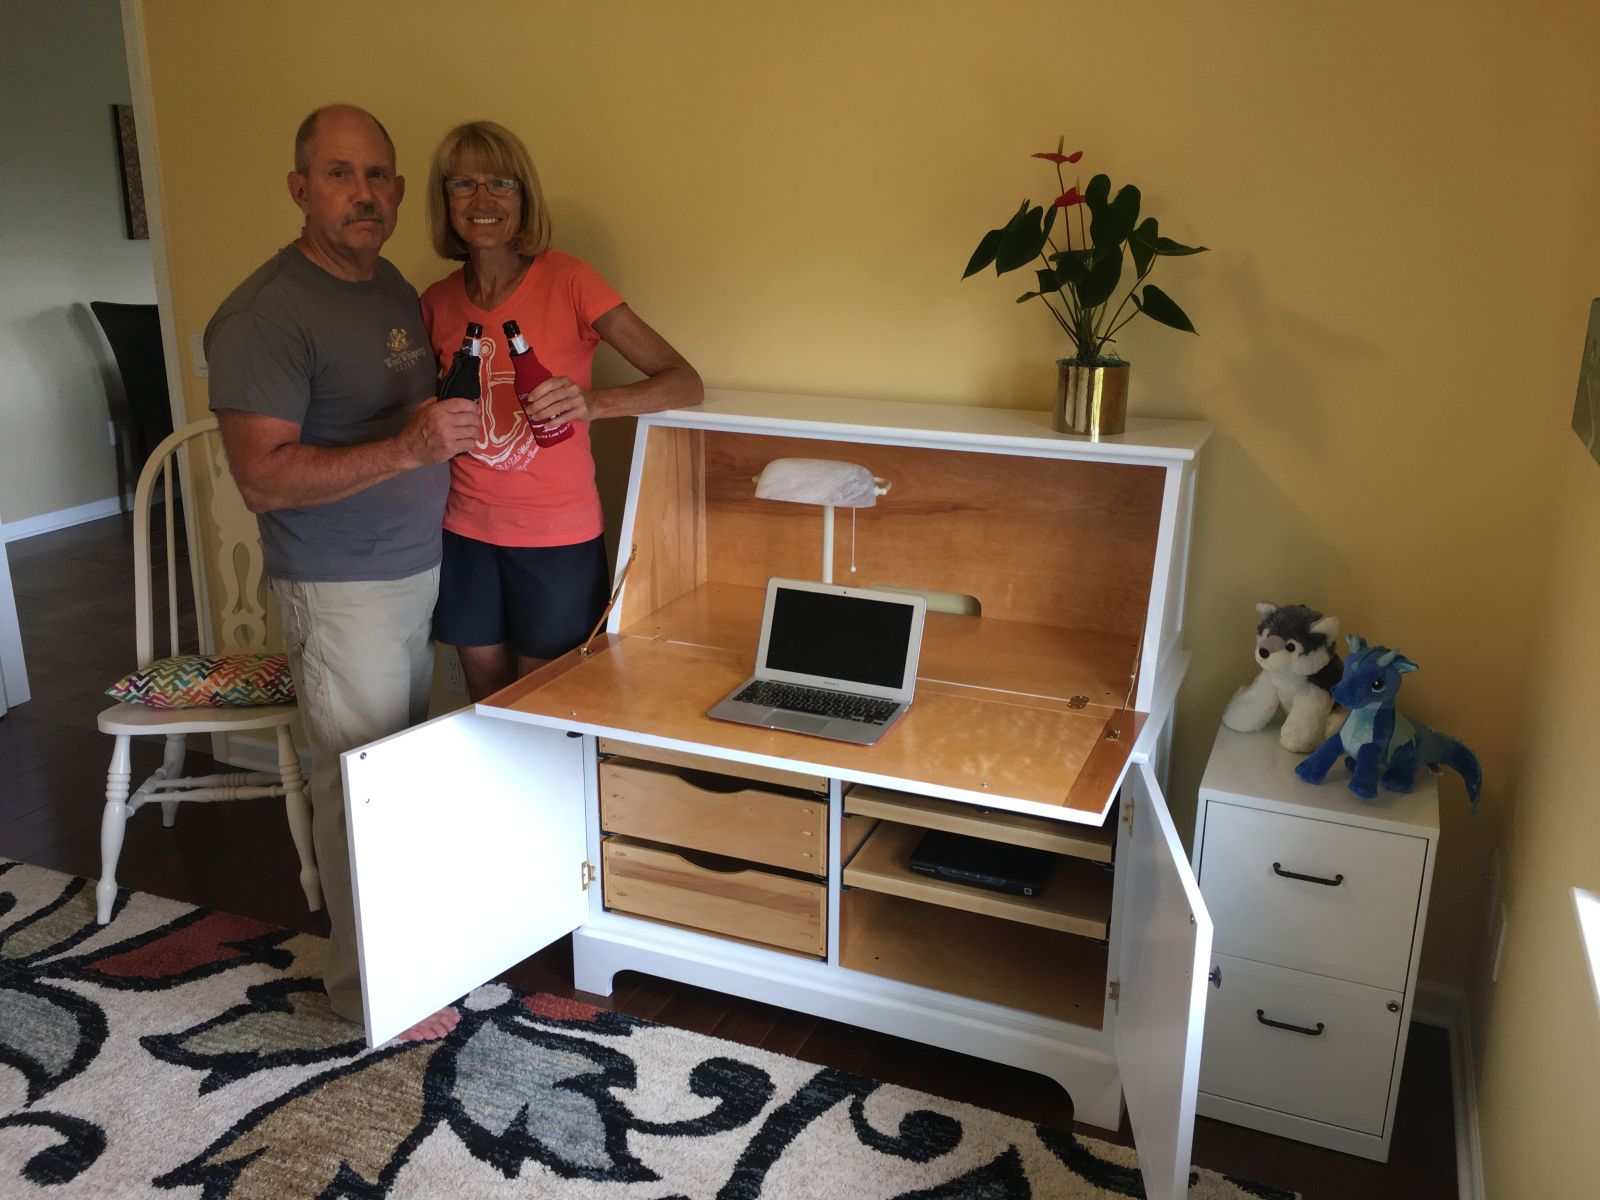
Inspired by a design in Woodsmith magazine, this drop front desk will fit nicely into Linda’s office, which does double duty as our guest room. With the desk closed, the Murphy bed will have plenty of room to open without having to rearrange the furniture, as we have to do now. This desk will have three drawers and two pullouts behind doors. We’re still thinking about the cubbies that will be separate inserts behind the drop front door.
Every cabinetry job starts with a trip to Chelsea Lumber for birch plywood
The plywood rolls into the shop in the same orientation from the truck
Each sheet slides onto saw horses to be broken down in the long direction with my track saw
Sheet goods ready for final width sizing on the table saw
The Marietta Wood Works version of the desk design done in SketchUp and LayOut
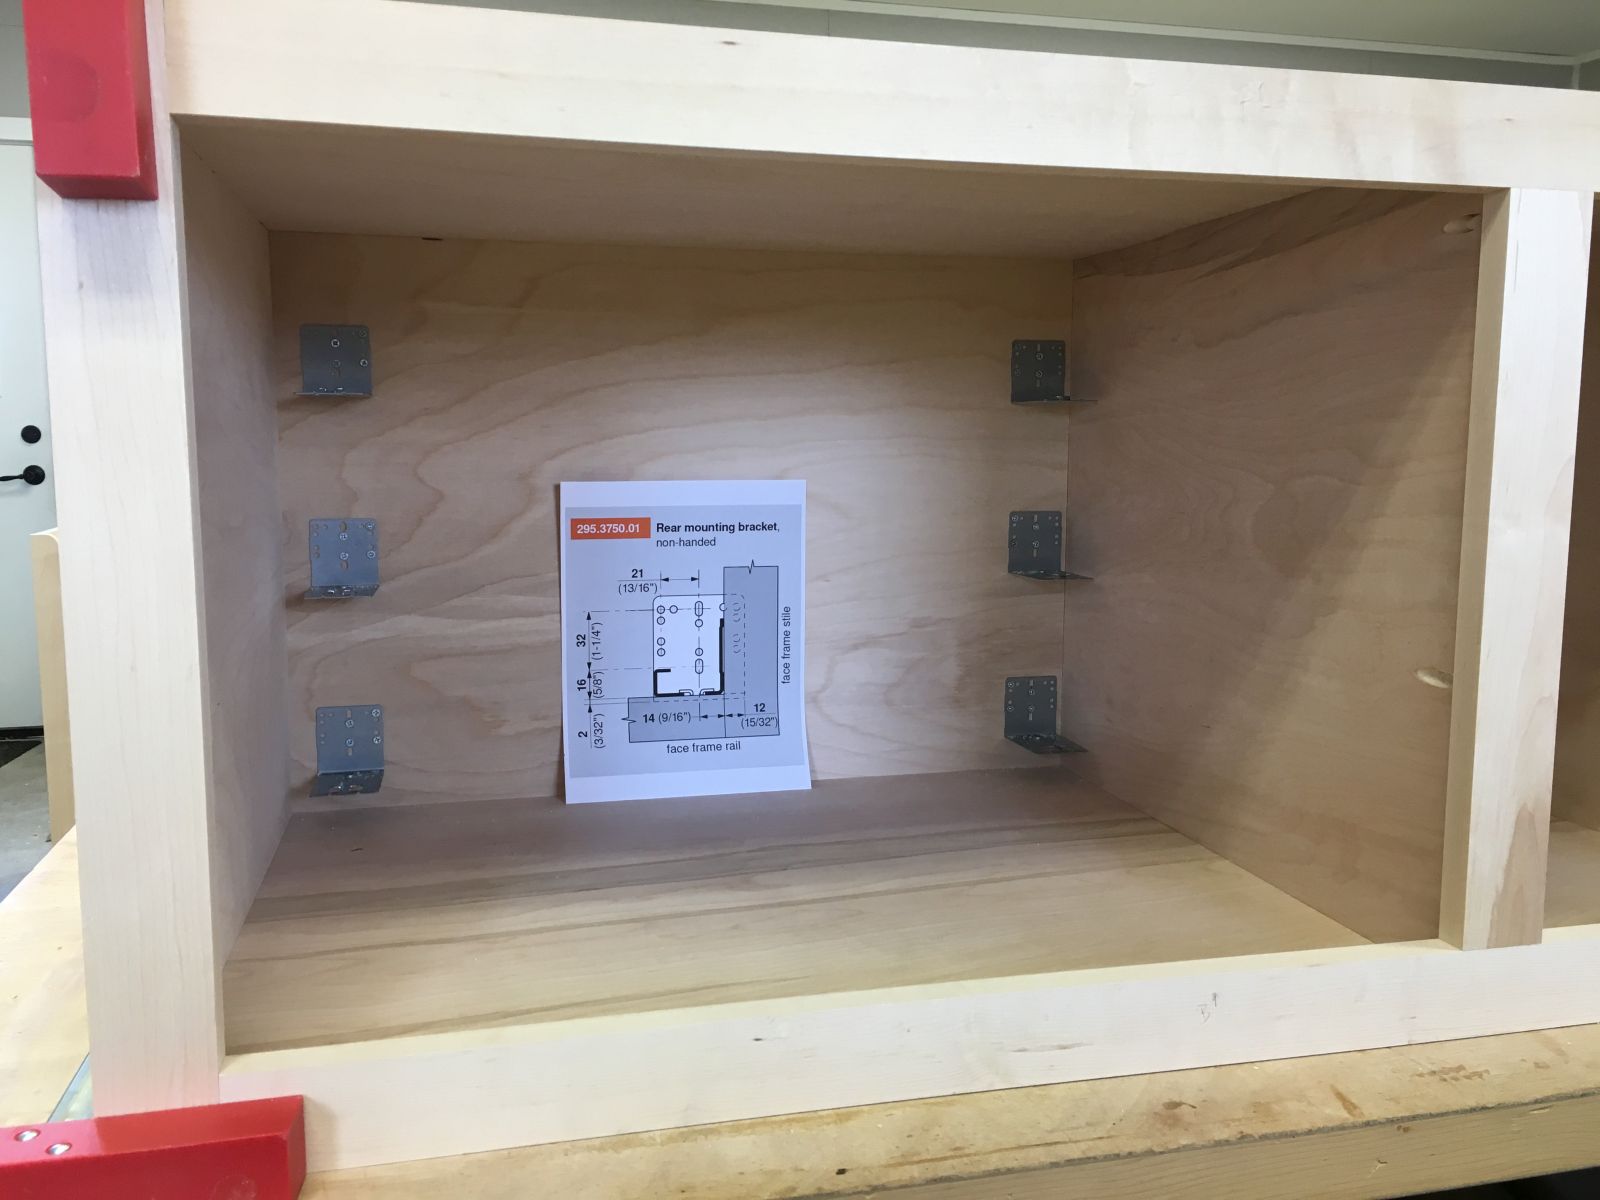
Laying out cable access in the upper and lower carcass backs
One inch radii cut with a two inch Forstner bit
Plunge cutting the straight portion of the openings by raising the table saw blade
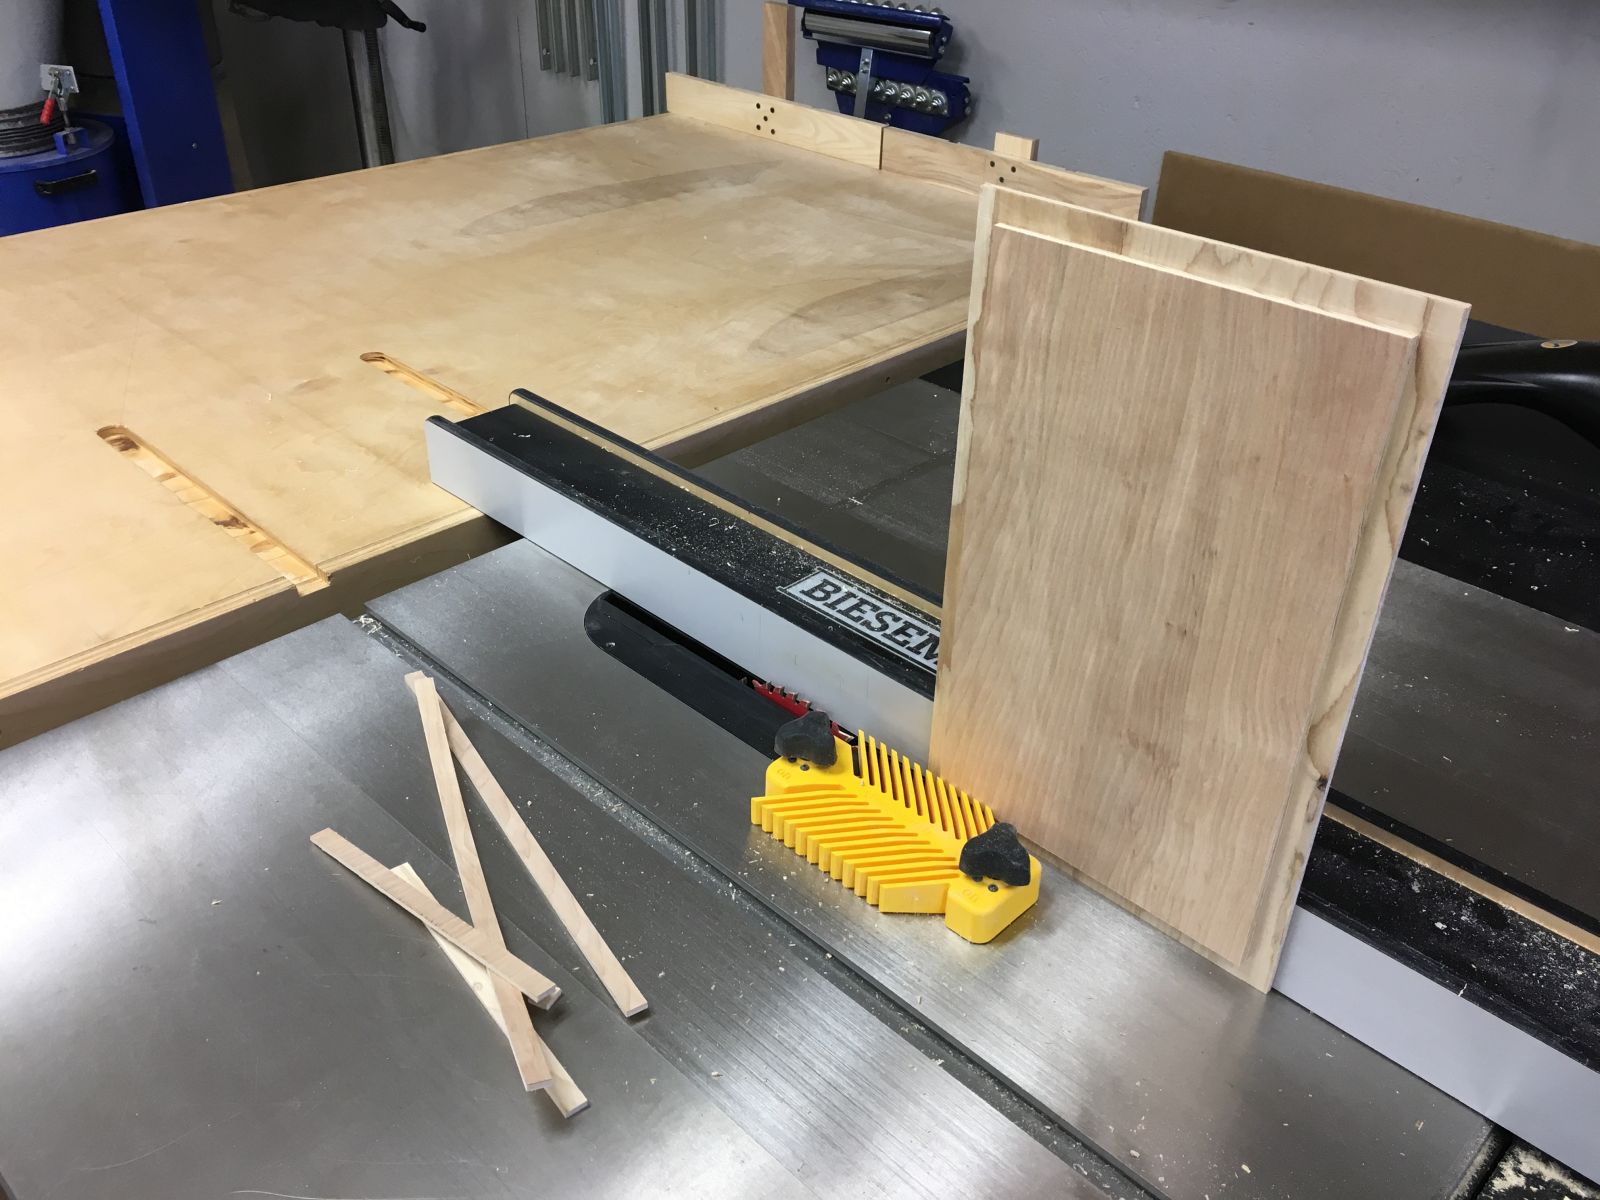
Cutting rabbets and grooves in carcass members with a stacked dado blade and sacrificial fence
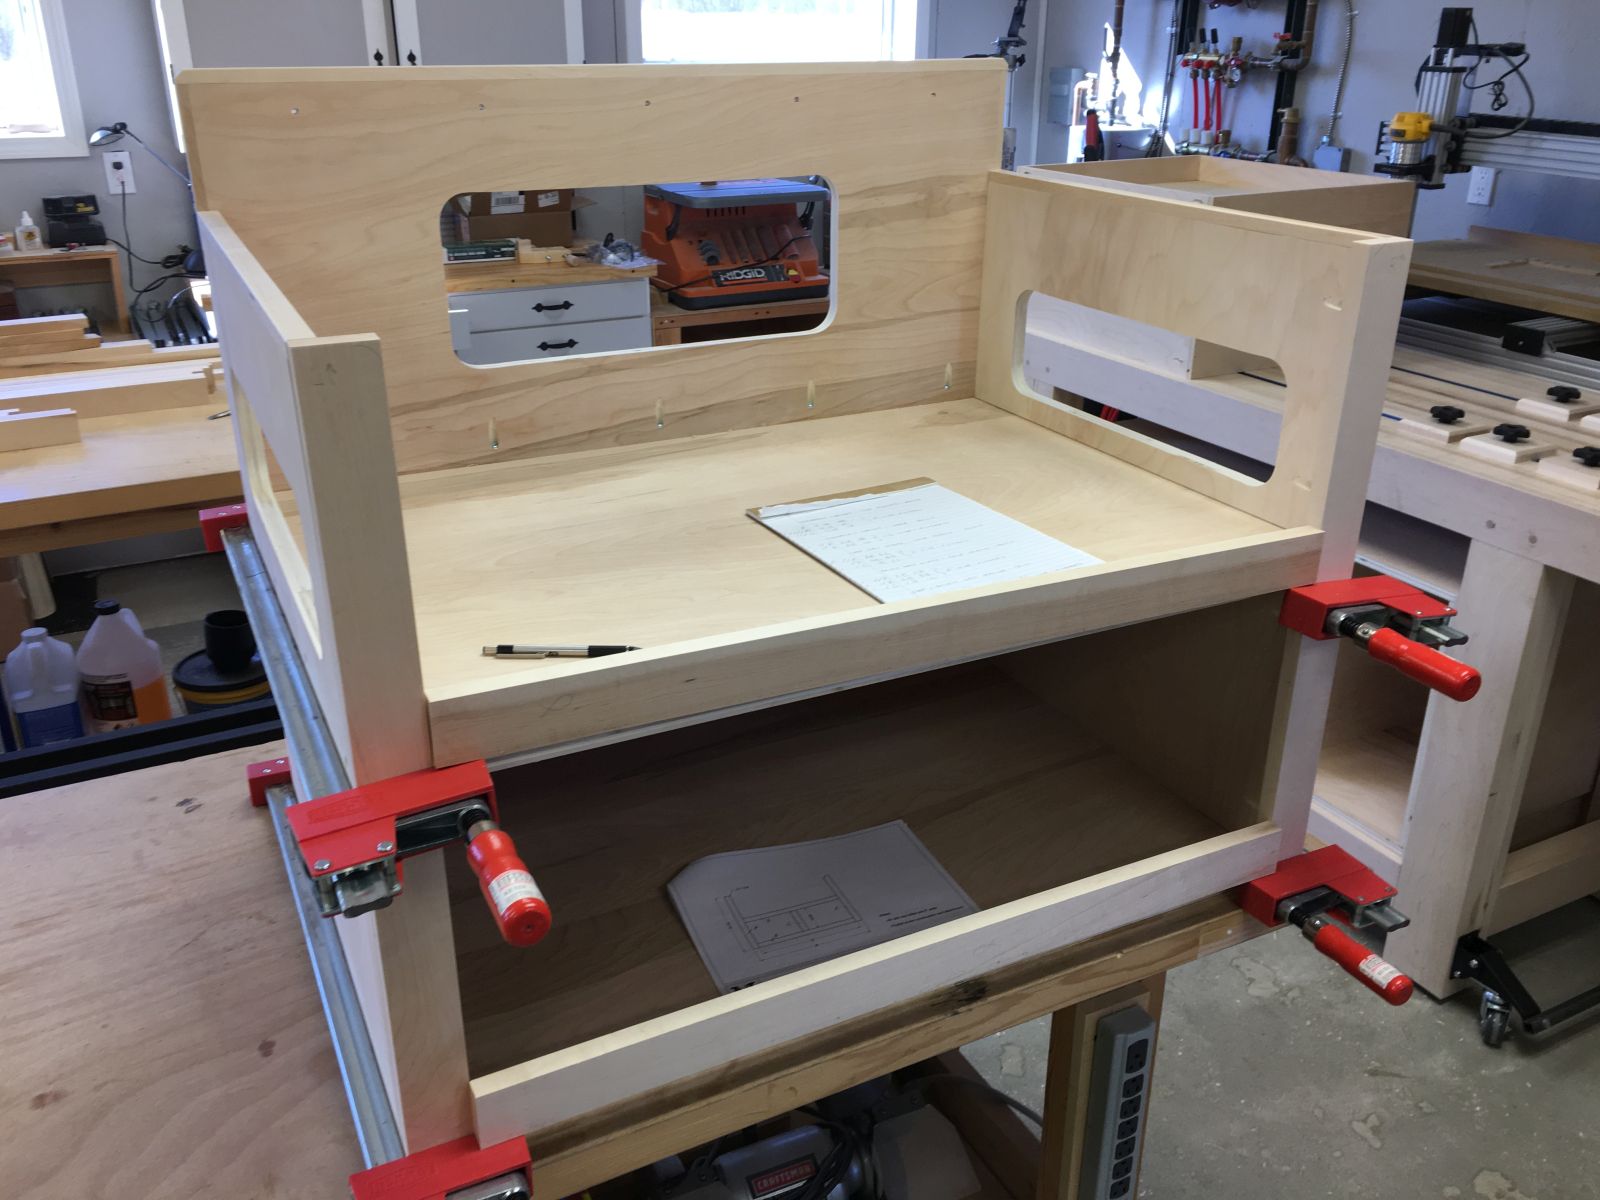
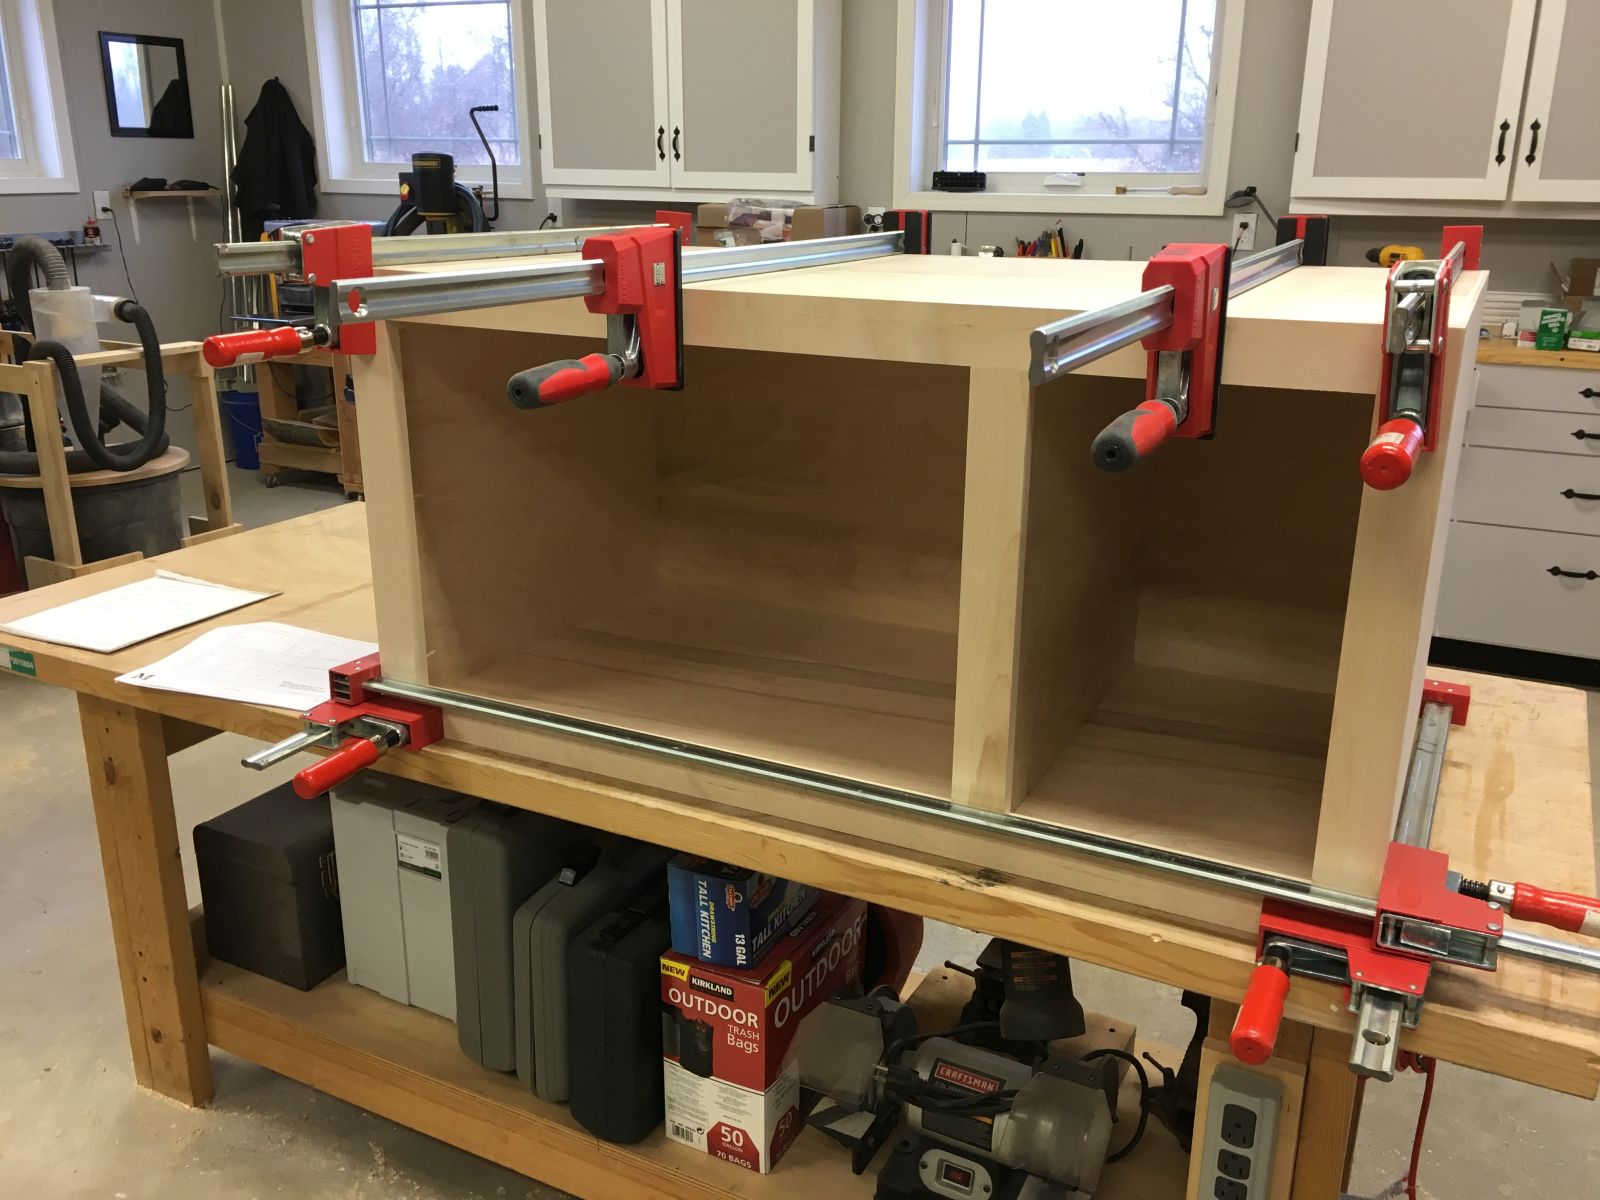
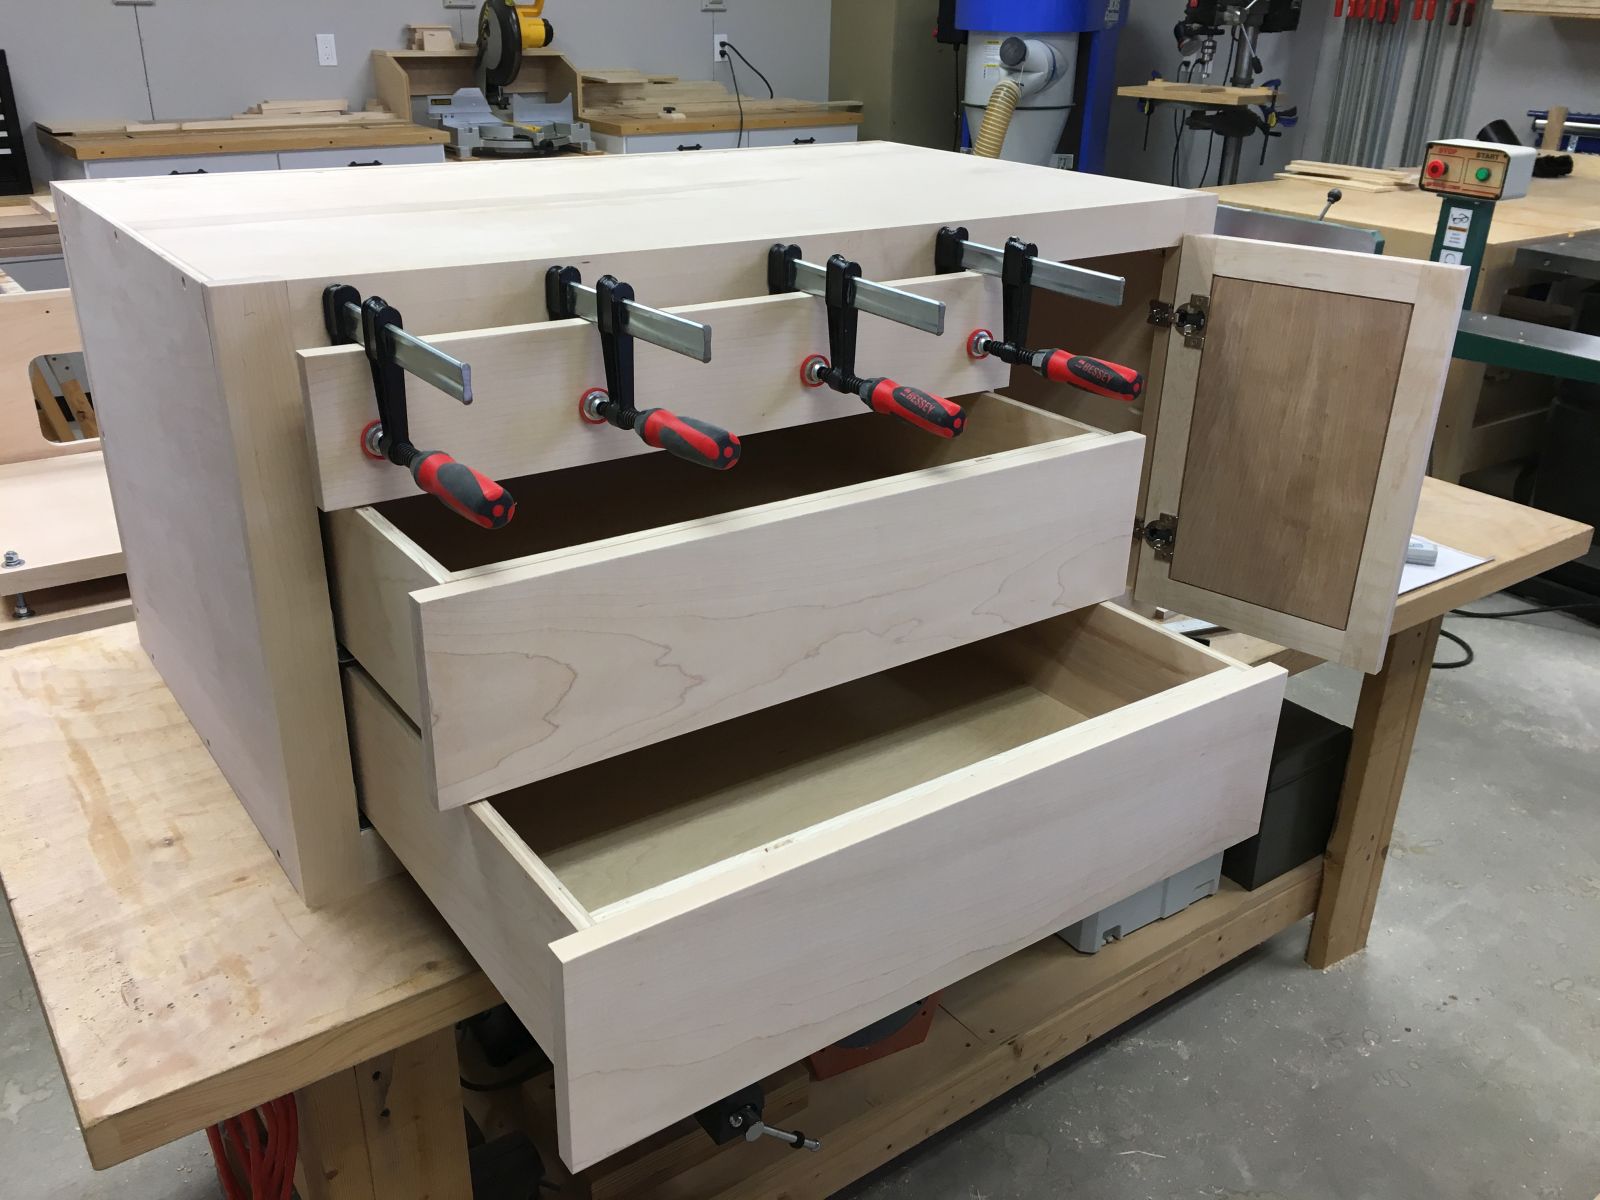
Lower carcass first dry fit
Shop view
Sanding interior surfaces to 150 grit before assembly
Using my track saw to pad cut the sixty-nine degree angle on the upper carcass sides
Pad sawing makes both sides identical
Using a dial indicator to make 0.010″ adjustments to the rip fence for cutting a twenty-one degree bevel on the upper carcass top panel to match the sides
Upper carcass first dry fit
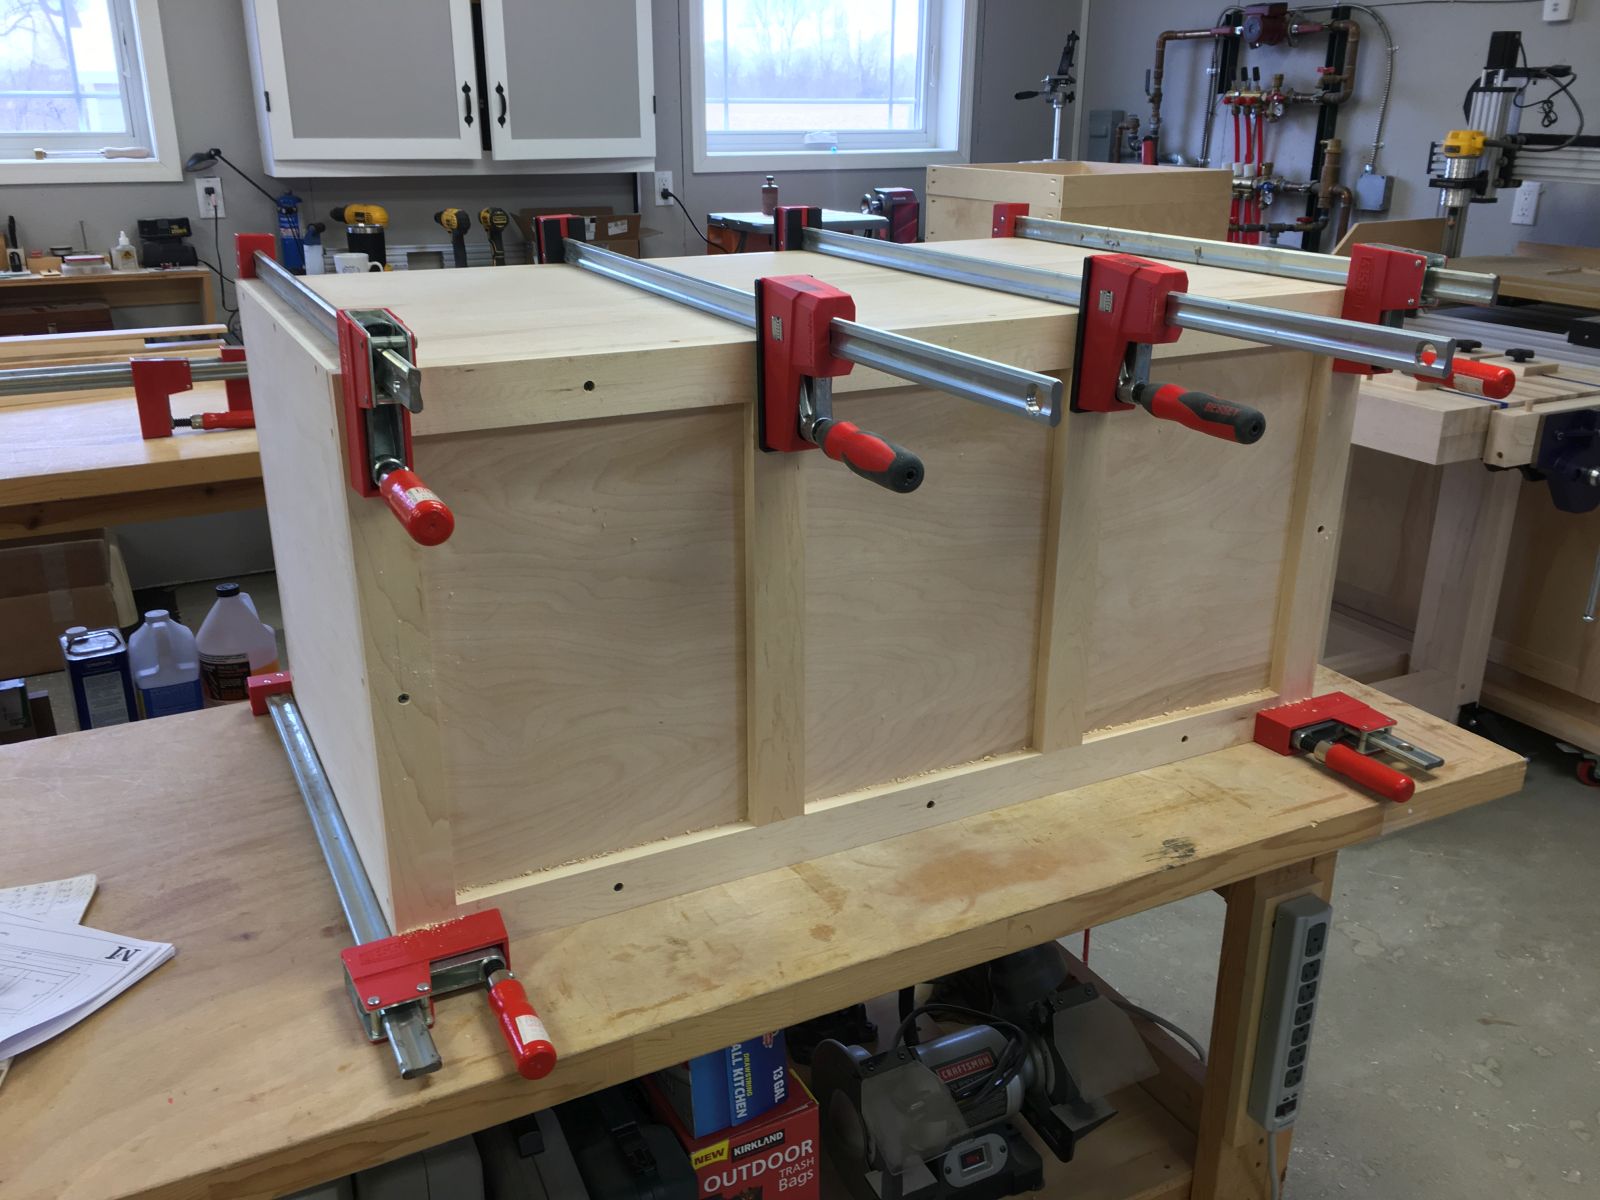
Upper and lower carcasses assembled and stacked in eventual final configuration
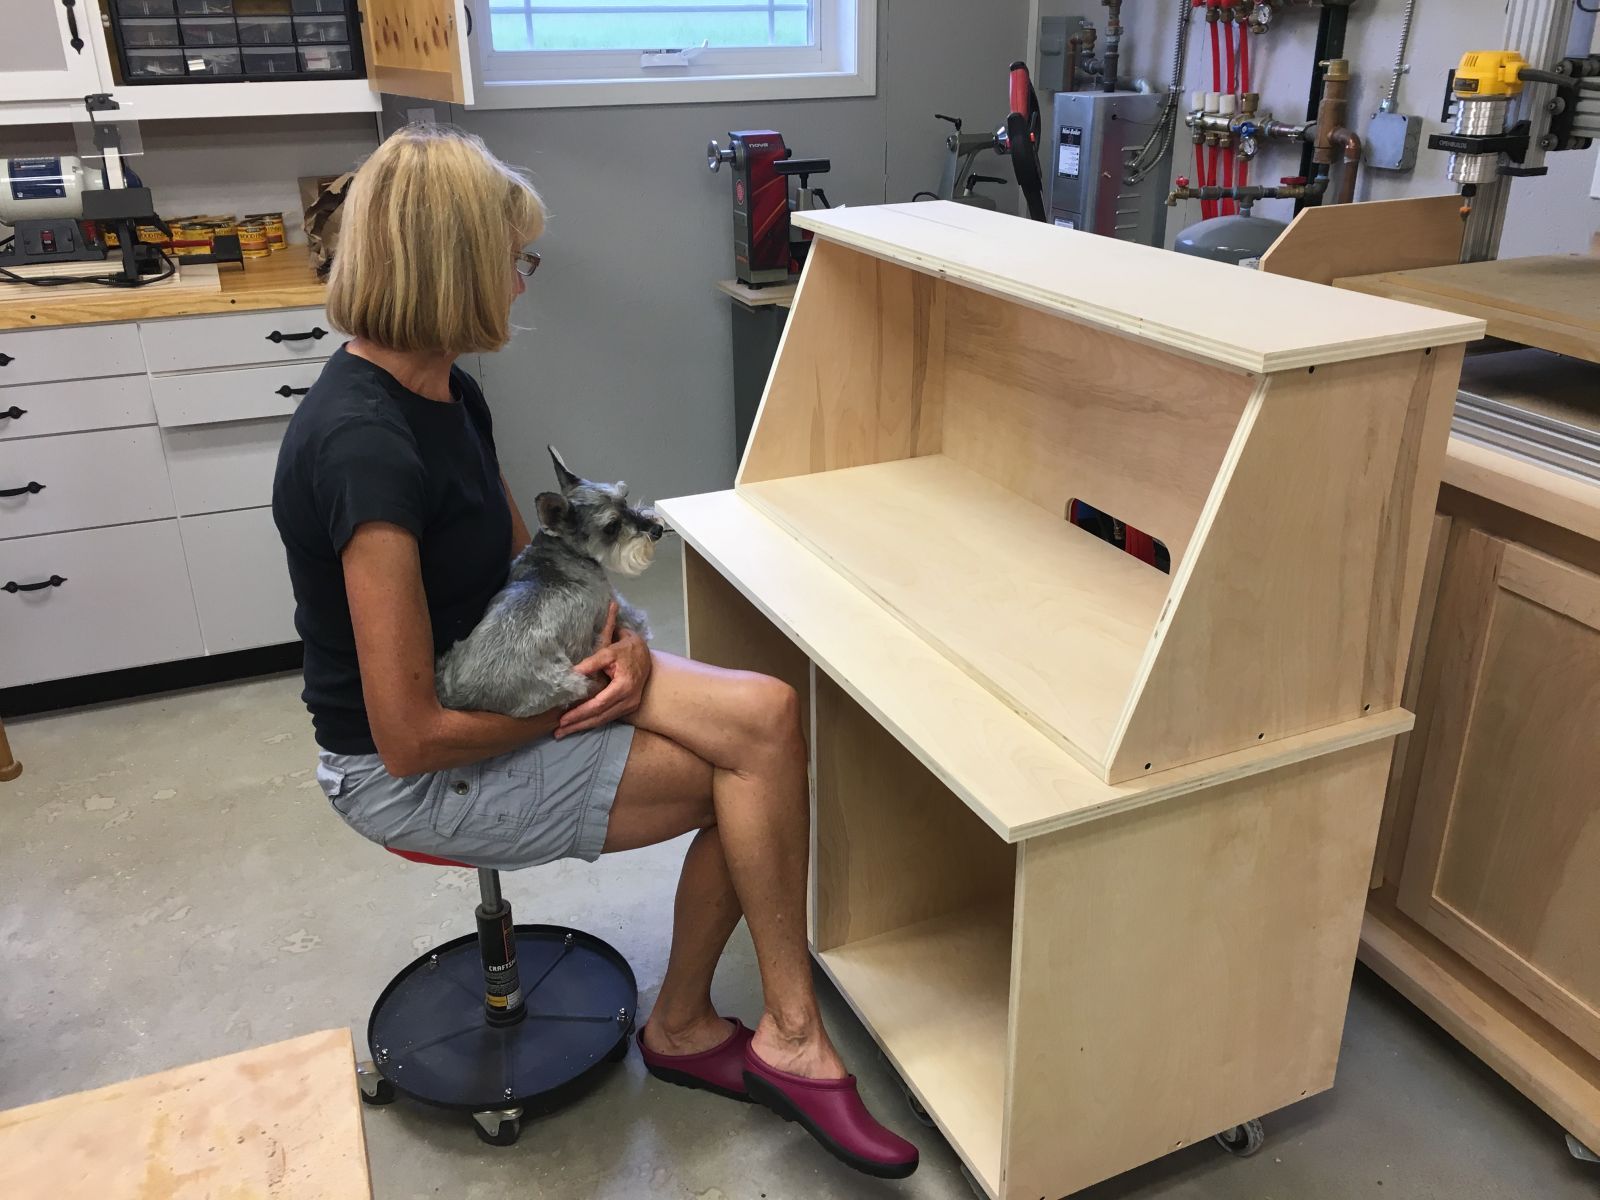
Linda and Murphy getting a first look at the new desk
Maple sides cut for base assembly
Base first (upside down) dry fit
Laying out cutouts in base sides and front
Ready for the bandsaw
Bandsawing 2 1/2″ radii, leaving the line for the drum sander
Base second (upside down) dry fit
Oscillating drum sander makes quick work of cleaning up band sawn edges
Oscillating drum sander overview
Cutting coves with a 1/2″ radius on the router table
Router table overview
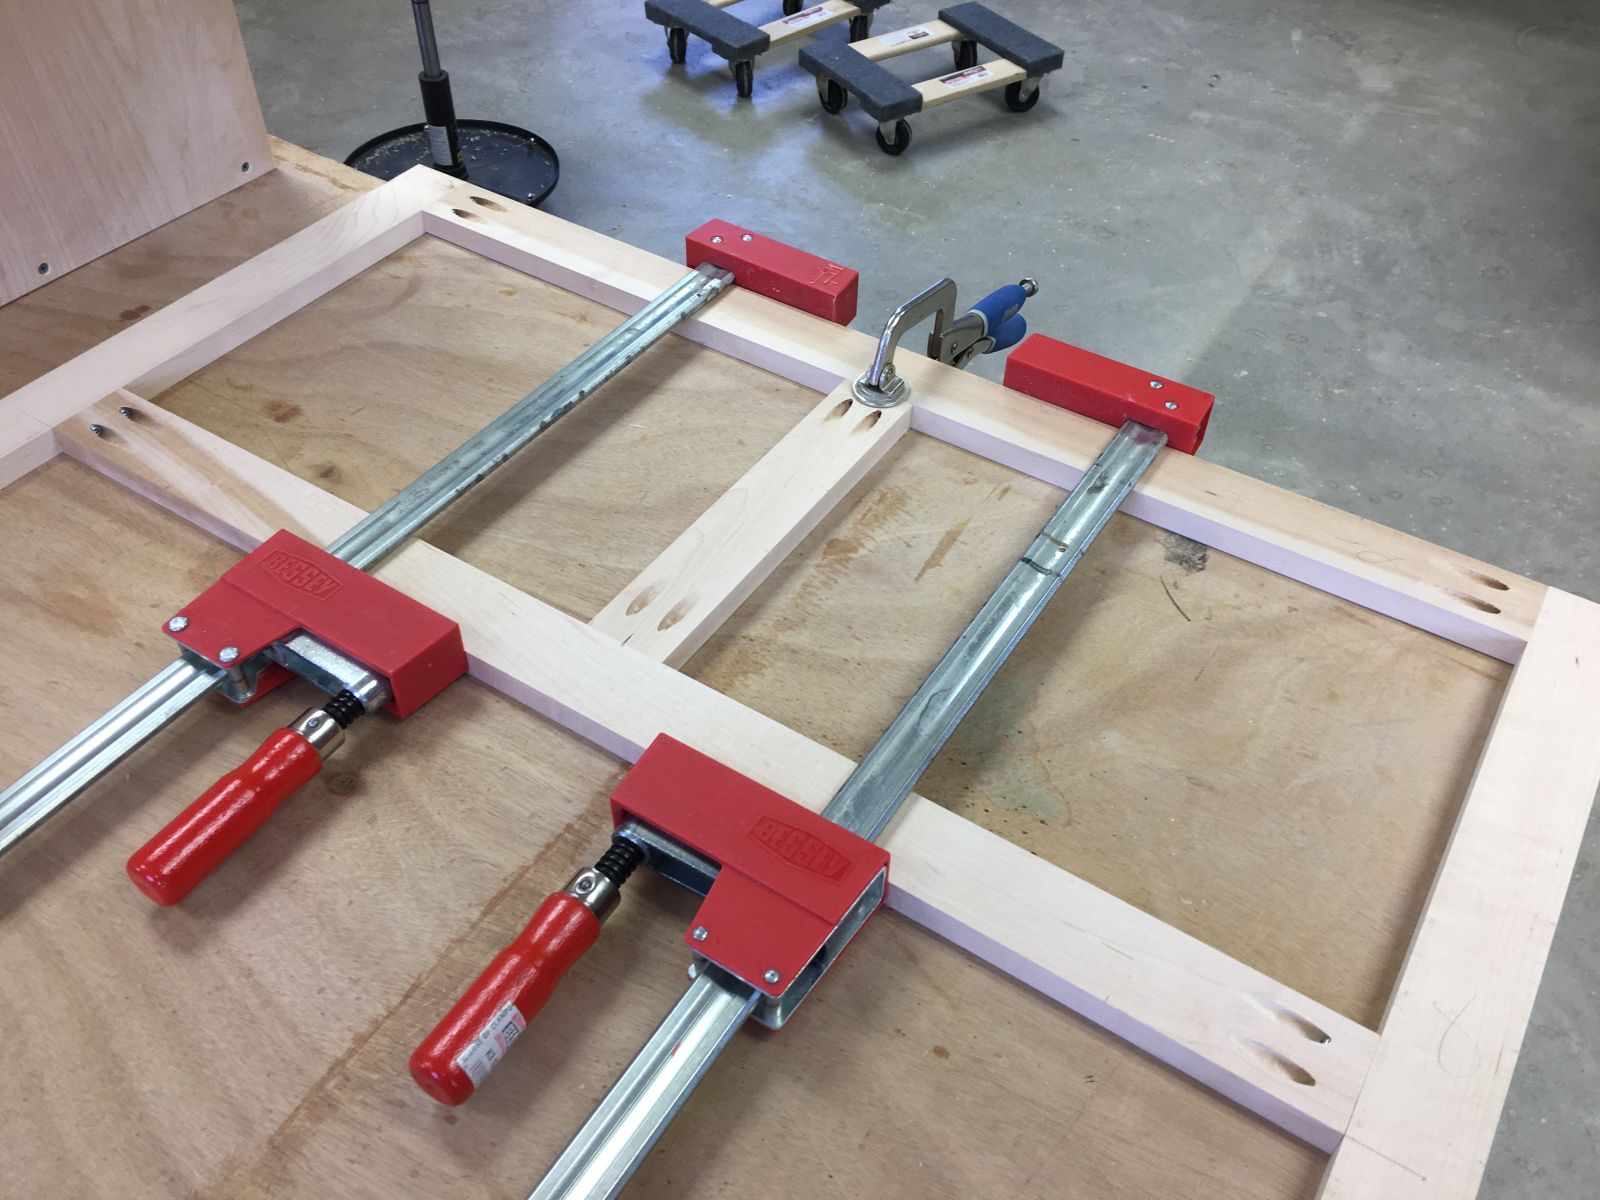
Base third (upside down) dry fit and clamping trial
Base detail showing corner blocks
Using my DIY self-centering drill press vise to drill holes in base cleats
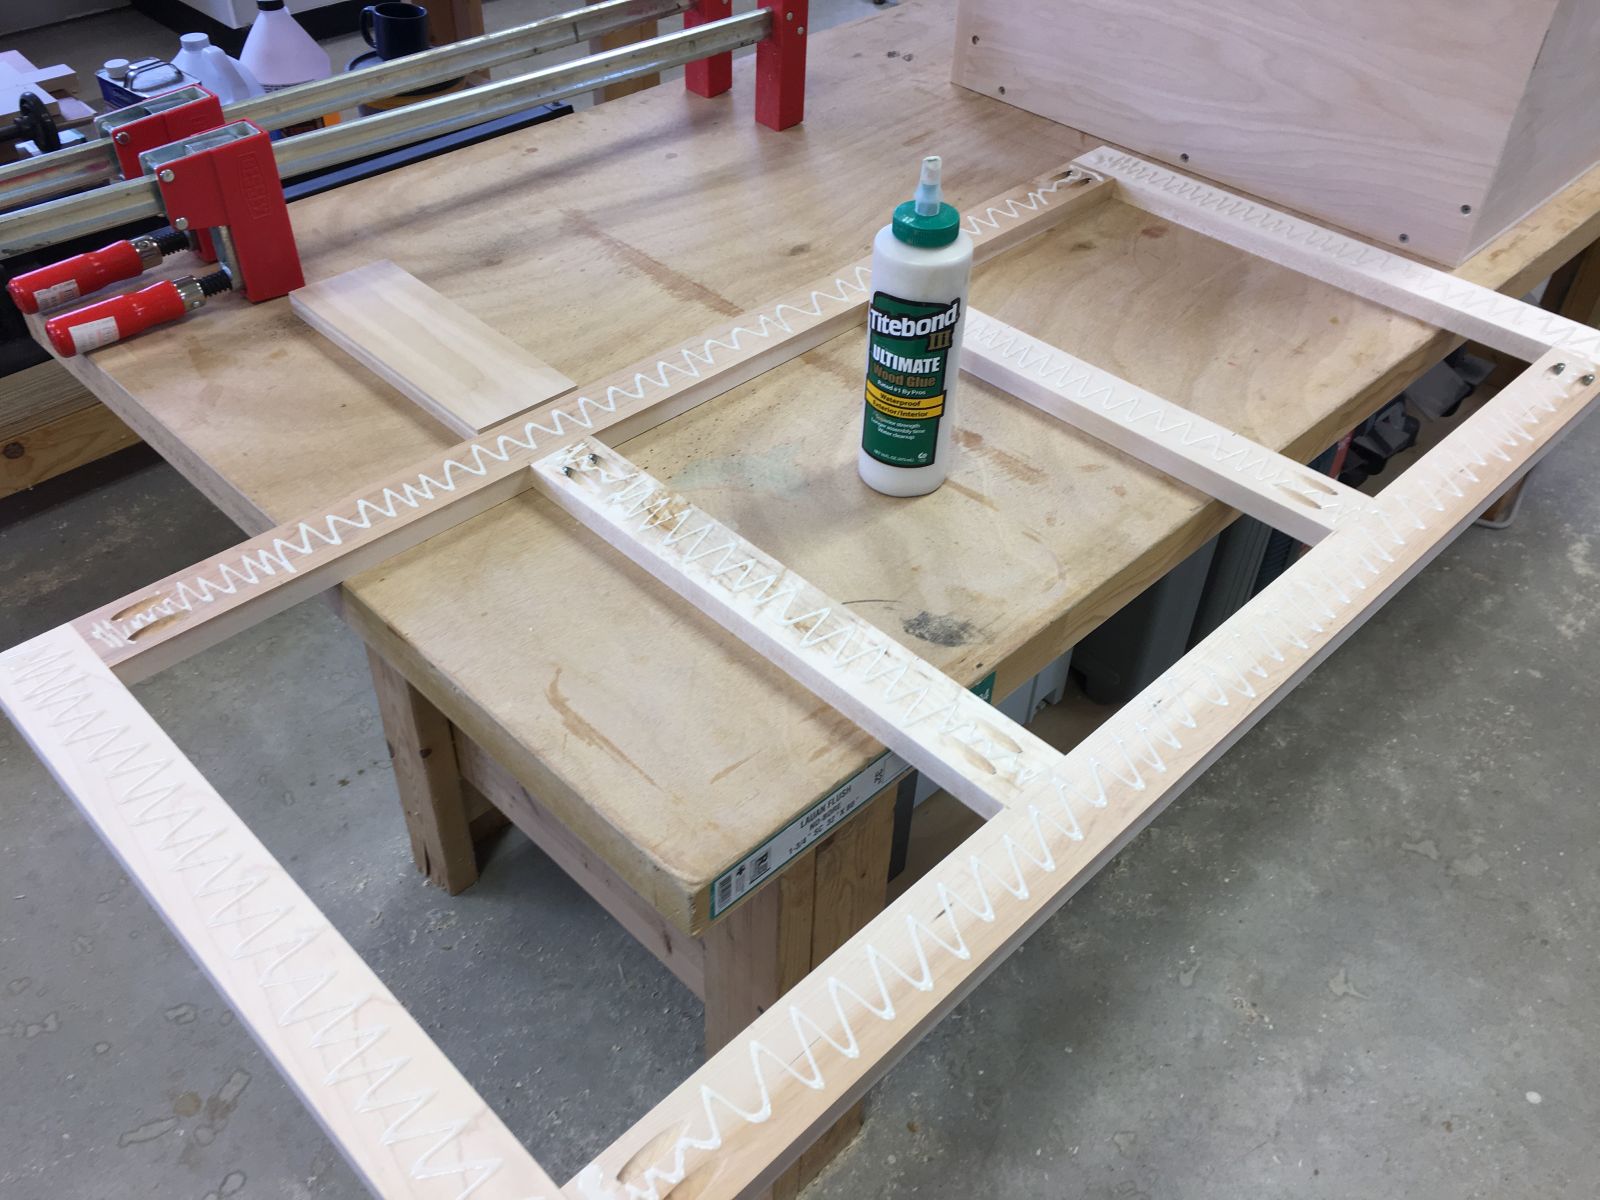
Using the painter’s-tape mitered corner folding method for base glue up
The painter’s tape acts as a hinge, maintaining joint alignment and preventing glue squeeze out
The old angle drive adapter comes in handy every so often
Base bottom (never to be seen again) with blocking details
Base, right side up
Linda’s custom design was adapted from this design in Woodsmith Magazine
Lower case temporarily set on base
Front view
Base, lower and upper cases, to get a feel for the volume of the finished desk
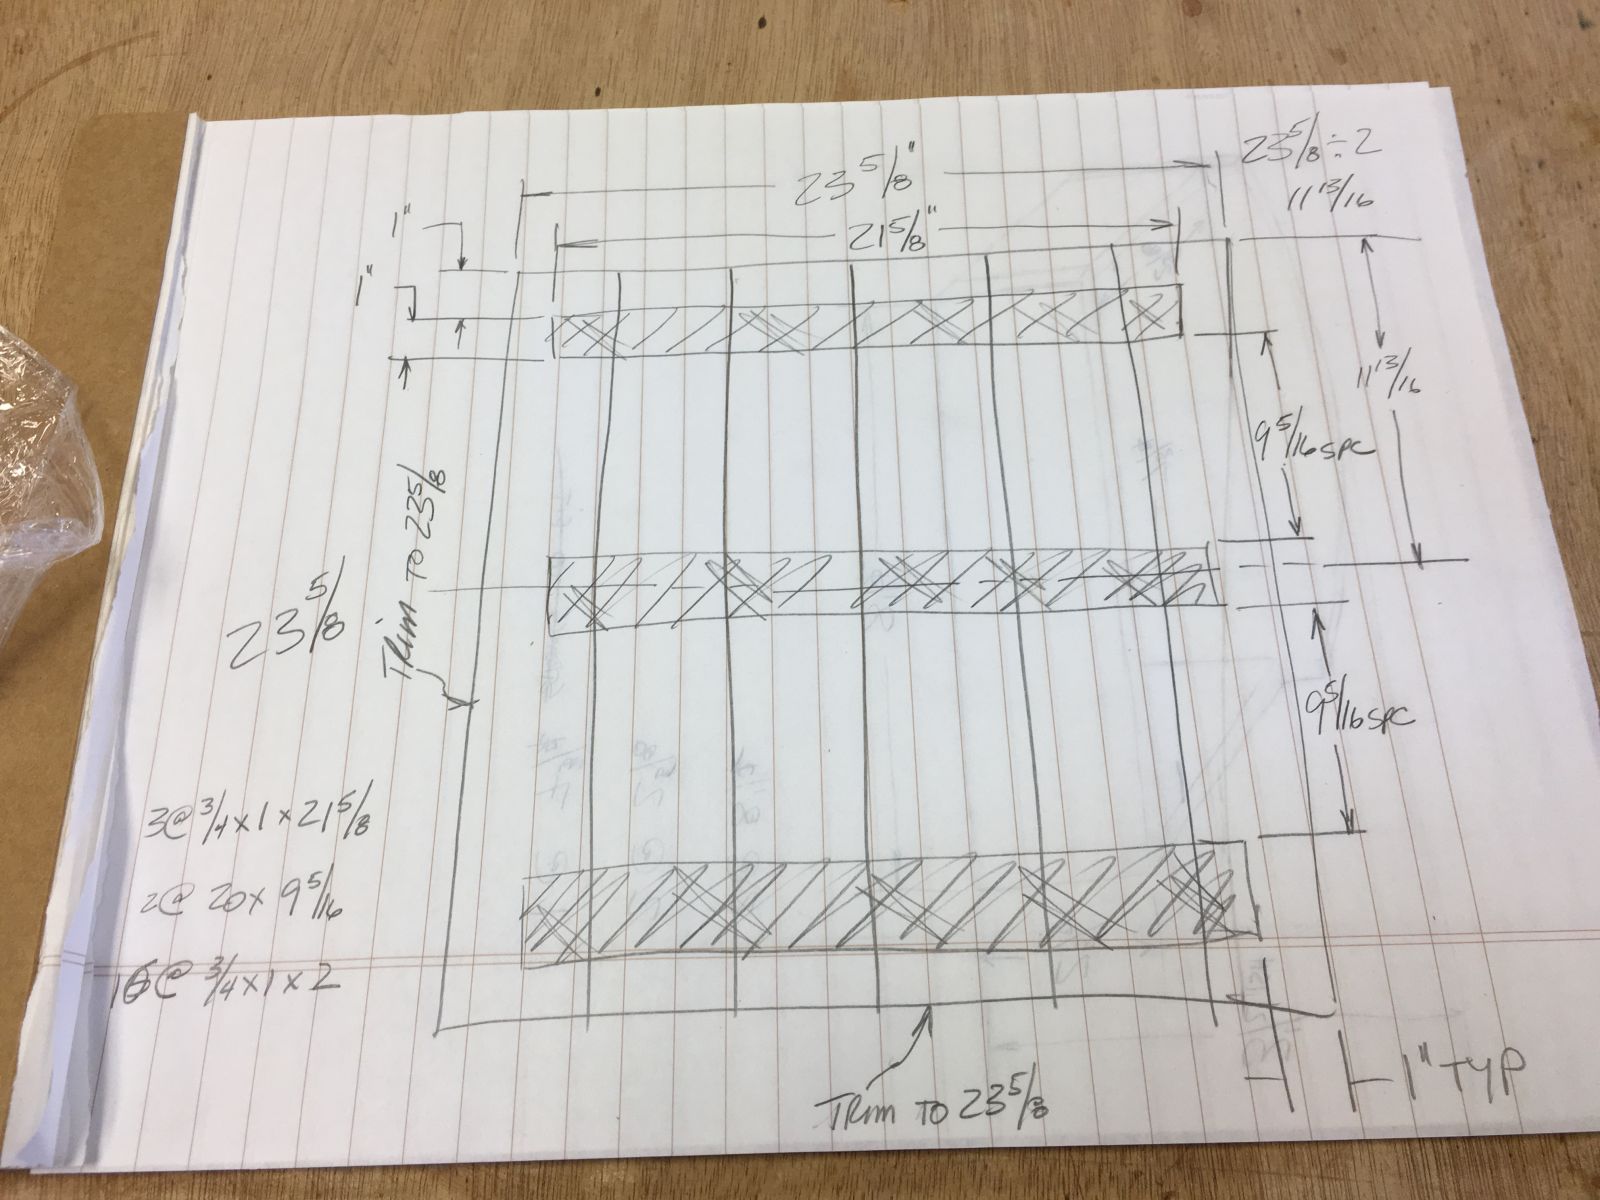
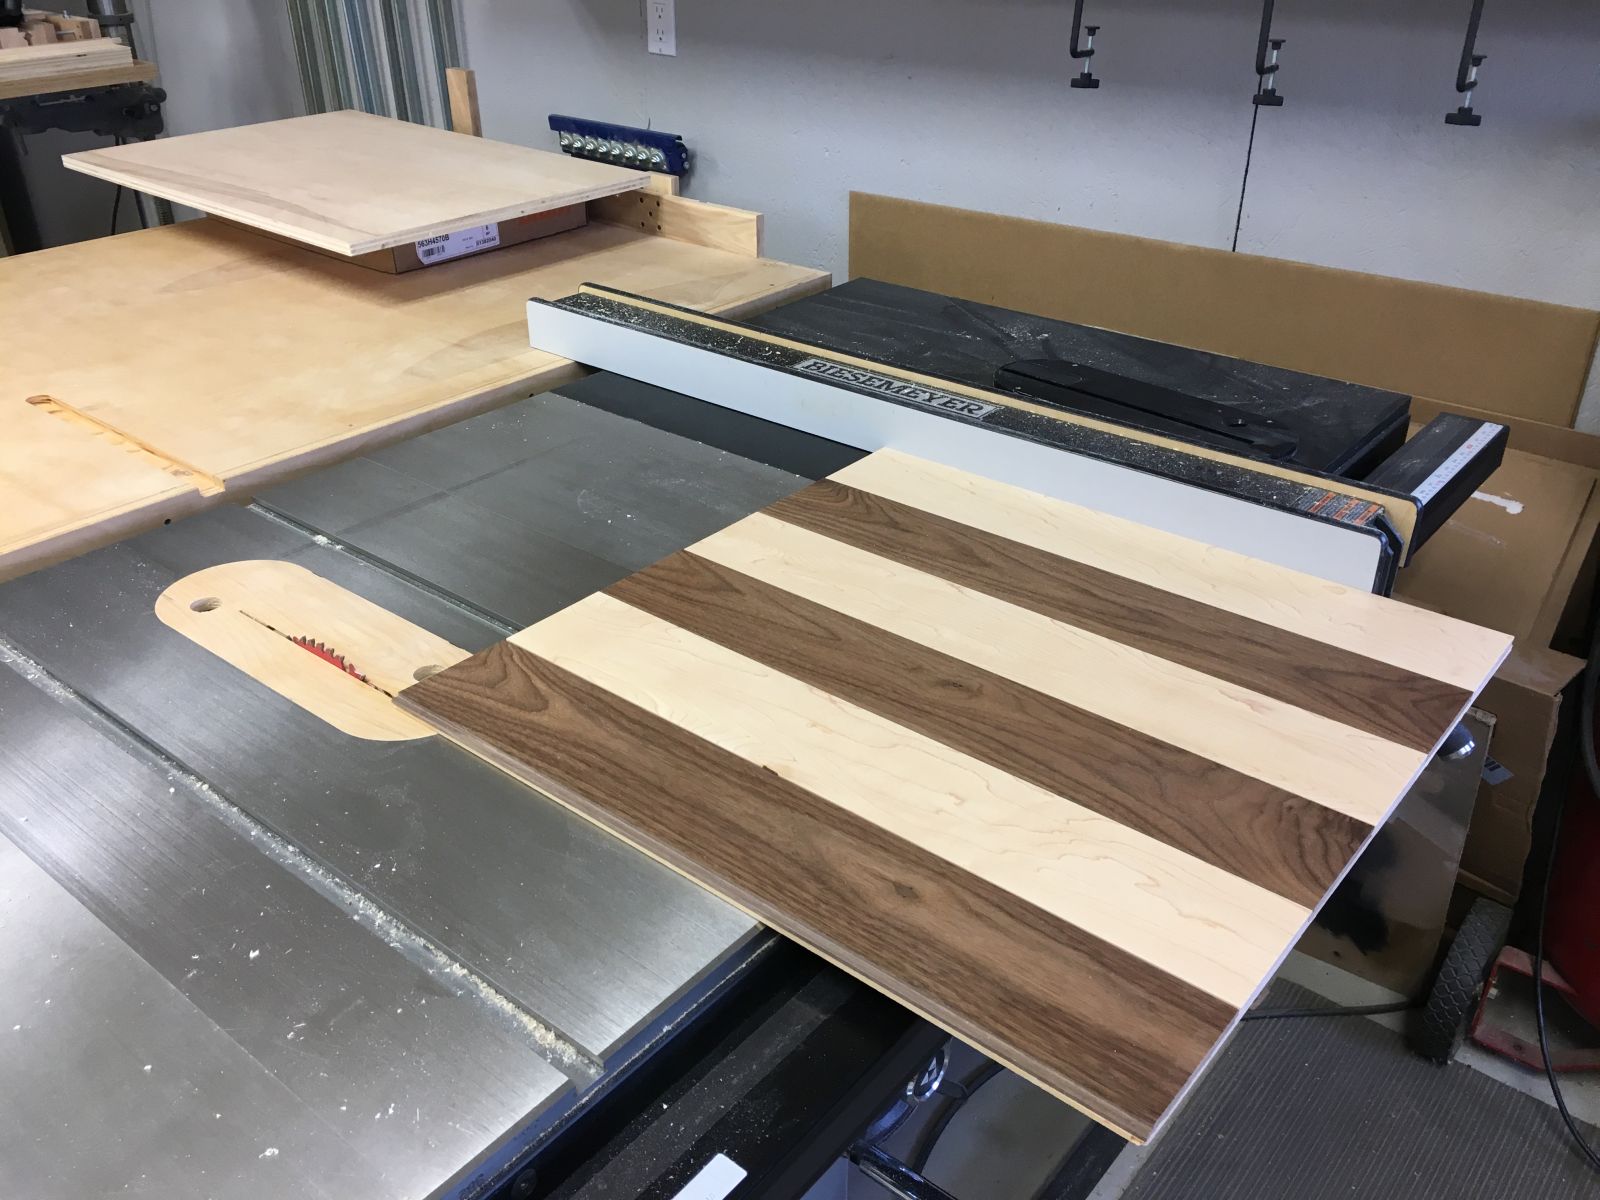
Adding mitered strips to upper and lower panels, to be bullnosed in place on the router table
Quarter inch thick edging strips cut and ready to attach
Edging strips for lower case
Edging strips attached to upper case with Titebond III glue and 3/4 inch, 22 gauge pin nails
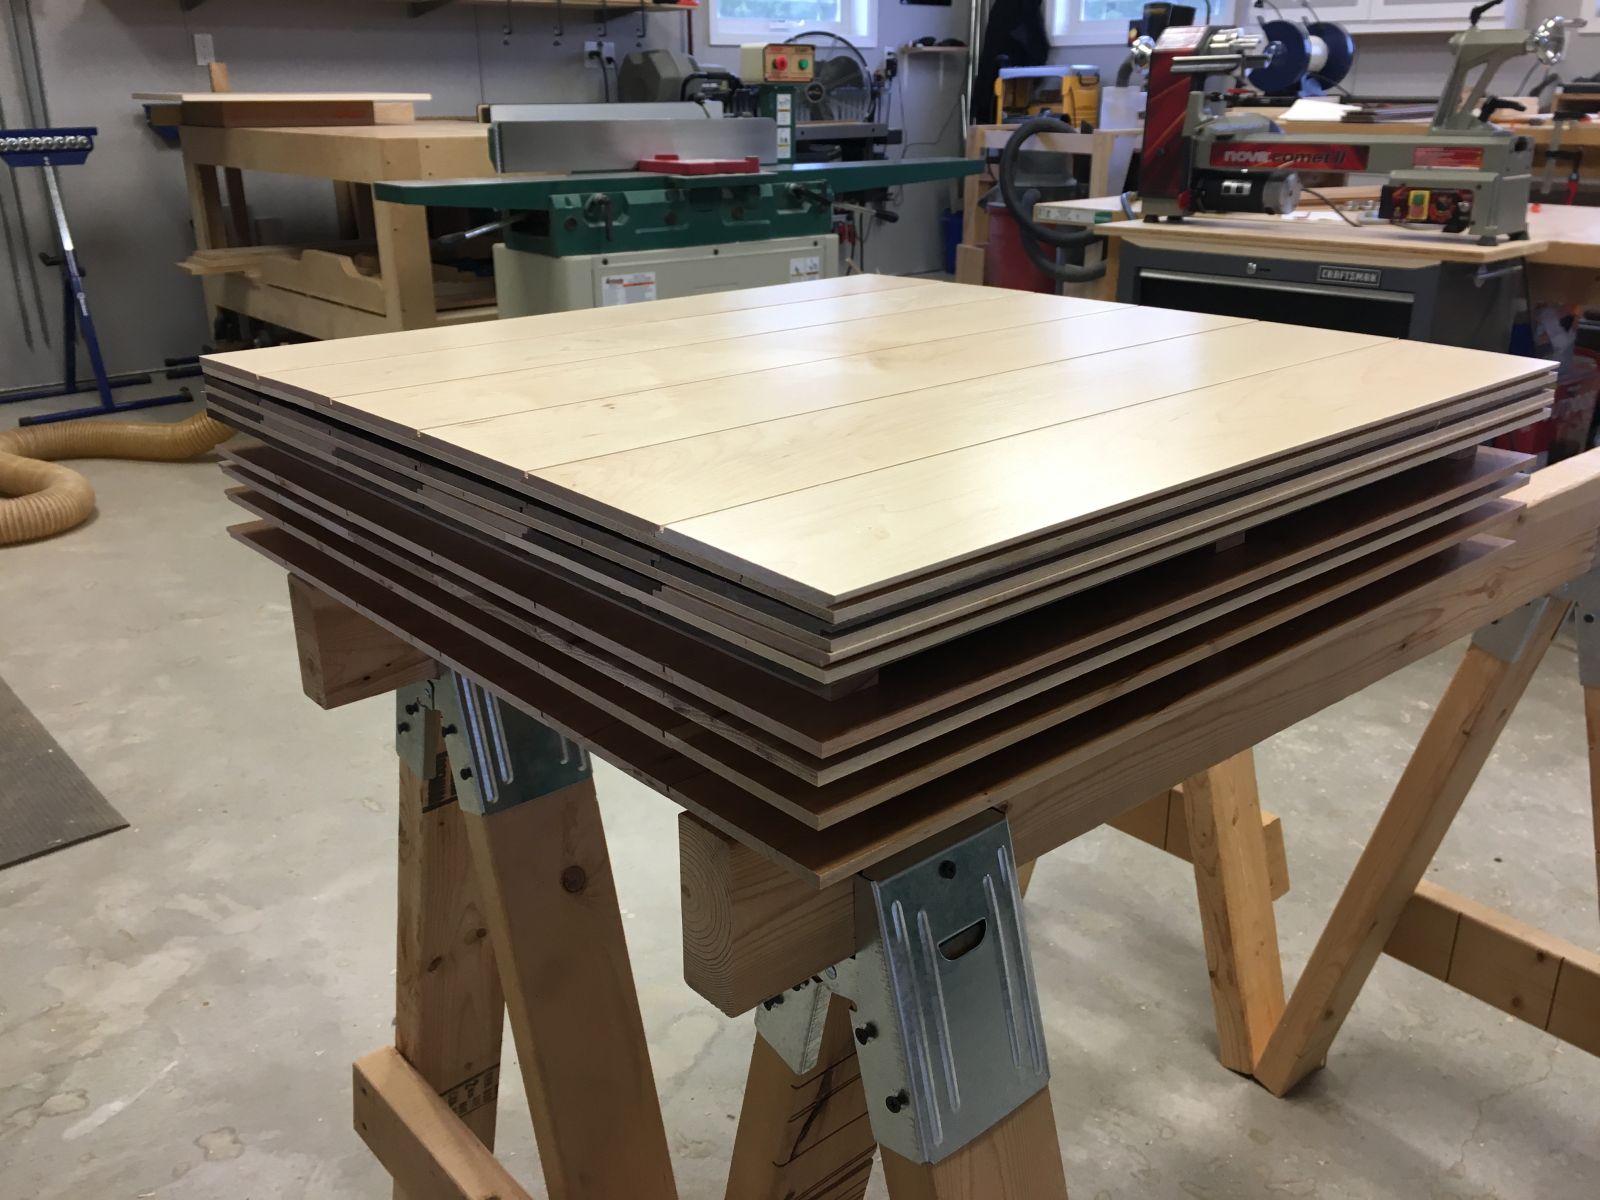
Simulating panel construction with thin sawn maple from Hardwood Solutions, Inc.
Completed simulated panels on lower case
Lower case with bullnosed lower panel
Hardware for drop front and doors, including magnetic catches
Completed simulated panel on upper case
Test stack of major subassemblies
End view of test stack
Machining stock for drop front and doors
Stock is machined to ~80% finished dimensions and allowed to sit over night to allow internal stresses to relieve before machining to final finished dimensions
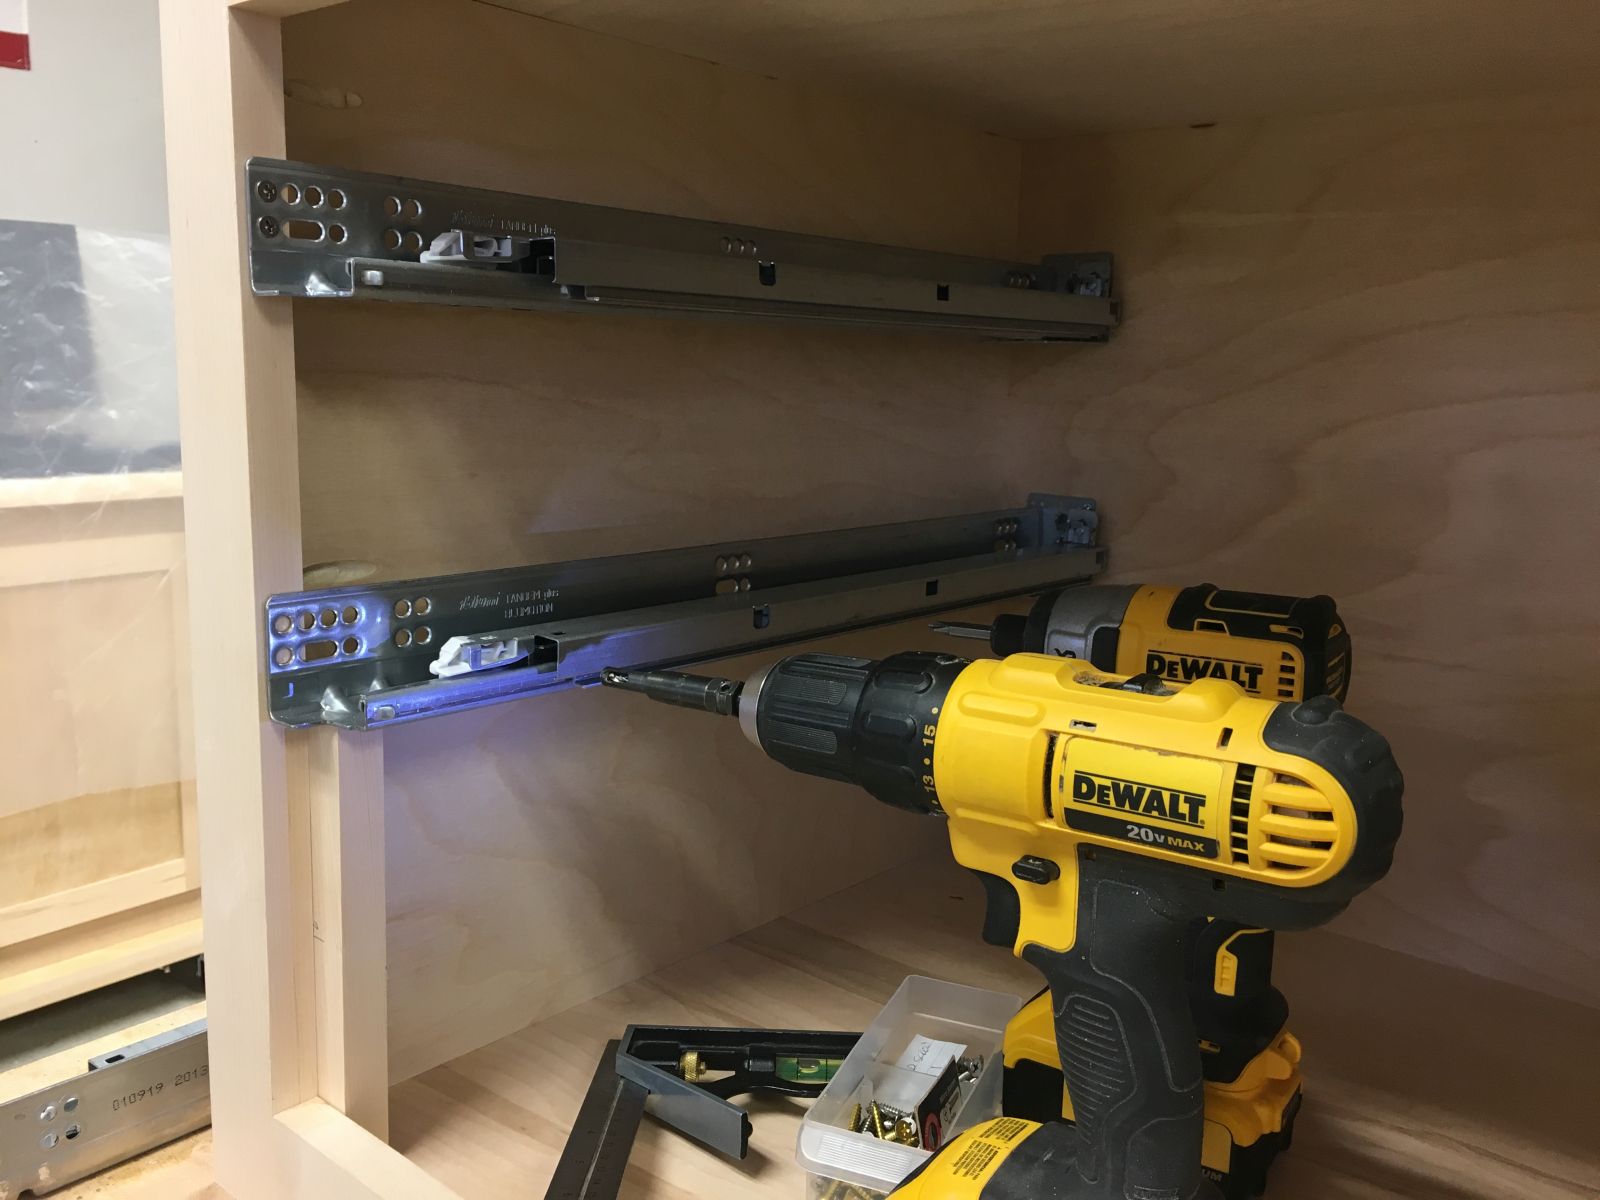
Blum Tandem Blumotion undermount drawer slides
Milling grooves in door frame components
Tenon shoulder cuts on the table saw
Tenon cheek cuts with the tenoning jig
Before cheek cuts
After cheek cuts
Drop front assembly, using 1/2″ plywood for the panel so the writing surface is even with the frame
Assembling one of the lower doors
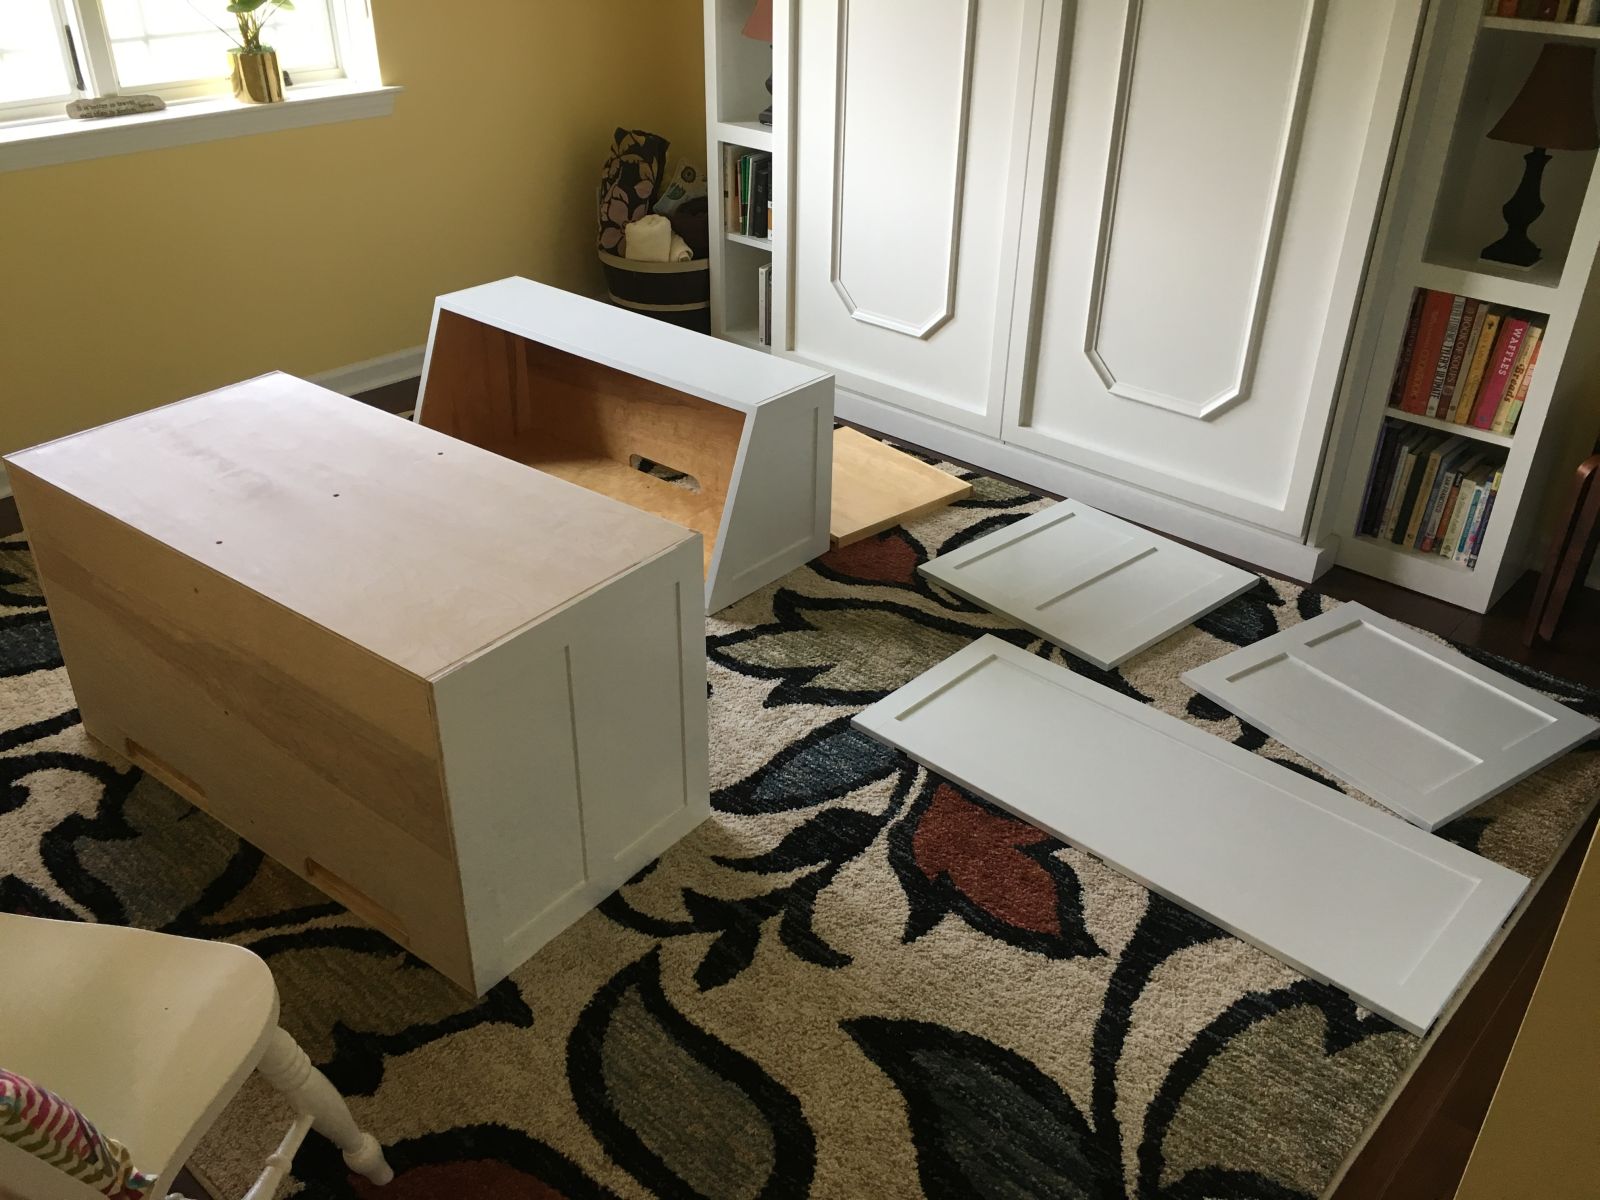
Drop front and doors set in place
Making a jig for the sewing machine hinge mortises
Refining the jig cutout with the oscillating spindle sander
A good fit on the hinge outline
Layout tools and the 5/8″ diameter top bearing router bit
Hinge instructions directed a 1/32″ gap between components, but a 1/16″ gap would have been better
Removable inserts allow for using the same jig to cut clearance for the hinge knuckles
A technique from the CNC router, painter’s tape on jig and components with a few drops of CA glue hold the jig firmly in place for routing the hinge mortises
Ready to rout the first of three sewing machine hinge mortises
Drop front with all three sewing machine hinges installed
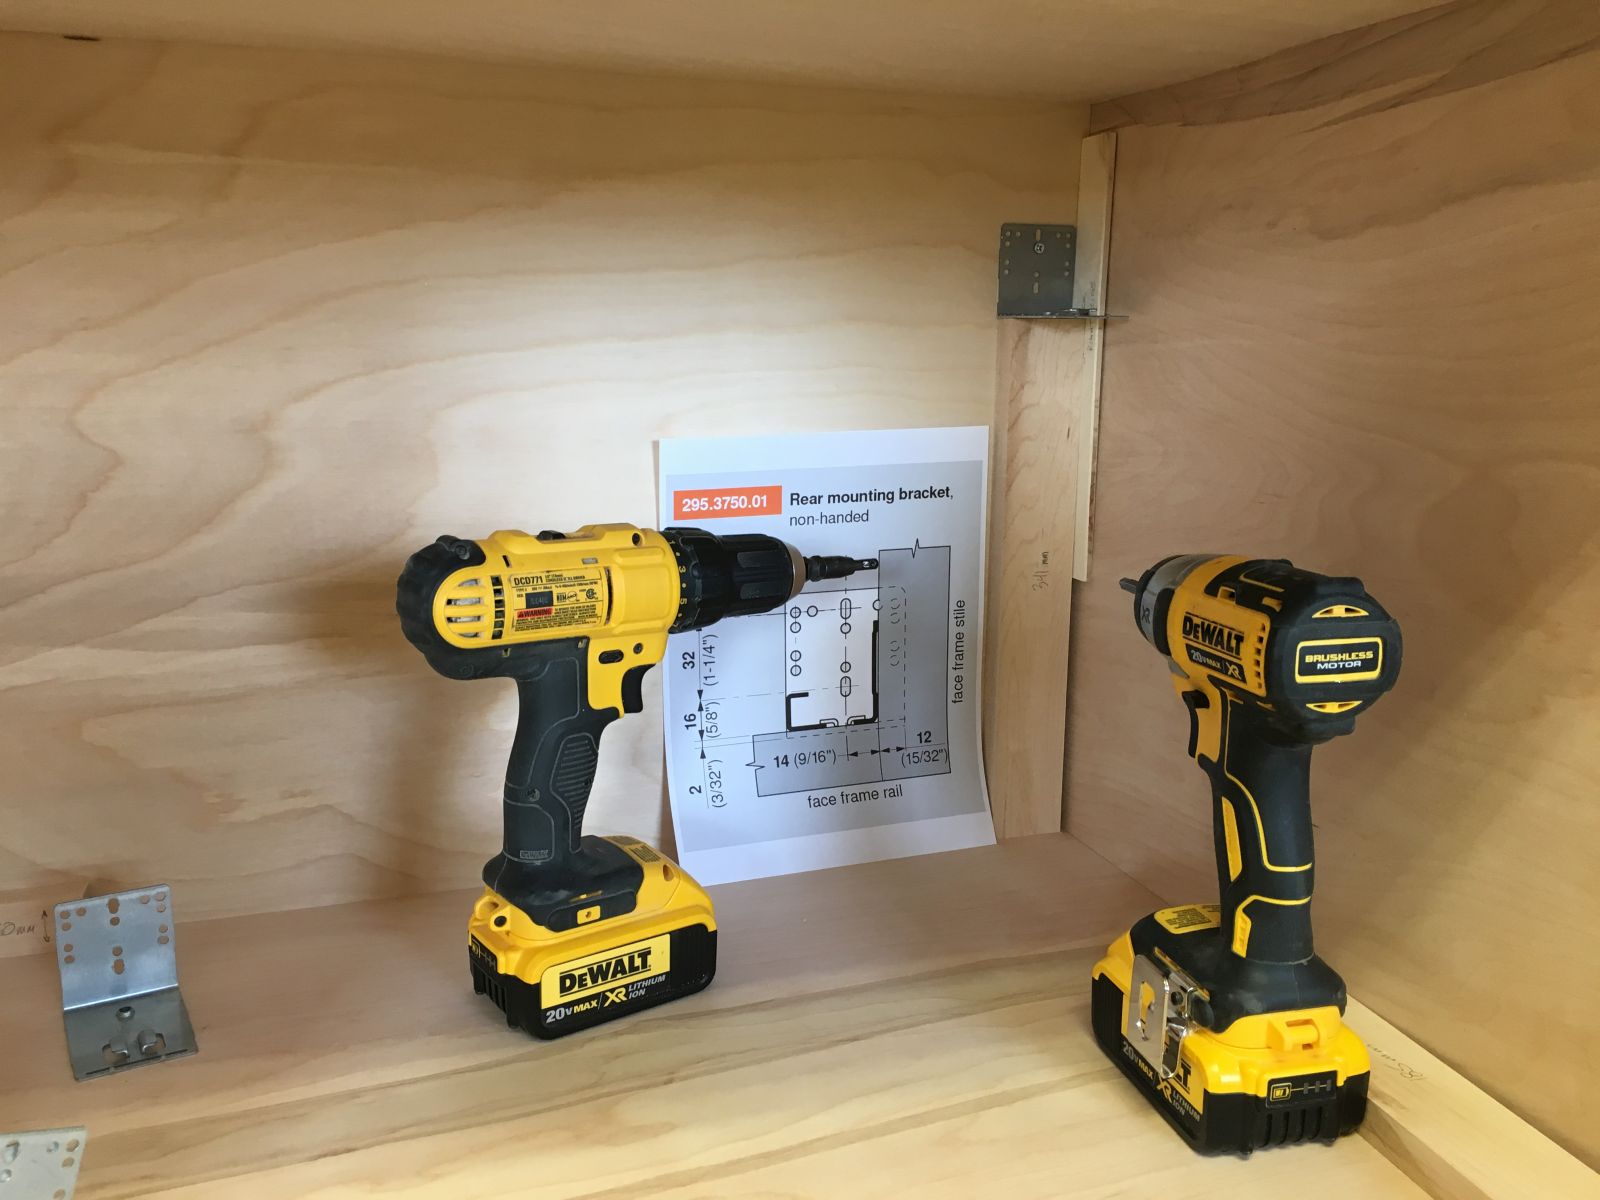
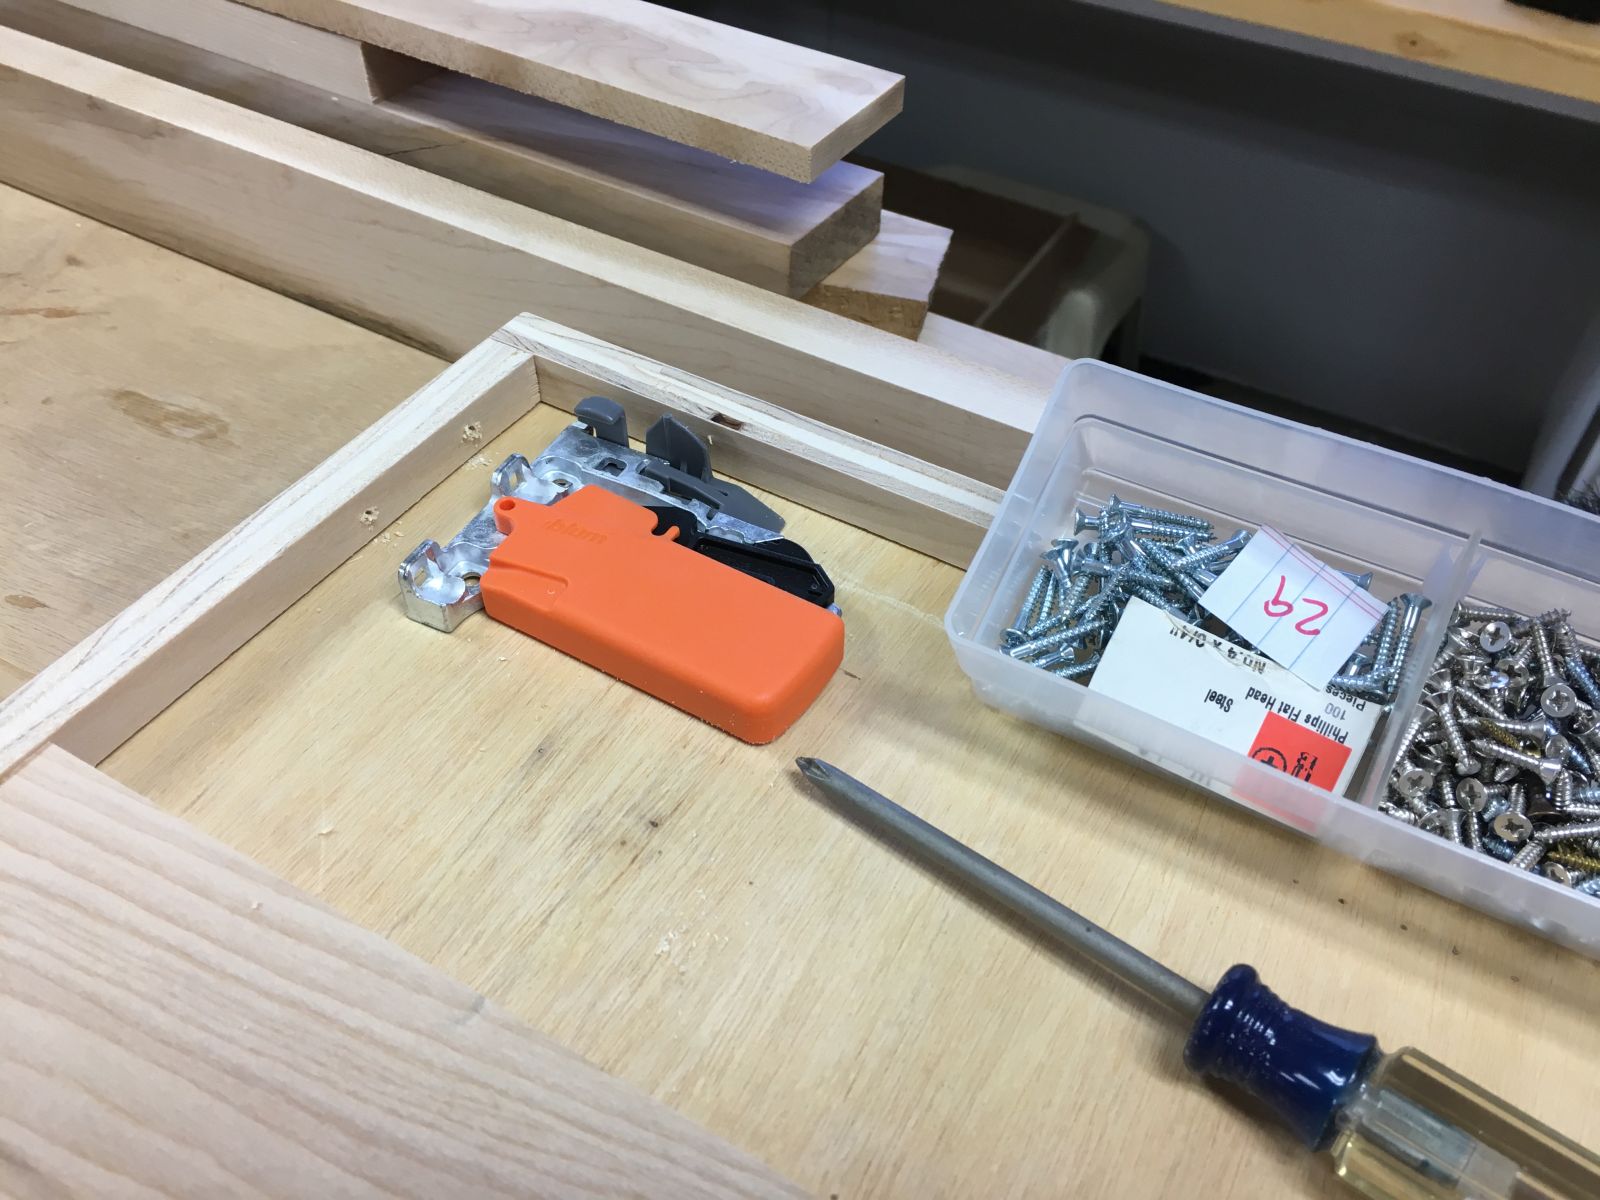
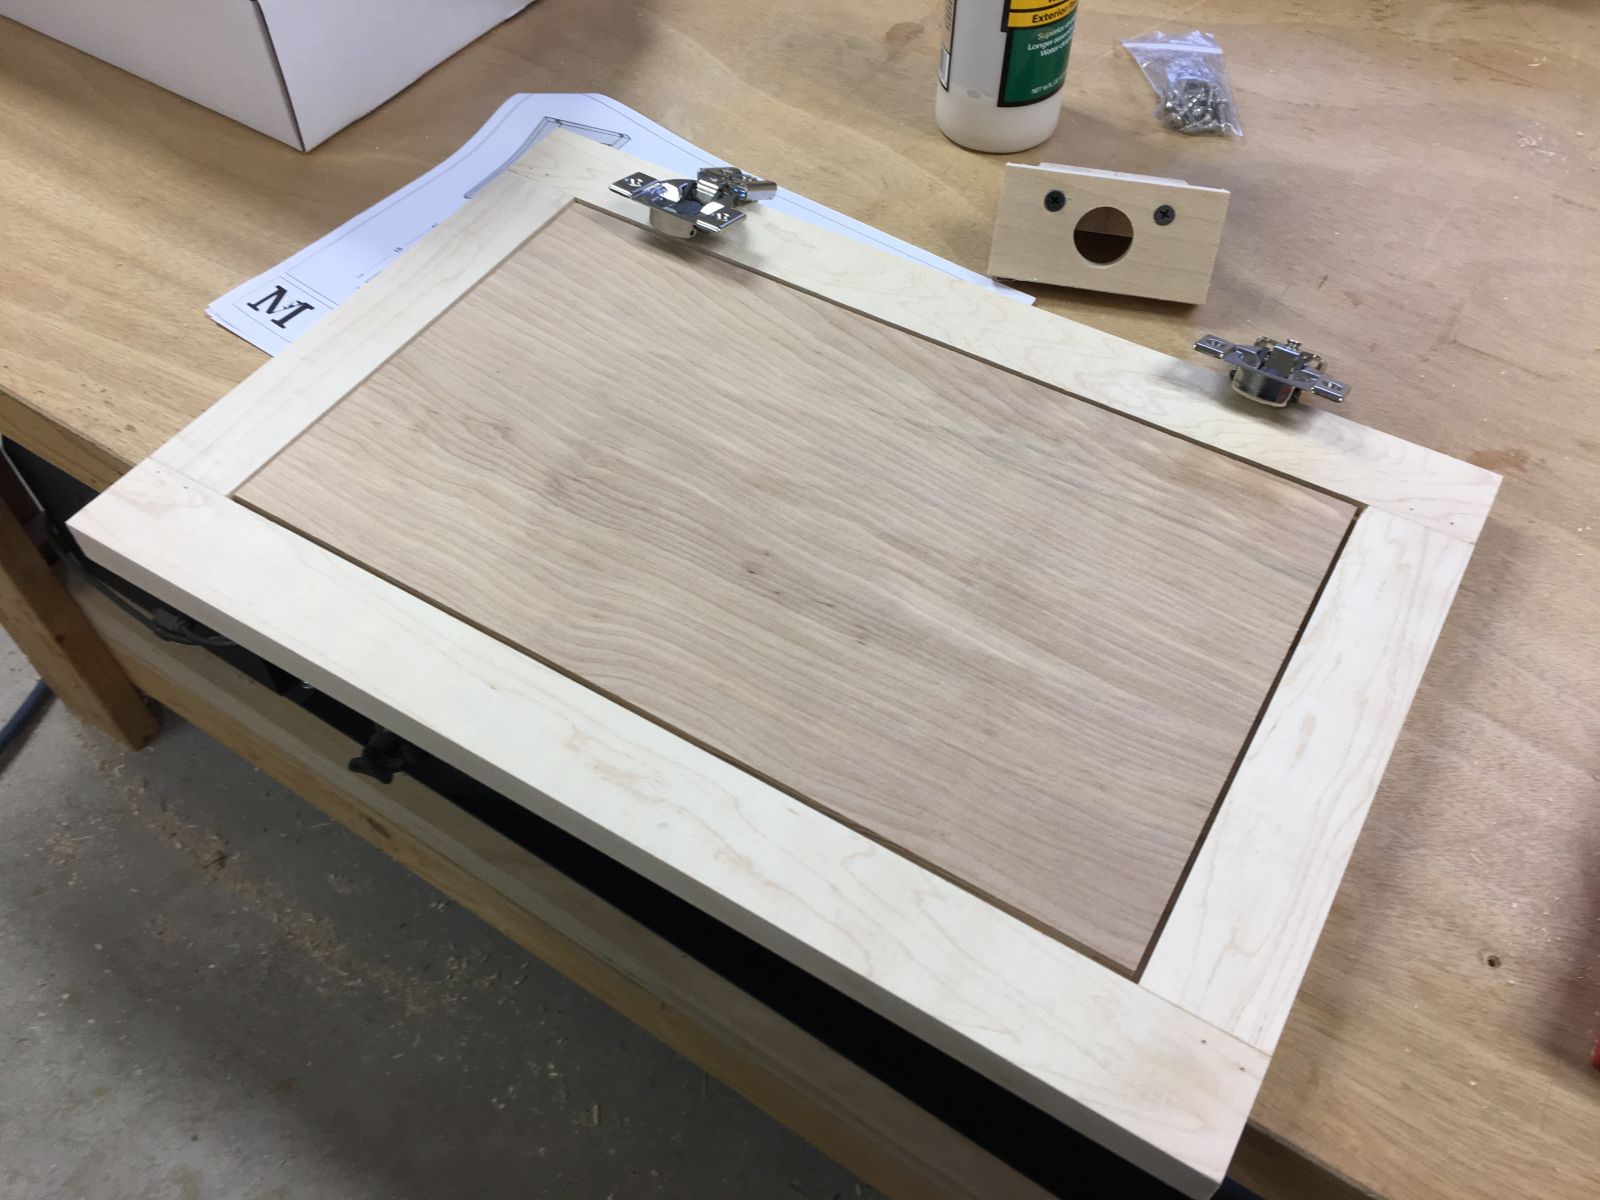
Setting up to install the no-mortise door hinges
A quick jig with holes drilled to enable locating the mounting holes on the case side of the hinges
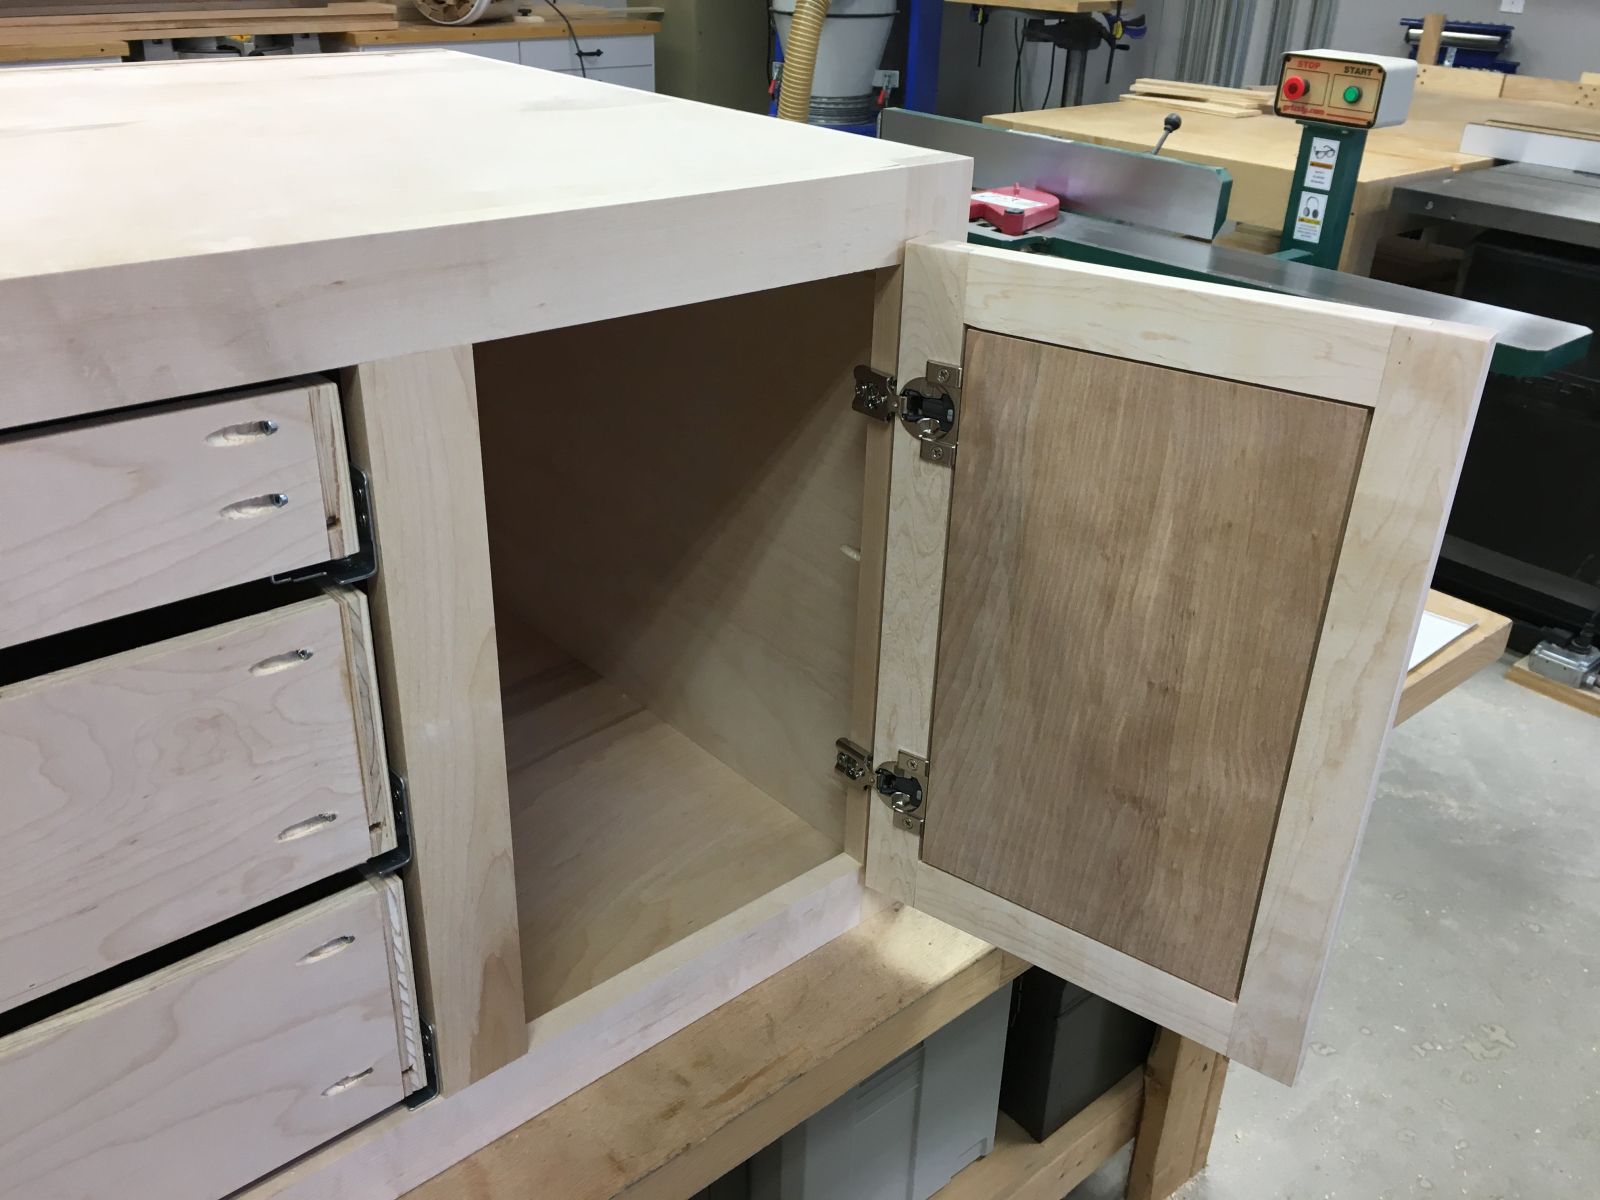
Lower doors successfully mounted with no-mortise hinges
A belt-and-suspenders approach dictated the addition of drop front door stays for additional support
Scrap plywood and a piece of piano hinge simulated the drop front motion, to allow test positioning of the drop front supports
Once the final mounting locations were established with the test setup, those locations were transferred to the drop front and upper case
The drop front supports bridge the drop front joints that would have taken all of the stress when the drop front was in use
Drop front supports and sewing machine hinges, all from Rockler, installed, will be removed prior to finishing
Marking a crescent finger pull on three drawer fronts
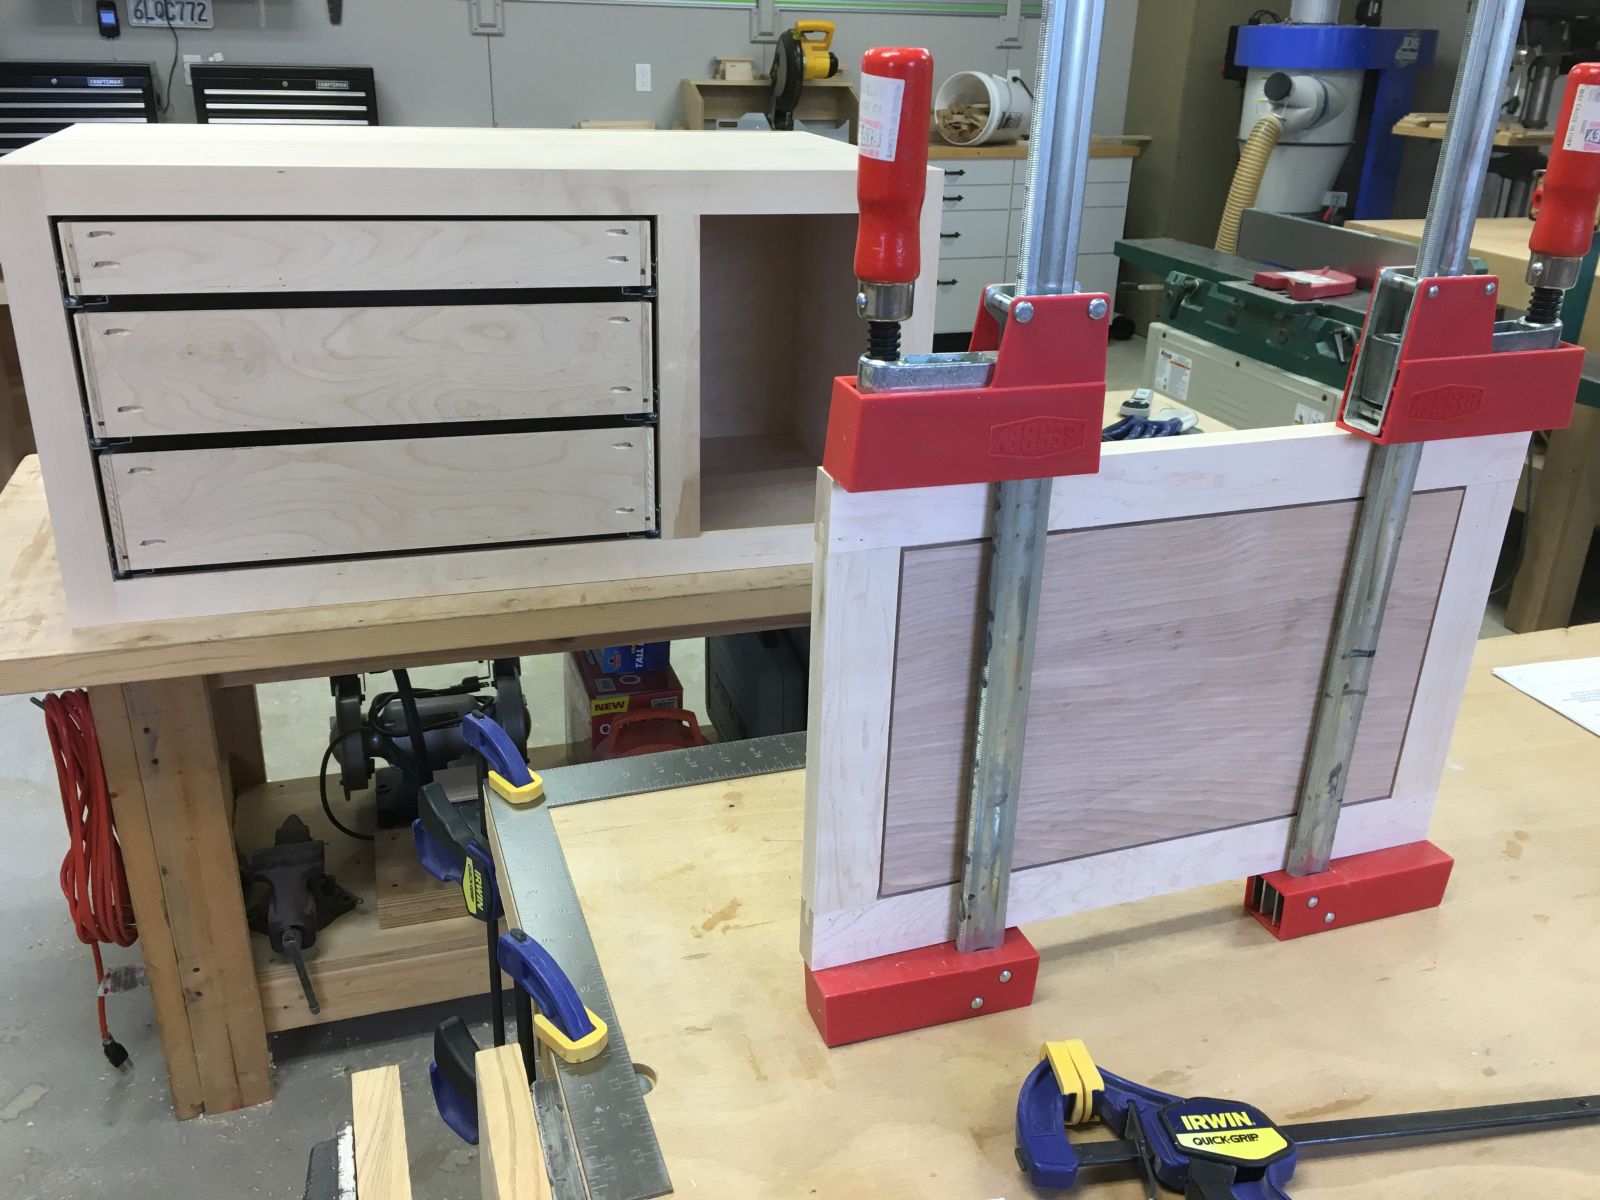
Kreg pocket screws for 1/2″ material reinforce the drawer assemblies
These new slip-on assembly clamps for 1/2″ material made drawer glue up and assembly very efficient
New slip-on assembly clamps from Rockler
A finished drawer ready for final sanding
Three drawers ready for finishing and installation
Assembling the pull-out trays
Desk components ready for finishing with spar urethane and bright white urethane trim paint
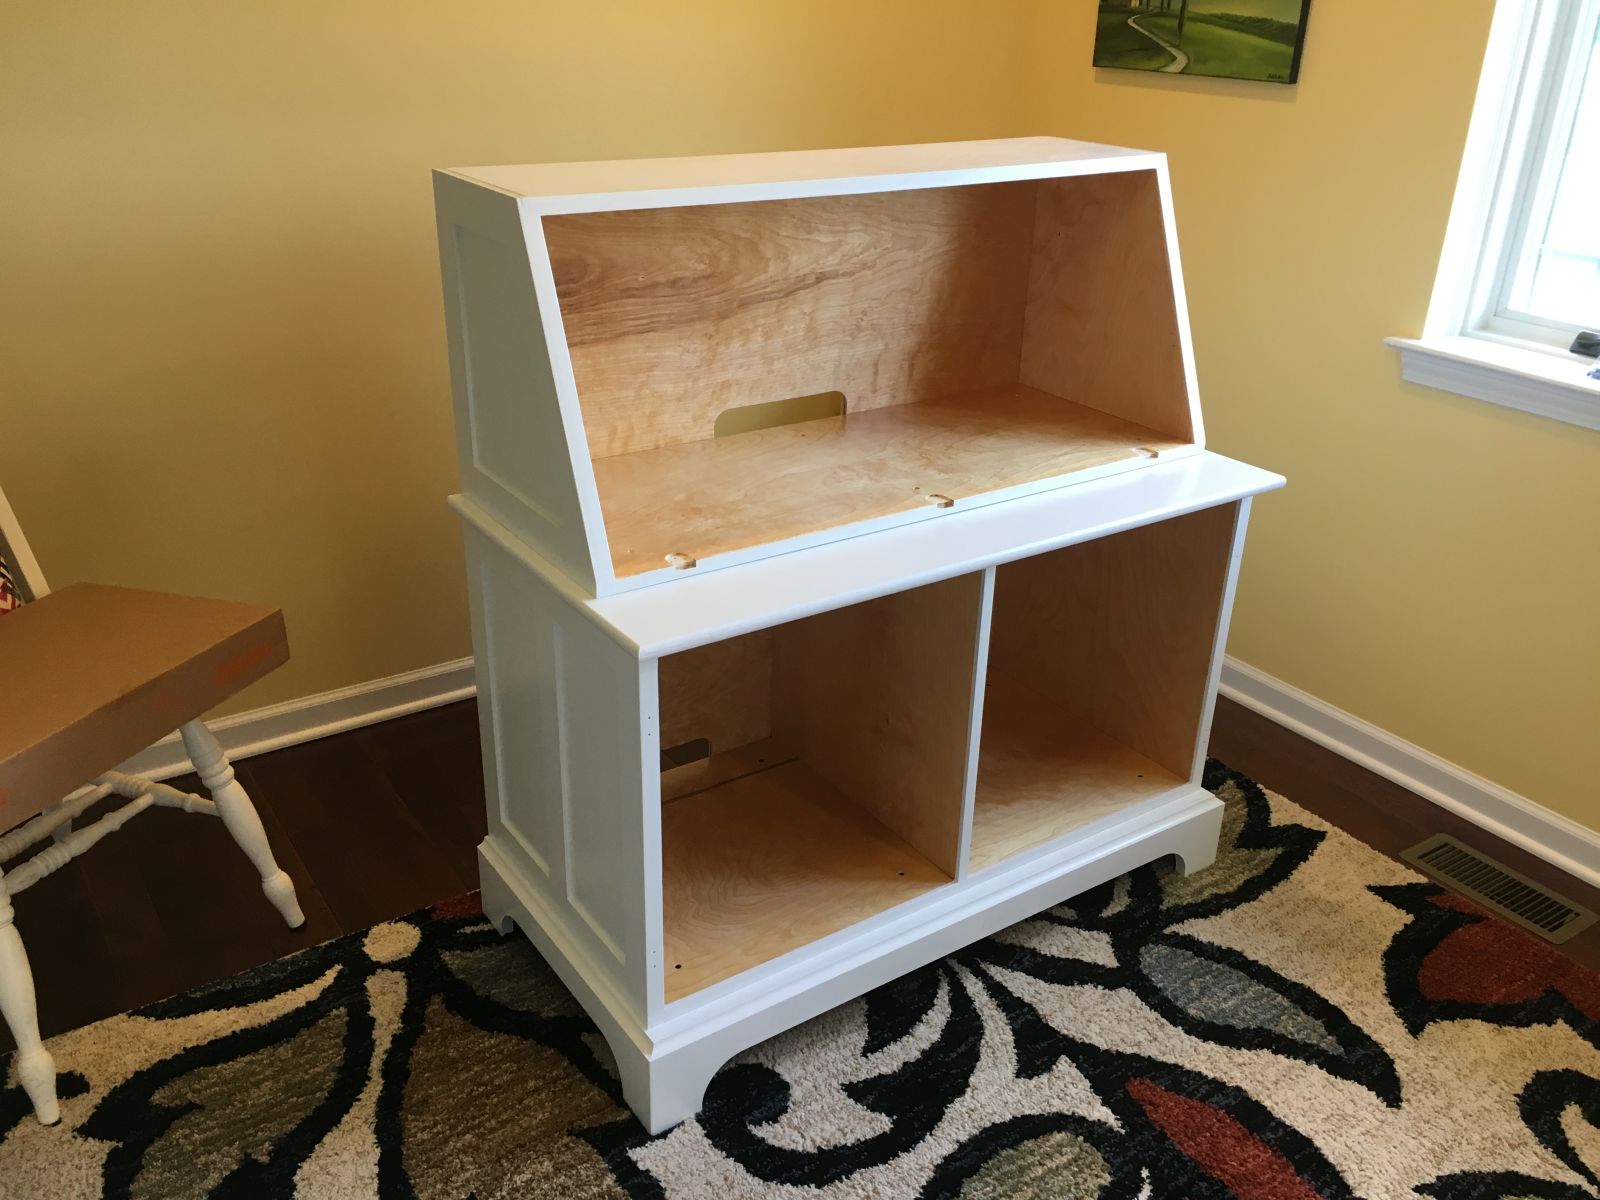
Upper cabinet with semi-gloss urethane on the interior and bright white urethane trim paint on the exterior
Lower cabinet in the finishing process
Lots of individual components finished and ready for final assembly
Finishing materials used on this desk
Desk base positioned in its new home location in Linda’s office
Base, upper and lower cabinets assembled and ready for more components
Using pre-cut spacers to locate drawer slides for installation
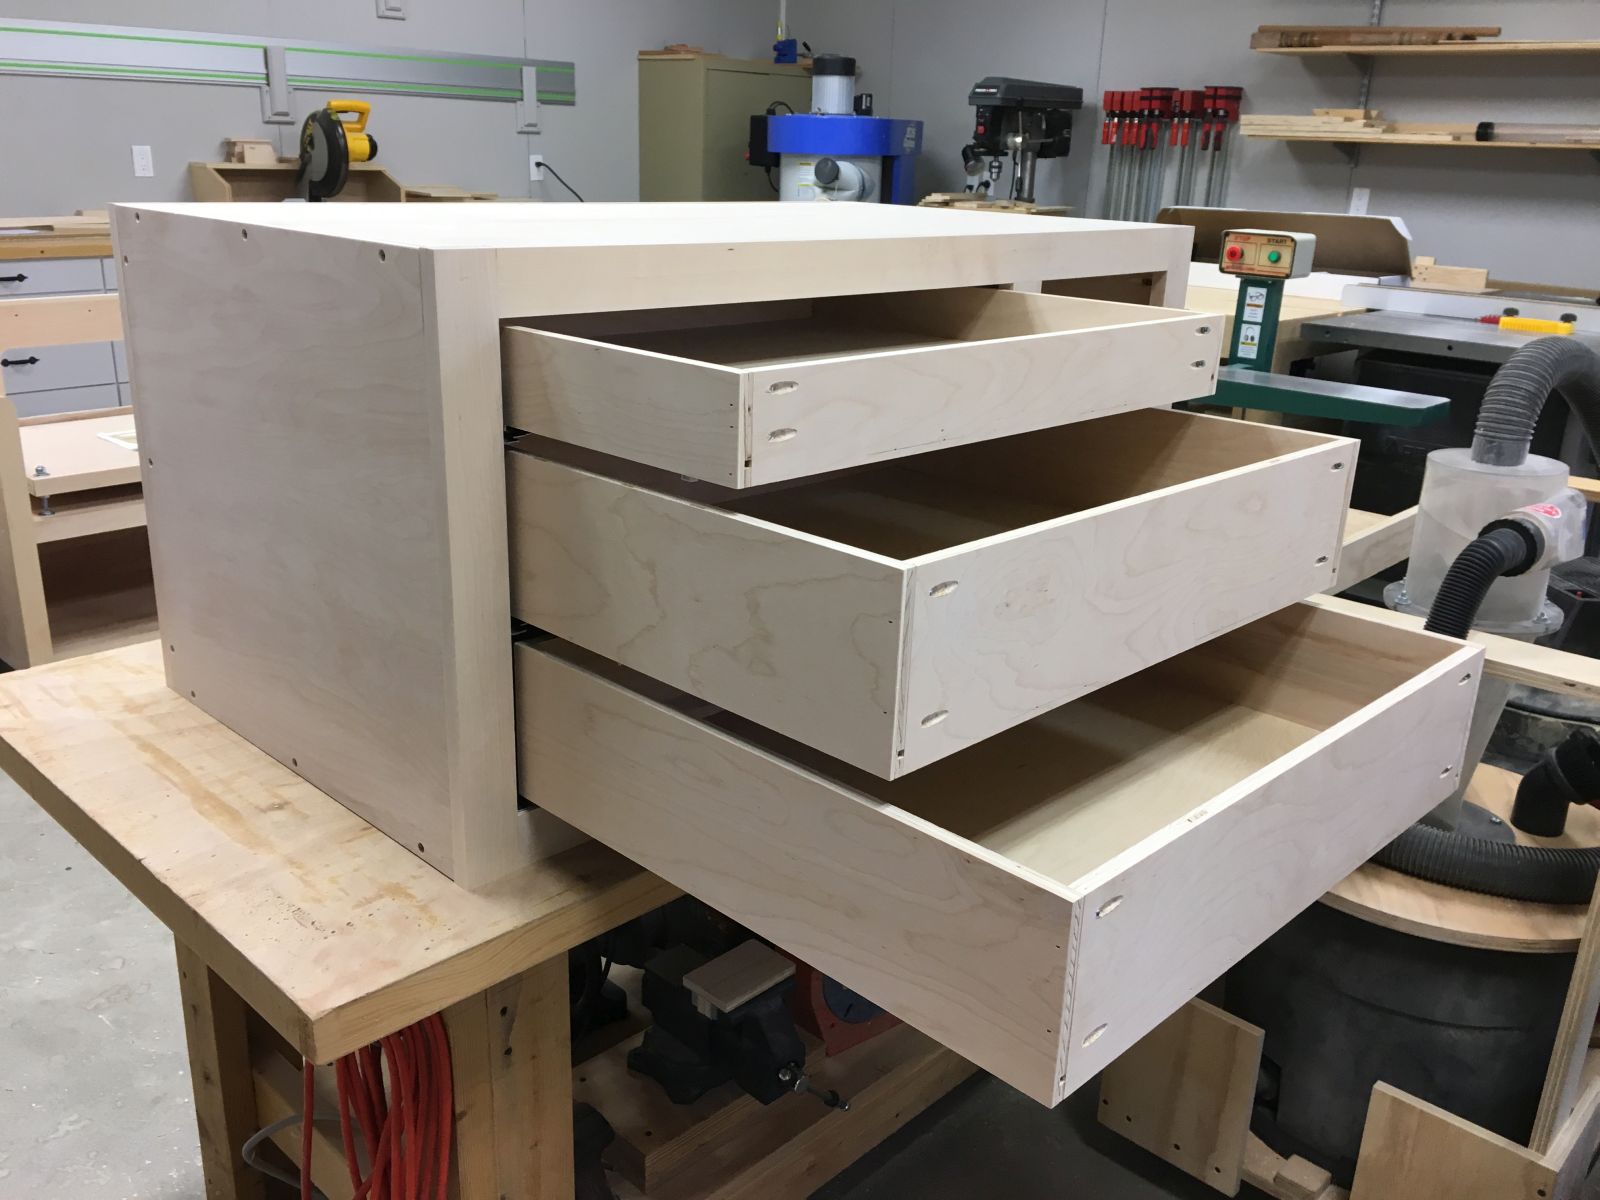
Drawers and pullouts fully installed in the lower cabinet
Five sets of Blum TandemMotion soft close drawer slides provide smooth openings and closings
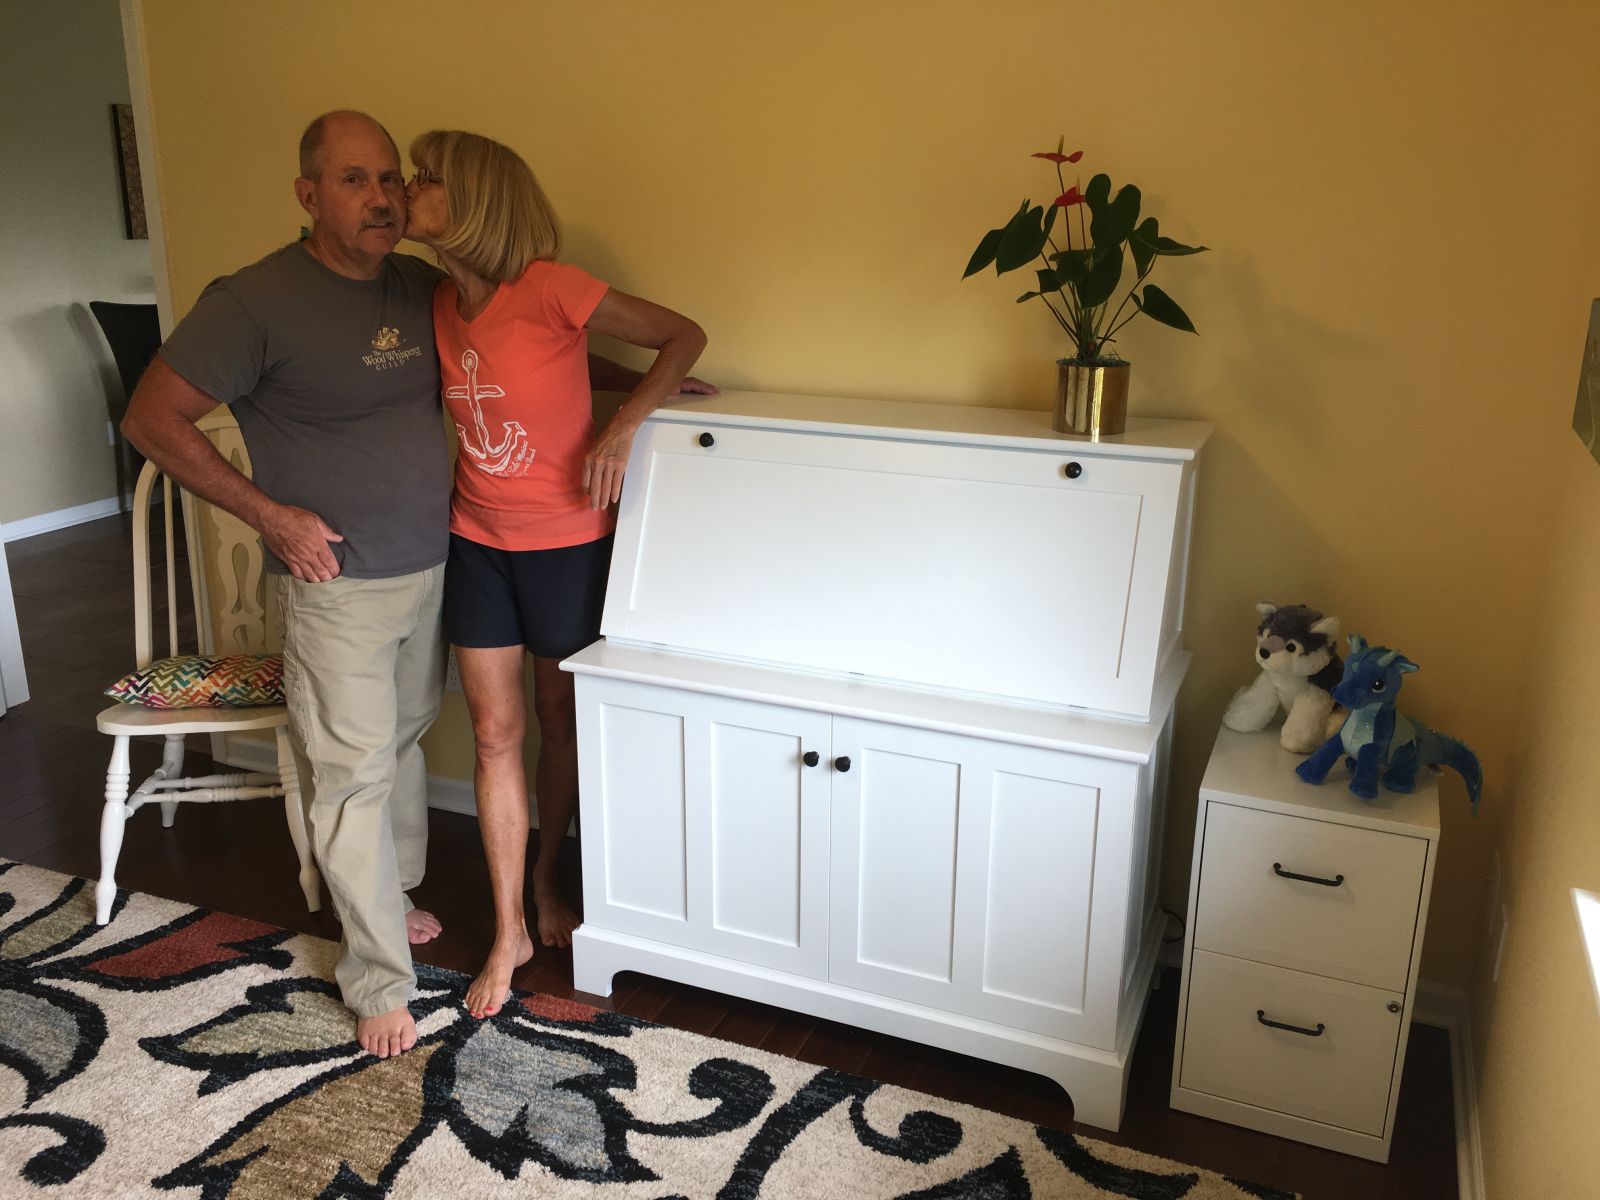
Finished desk, closed
Finished desk, lower cabinet doors open
Finished desk, slant front open
Another happy customer of Marietta Wood Works!
Celebrating a successful joint project to be enjoyed for years to come
This coffee table will complement a new sectional in my son, Kyle’s living room. We collaborated with a few rounds of emails until the design below was settled on. It features a 6/4 white ash top with breadboard ends and heavy duty steel hairpin legs. The top will receive a light brown stain and the legs will be primed and painted black. The overall dimensions are 17 1/2 H x 22 W x 36 L. The top approximates a Golden Rectangle, respecting the Golden Ratio of 1.618 : 1, which also can be observed in the way trees grow, in the proportions of both human and animal bodies, and in the frequency of rabbit births.
After preparing and sending eight varnished stain samples (actually seven stains and one no stain) on white ash, Kyle chose Minwax Puritan Pine to go with his existing wood furniture and floors. The coffee table top will be sealed with several coats of Minwax spar urethane in a satin gloss level.
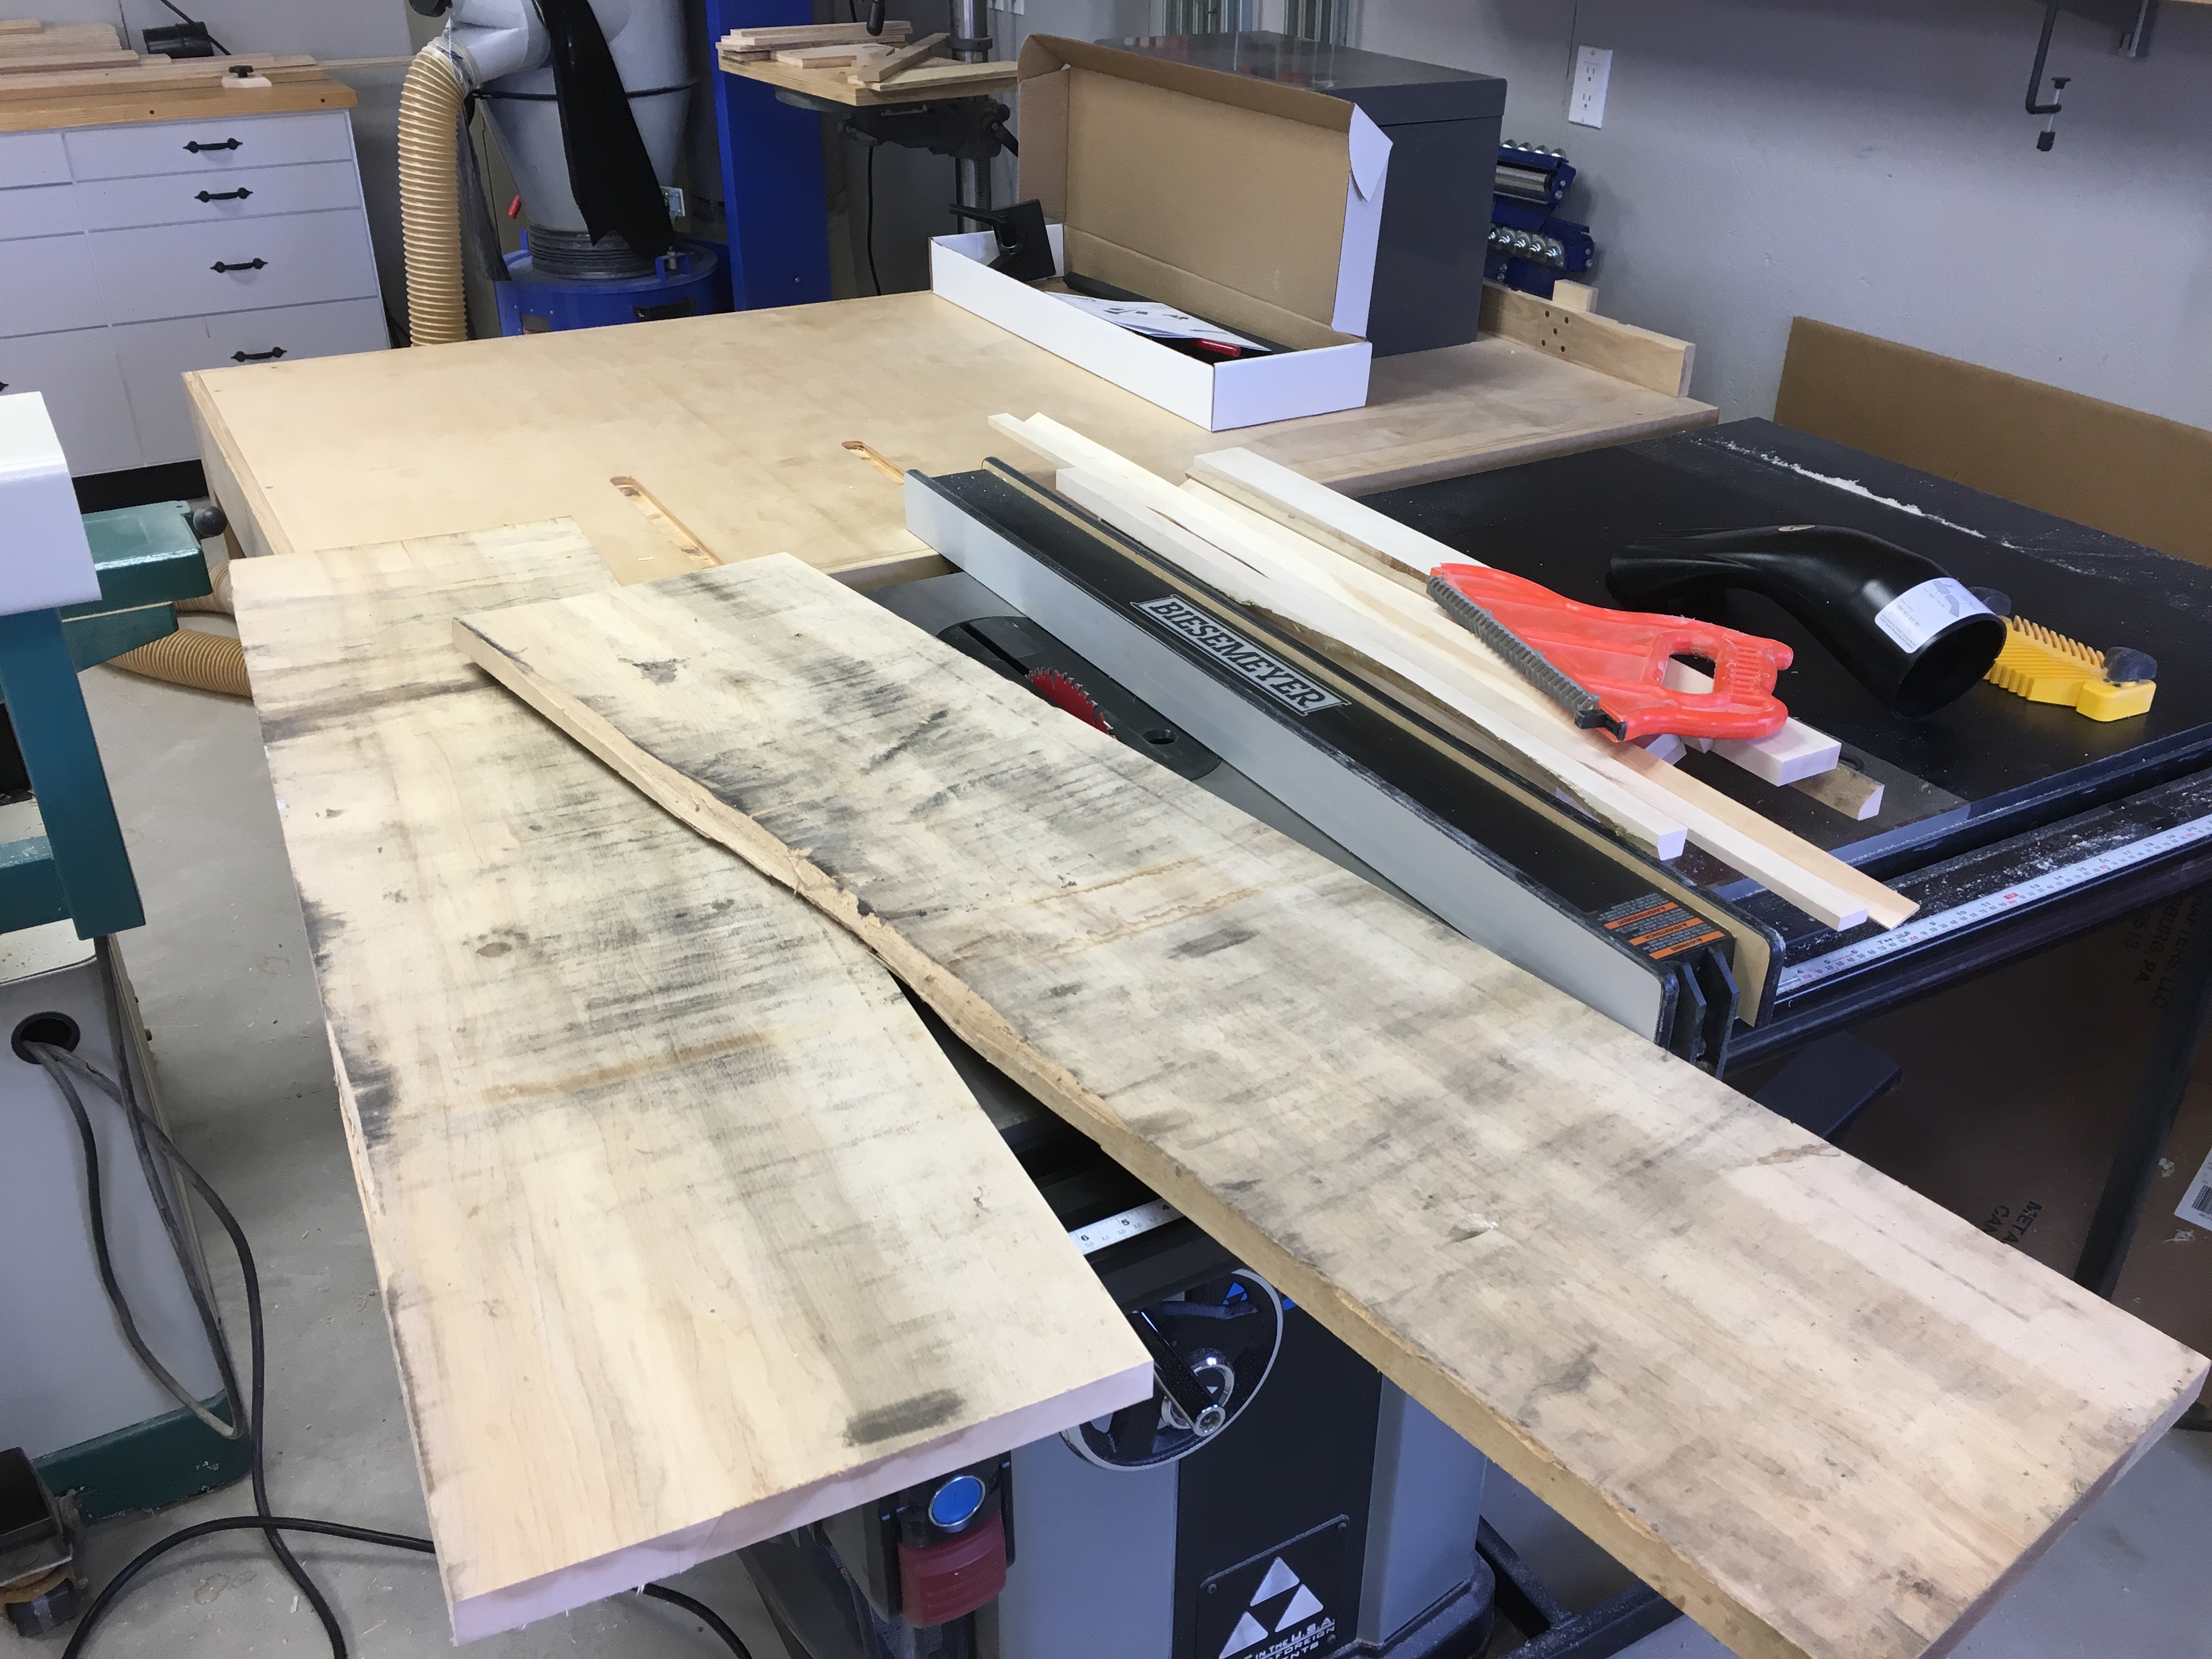
Been saving this 12″ wide by almost 10′ long 6/4 white ash board for a special project. Today’s the day!
Passes preliminary coffee table testing with flying colors!
The heavy duty 16″ tall hairpin legs are in the shop.
From hairpinlegs.com, these raw steel legs will be primed and painted black.
Cutting the ash board to rough lengths … glad I measured twice!
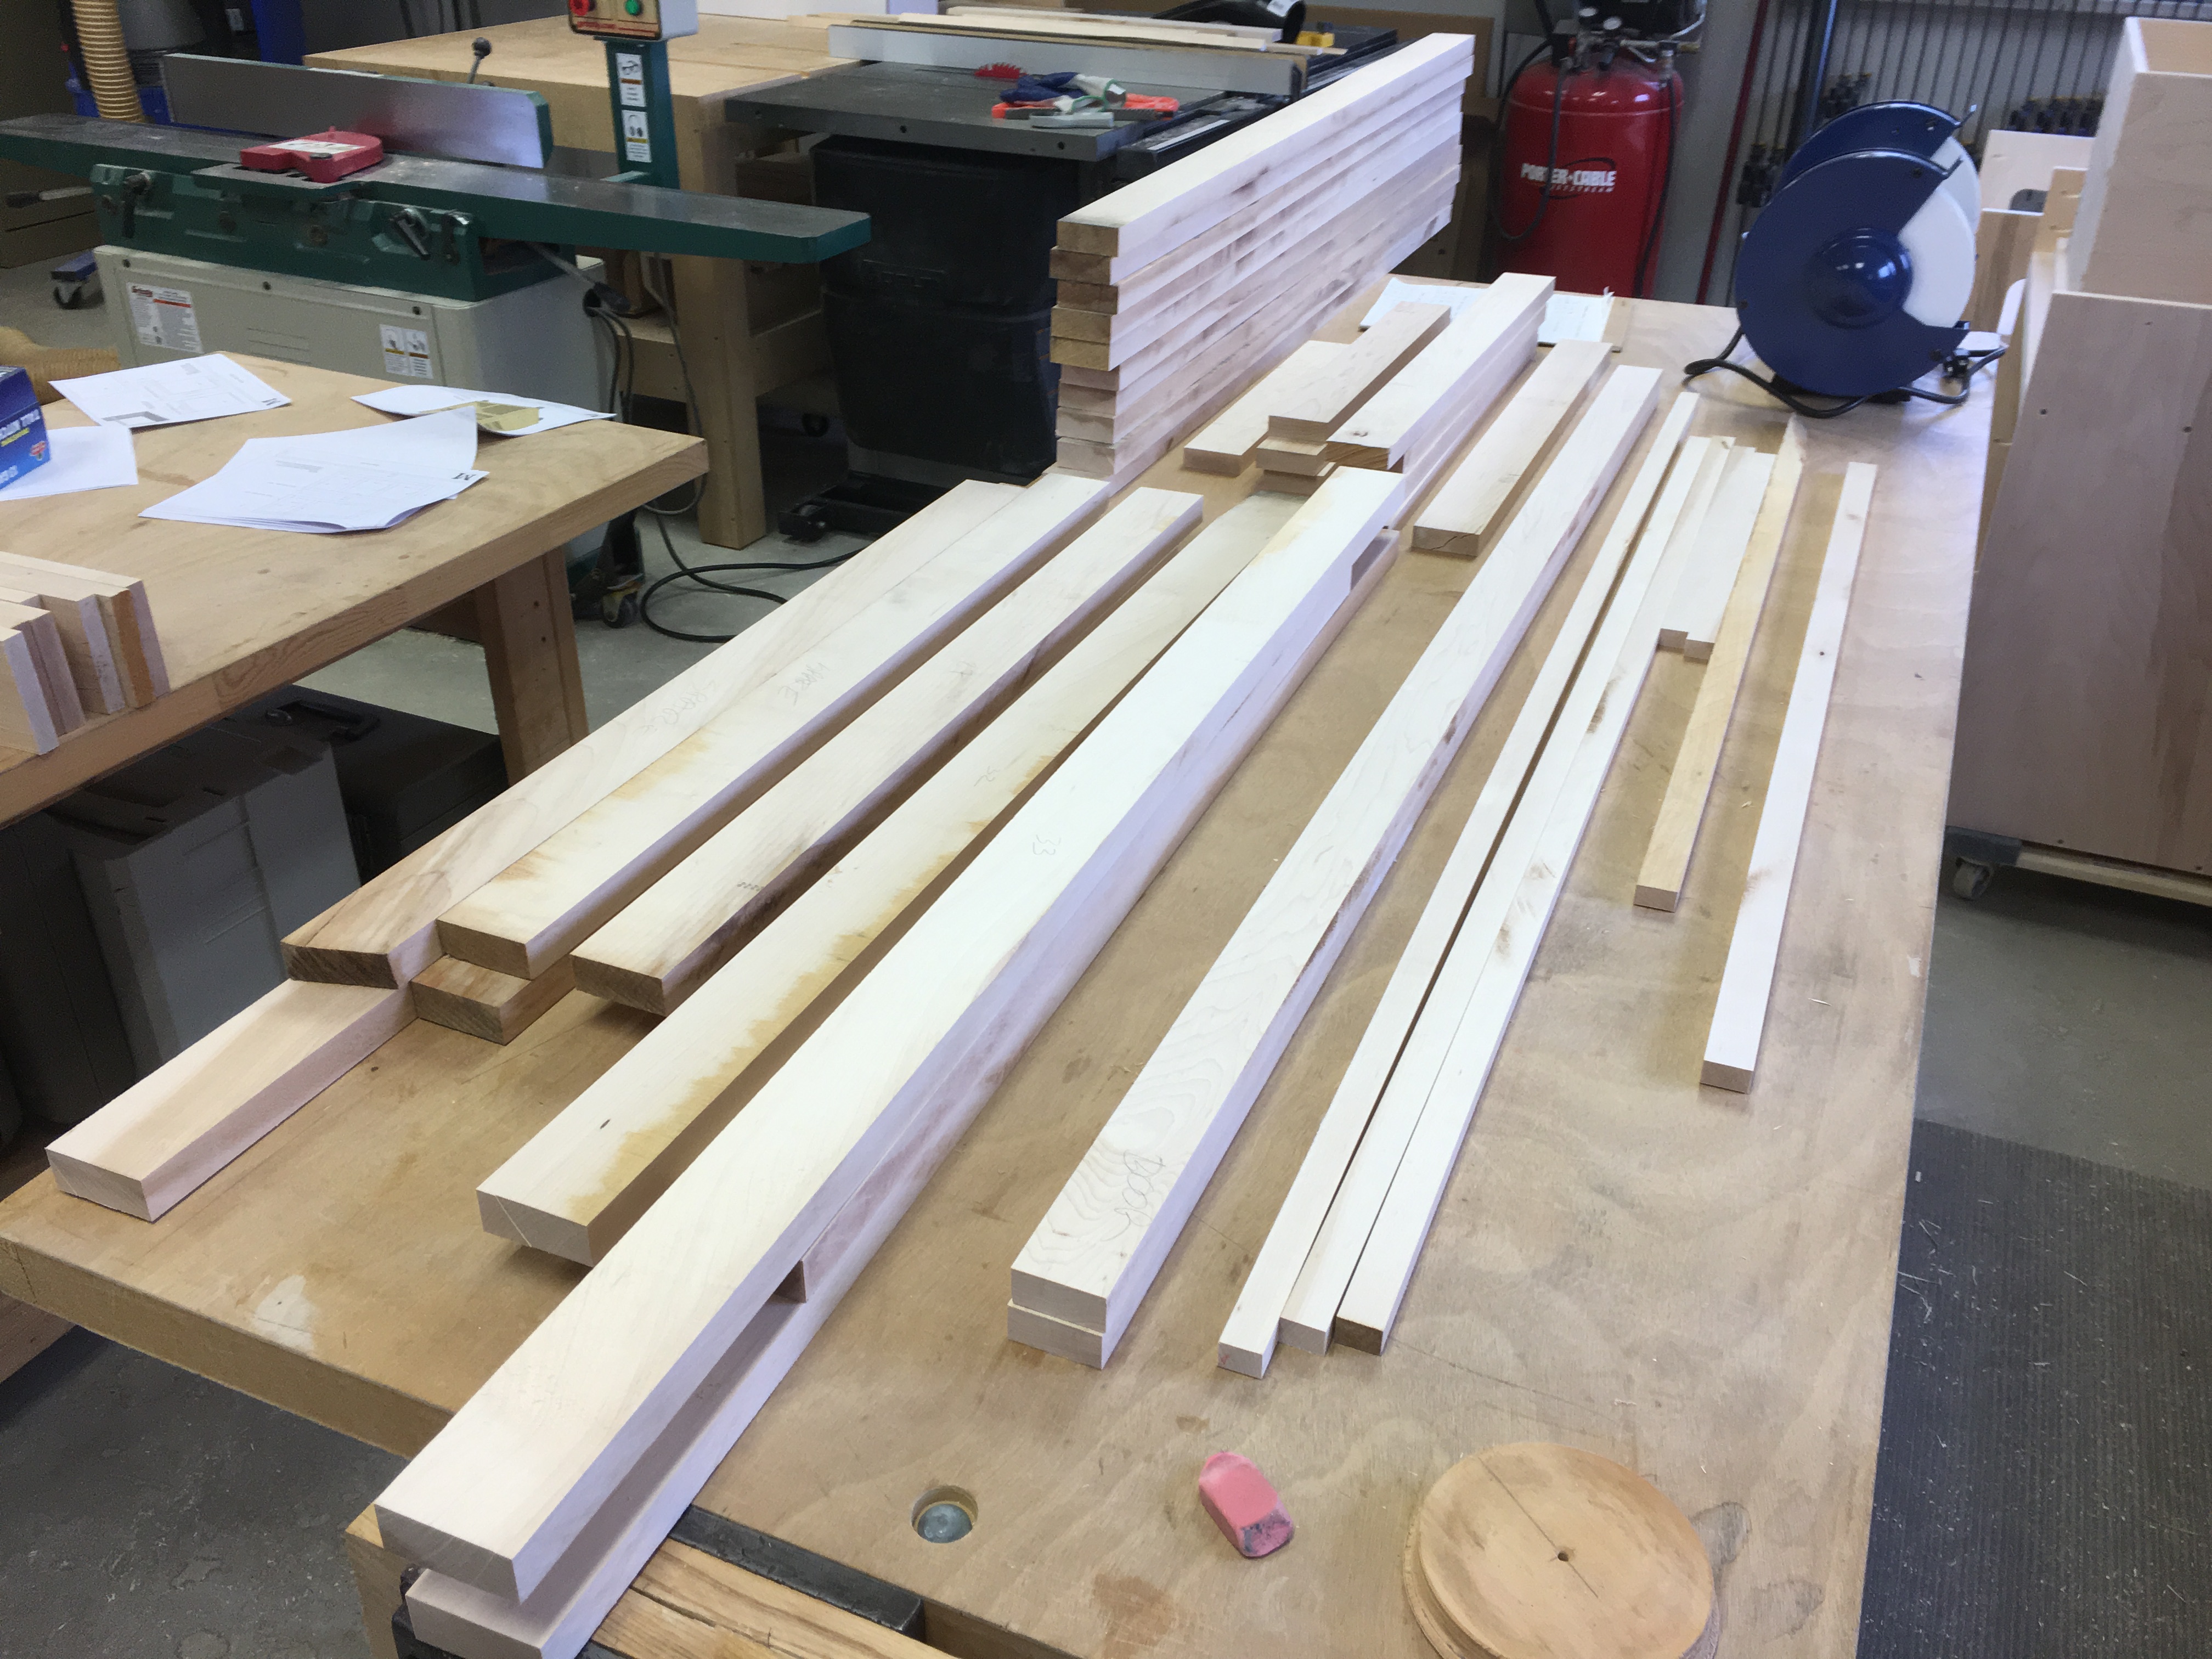
Project materials ready
Approximate layout of boards to form the coffee table top.
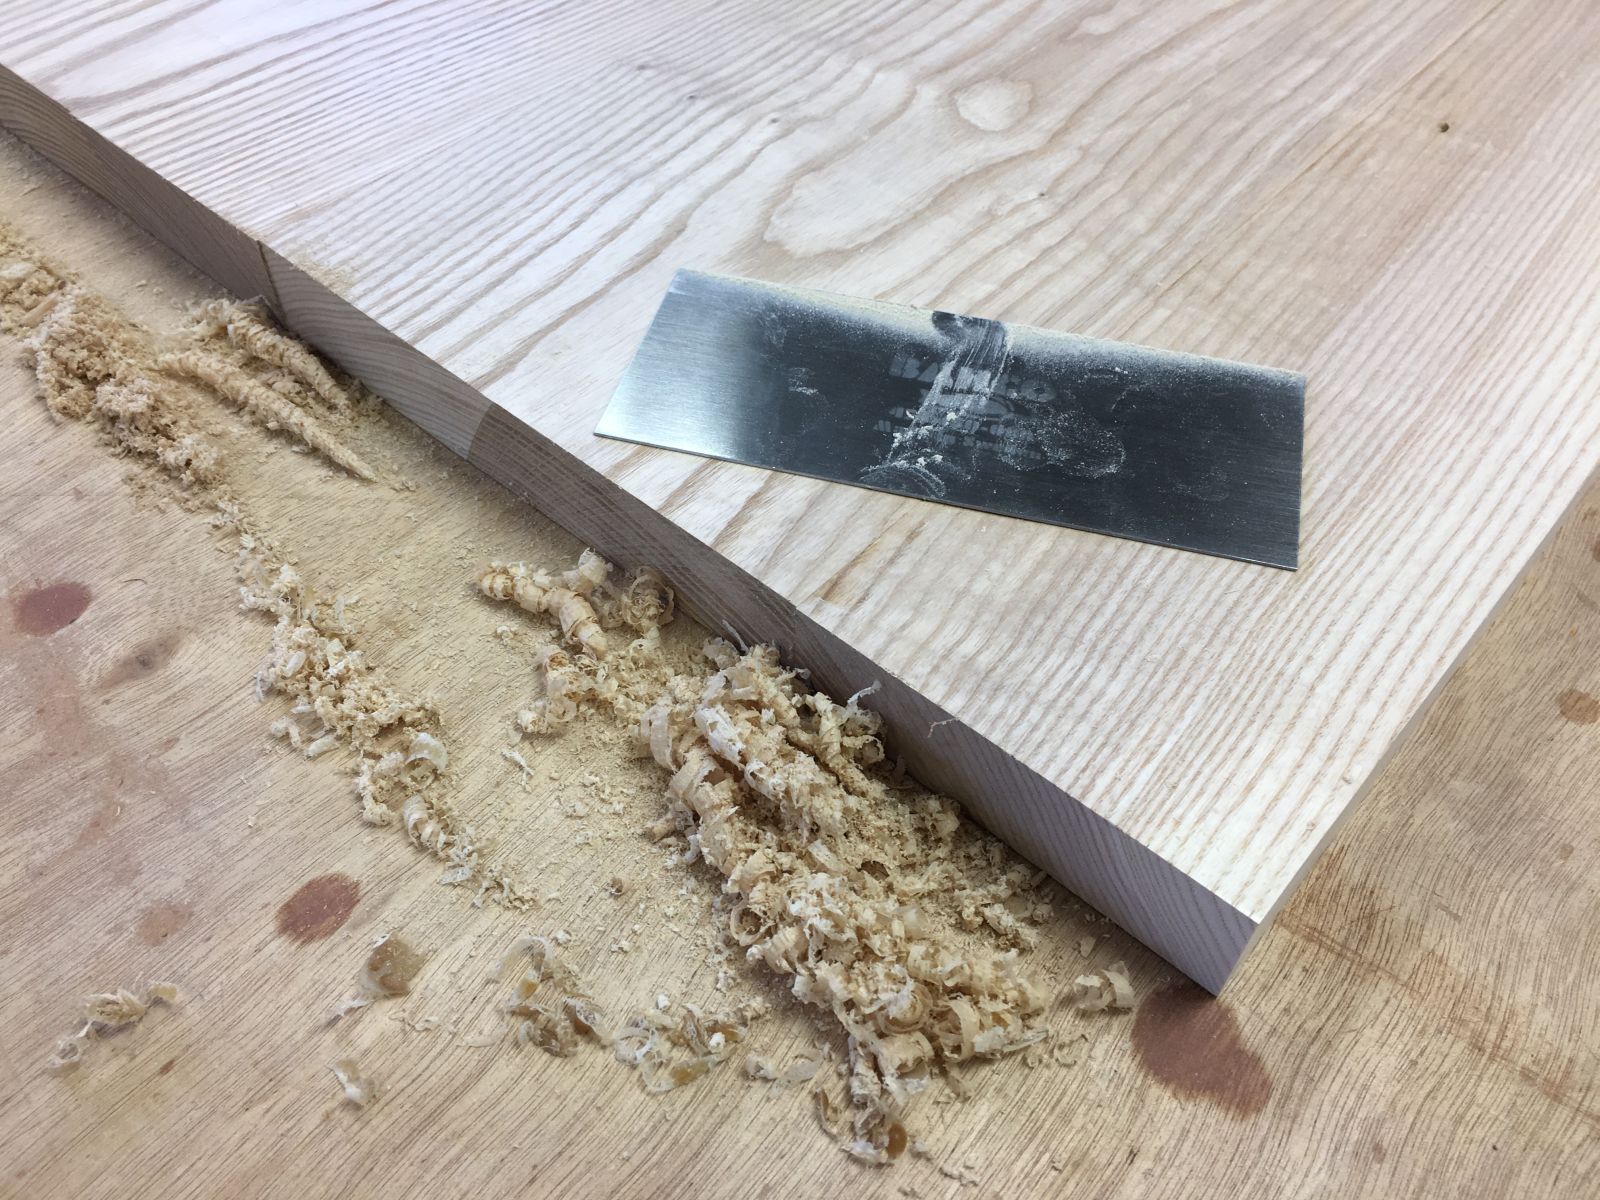
Jointing one face flat and one edge at 90 degrees.
Pencil marks to tell when the entire face has been planed.
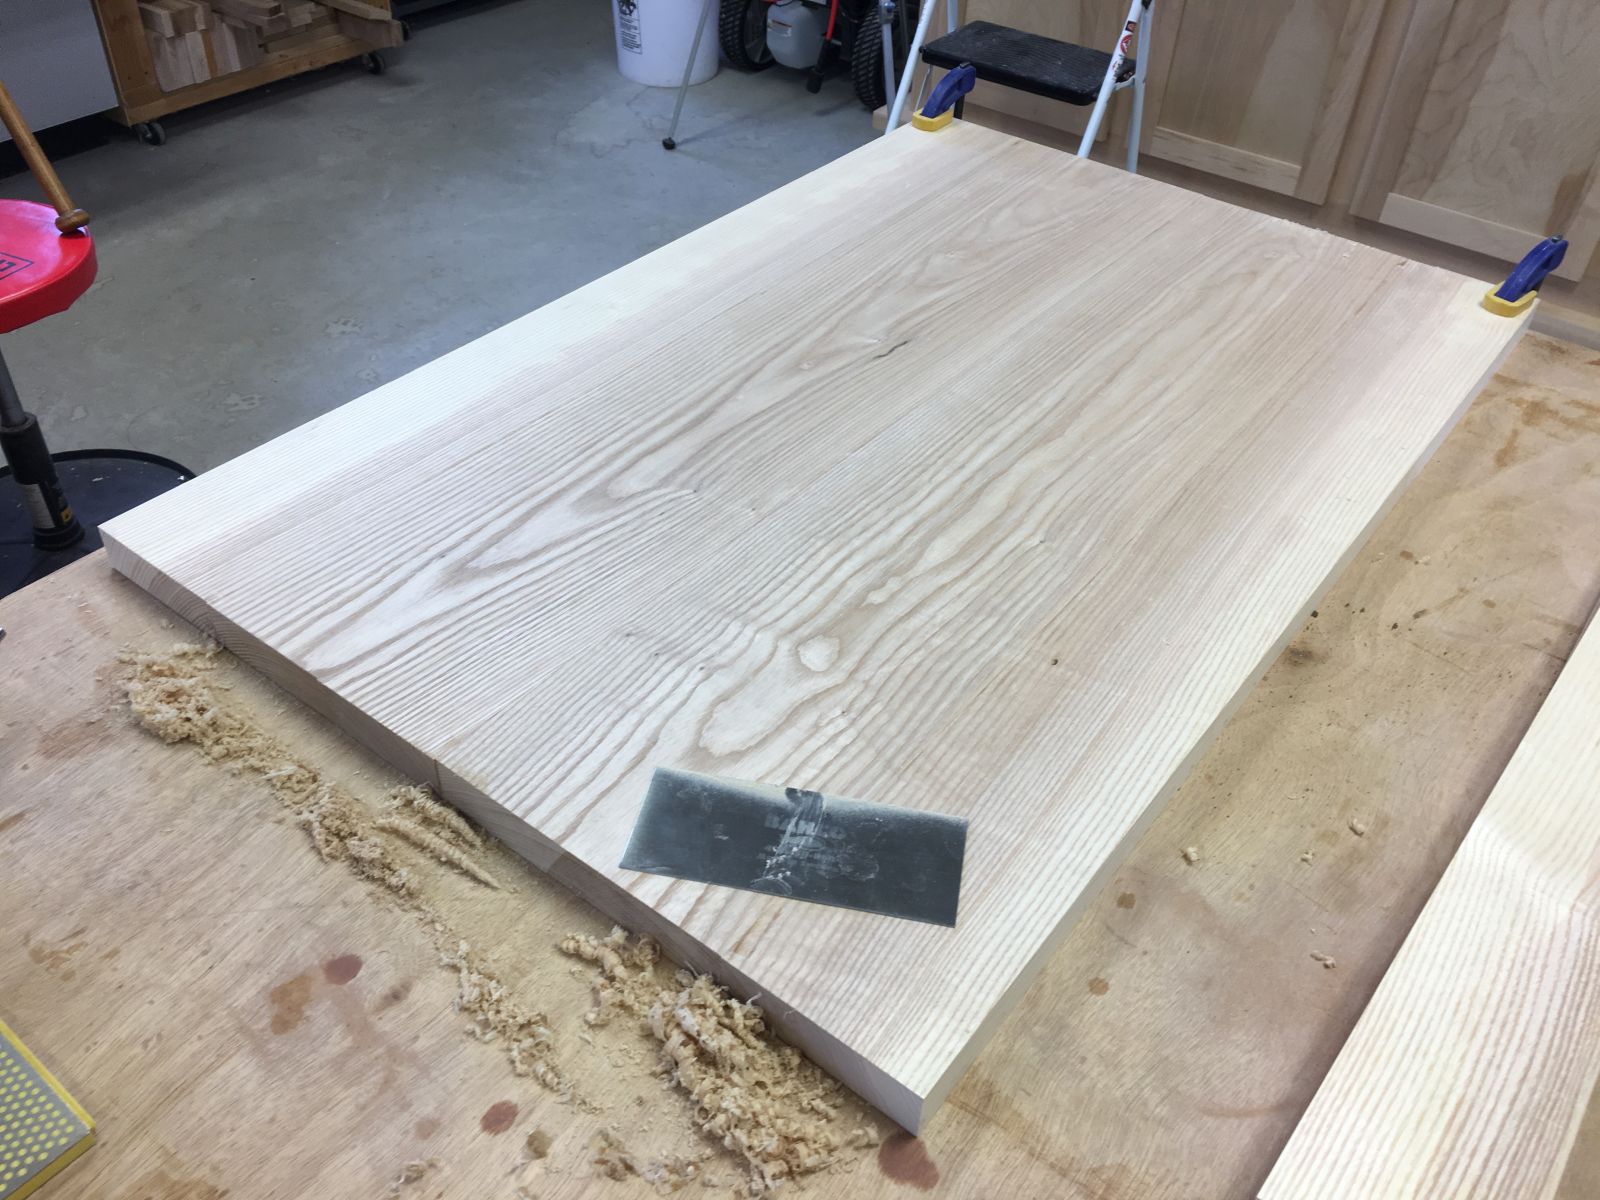
Jointed and planed, white ash cleans up beautifully.
Planing to clean up faces and make all boards a uniform thickness.
Shop drawings – cover page
Shop drawings – exploded view
Shop drawings – details
Shop drawings – details
Dry clamp up of jointed middle and end boards.
Generous application of Titebond III for edge gluing.
Since PVA glue is slippery until it cures, the small clamps keep the boards aligned at their interfaces.
Trimming one end square with the track saw
Trimming square and to length on the table saw
Forming the end tenons with a dado blade on the table saw
Cleaning up the tenons with a block plane
Trimming the tenon sides with a back saw to allow for wood movement
Half-inch holes to allow for dropping the breadboard ends over the router bit to form the mortises in the breadboard ends
Router setup using a quarter inch solid carbide spiral upcutting bit (which is “upside down” in the router table so it will pull chips out of the mortise
Forming the mortises with shallow passes on both sides to assure it is centered
Final position of router bit for cutting 1 1/4 inch deep mortises in the breadboard ends
Dry fit showing the (way bigger than needed) clearance to allow for wood movement of the top inside the breadboard end
Transferring pilot holes from the breadboard ends to the main field of the top
Drilling the quarter inch clearance hole in the center of the half inch counter bores
Drill press setup for drilling the breadboard ends in multiple steps
Breadboard ends are only glued in the center three or four inches, and the holes for the outer two screws are elongated to allow for wood movement
Driving the 3 1/2 long center screw through the breadboard end into the edge of the top
Red oak dowels to plug the counterbores in the breadboard ends
The very porous exposed end grain of the red oak dowels will pick up more stain and be darker than the surrounding wood
White ash coupons for stain samples
Satin Dark Walnut for the steel hairpin legs
Wiping the raw steel hairpin legs with denatured alcohol
Drilling pilot holes for hairpin leg positions on the bottom of the top
A Vix self-centering bit accurately transfers the hole centers from the leg plates to the underside of the top
First step in painting the hairpin legs is mounting surface
Three Minwax stains and Pre-Stain Conditioner to make six stain samples
R to L: Special Walnut, Puritan Pine, and Natural
Special Walnut, conditioned in the front
Puritan Pine, conditioned in the front
Natural, conditioned in the front
Hairpin legs ready for paint
Hairpin legs with three coats of Rustoleum Dark Walnut (Satin)
Filling a small instance of insect damage in the top surface of the table
Added a darker heartwood sample of Special Walnut (left, closest to can)
Sanding white ash plaques from the project board for stain samples
Four plaques, eight sides, ready for sample stains
Lighter Minwax stains
No stain, and darker Minwax stains
Hairpin legs temporarily attached to top
Final sanding of top with 120, 150, 220 and 320 grit
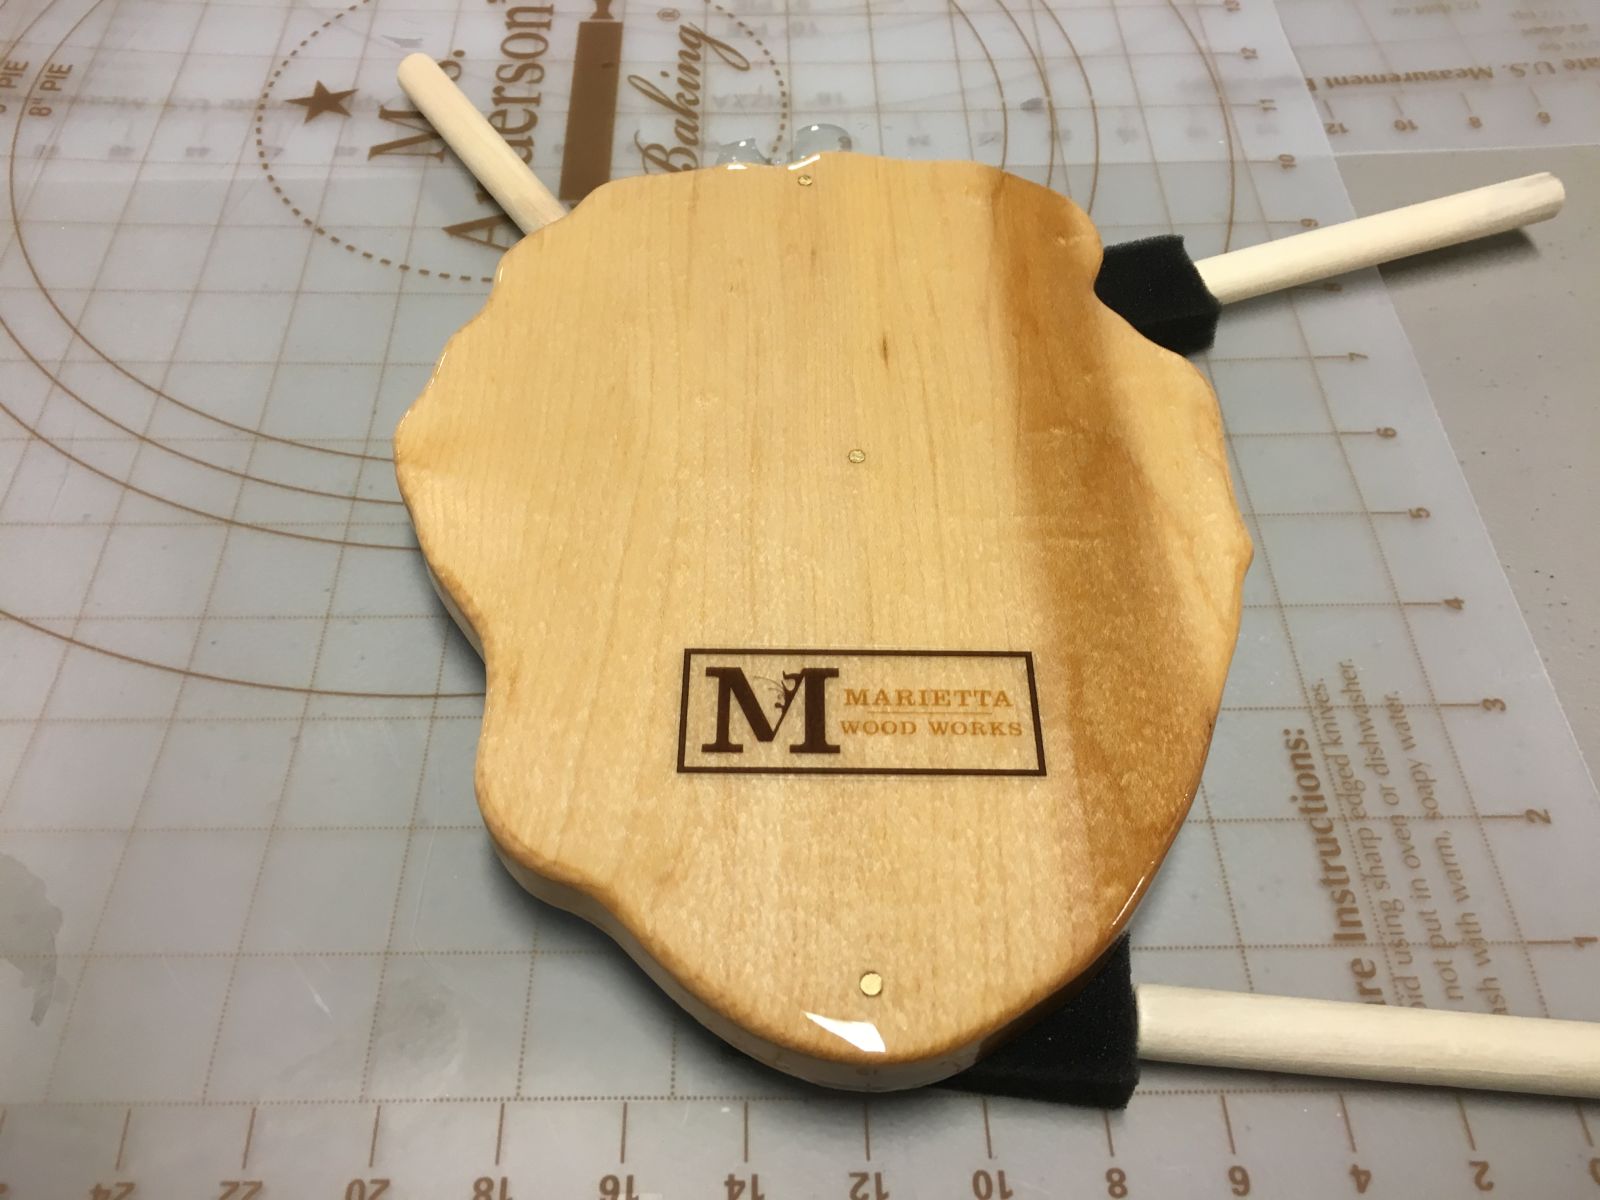
Marietta Wood Works brand on bottom of top, with white ash test piece
Brand after final sanding
Puritan Pine stain being applied to bottom
Bottom stained, wiped and dry
Two applications of Minwax Puritan Pine stain on top and sides (still wet here)
Top stained, wiped and dry
Bottom ready for first coat of Minwax spar urethane, satin gloss level
First coat of spar urethane, (still wet here)
Packed up and ready for shipping
Coffee table Looking great in Kyle’s living room, alongside the beautiful handmade quilt from Linda!
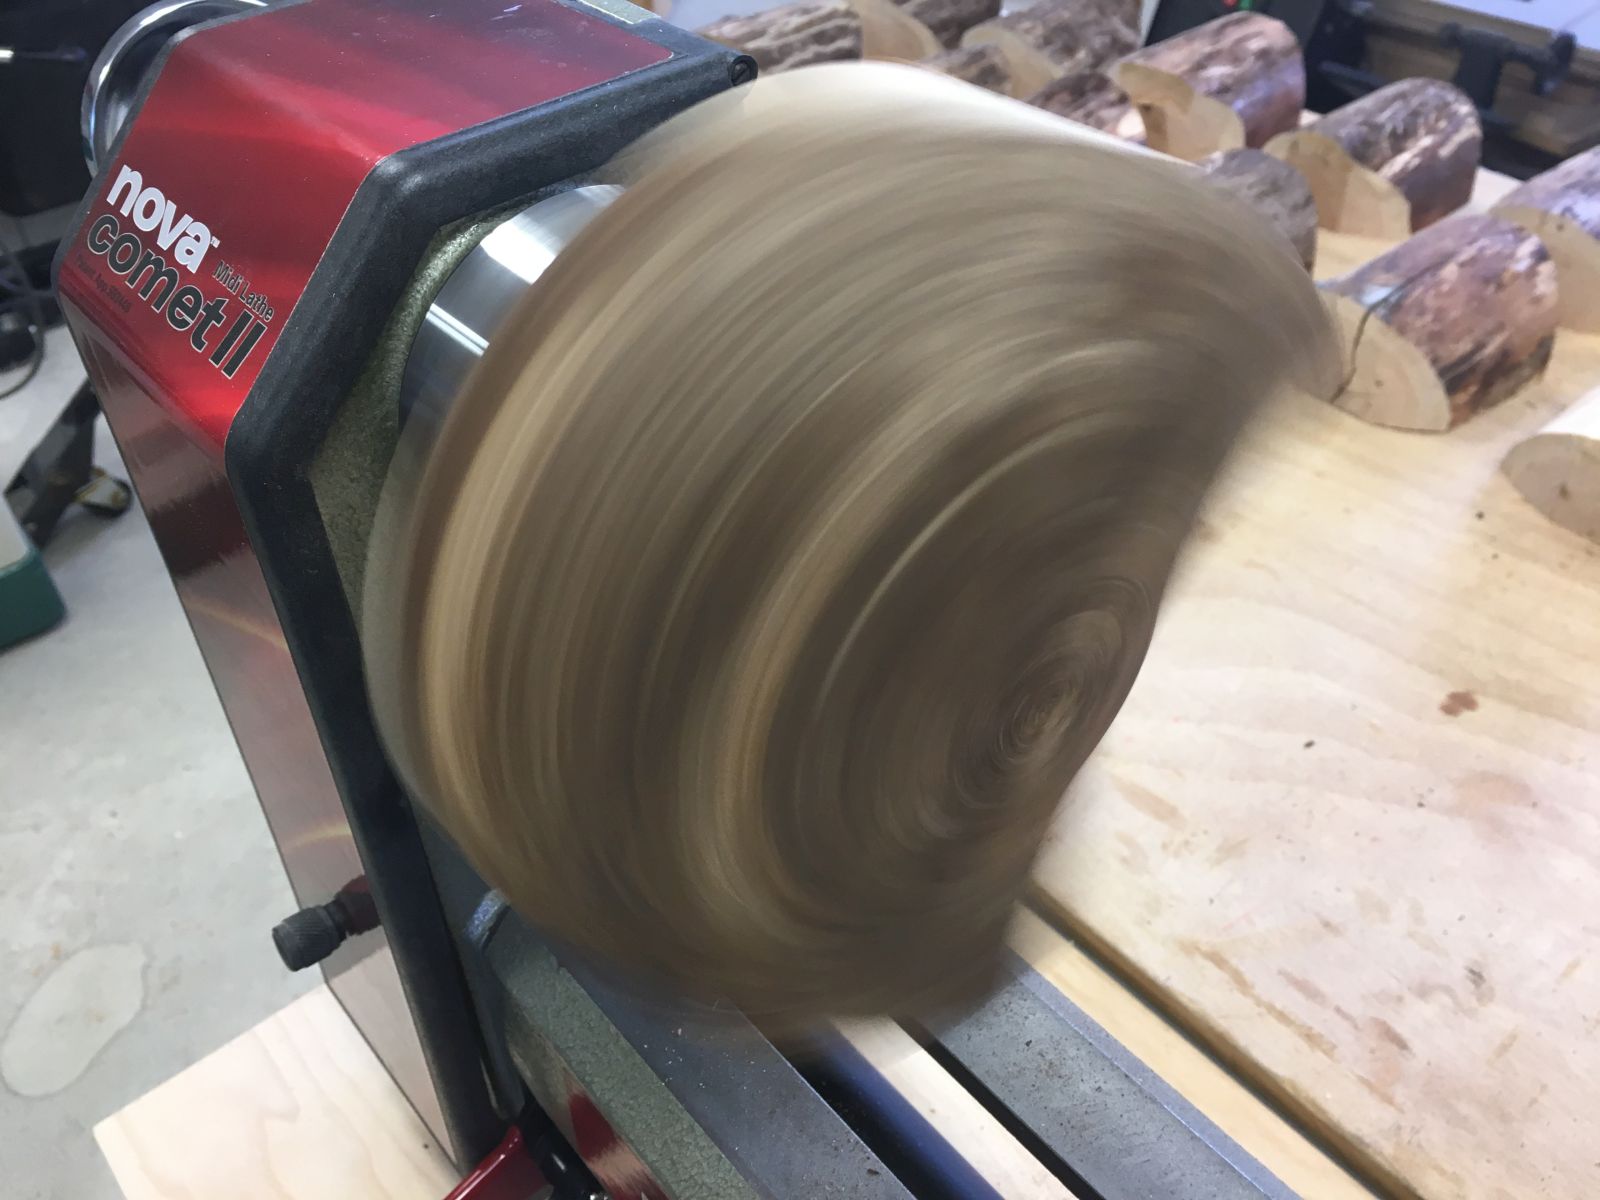
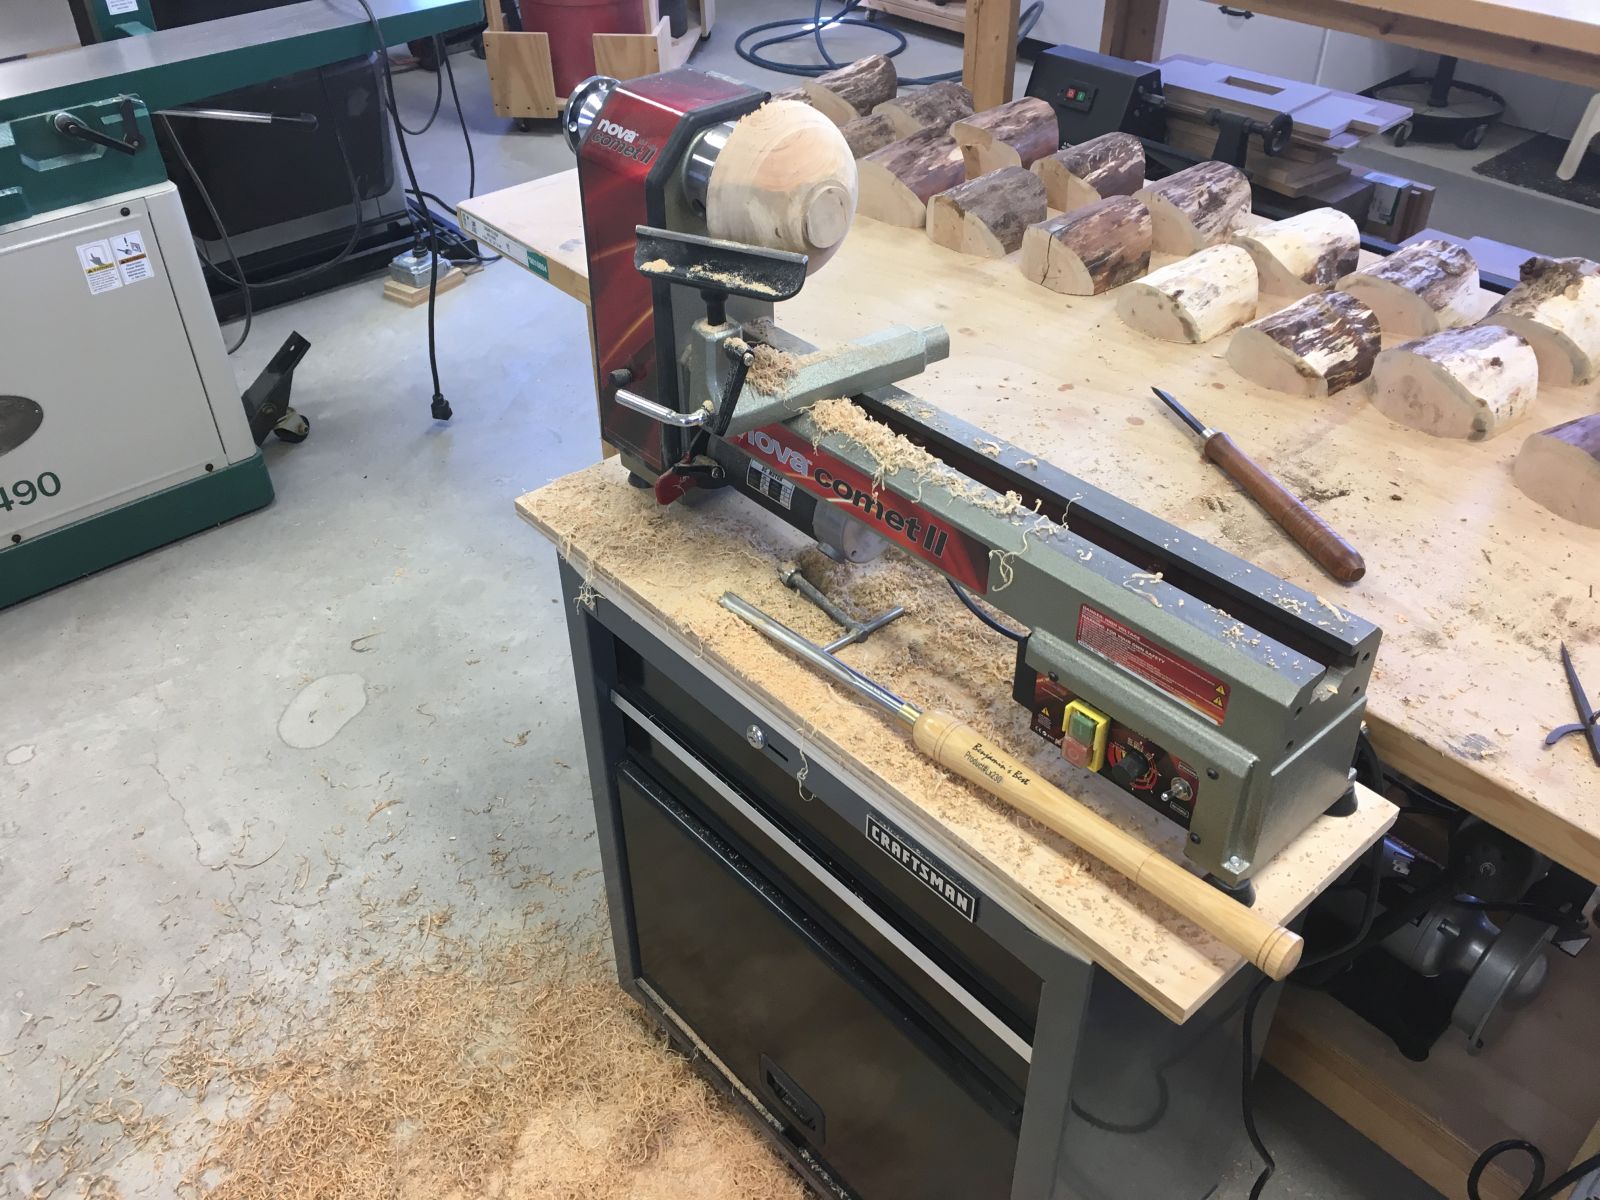
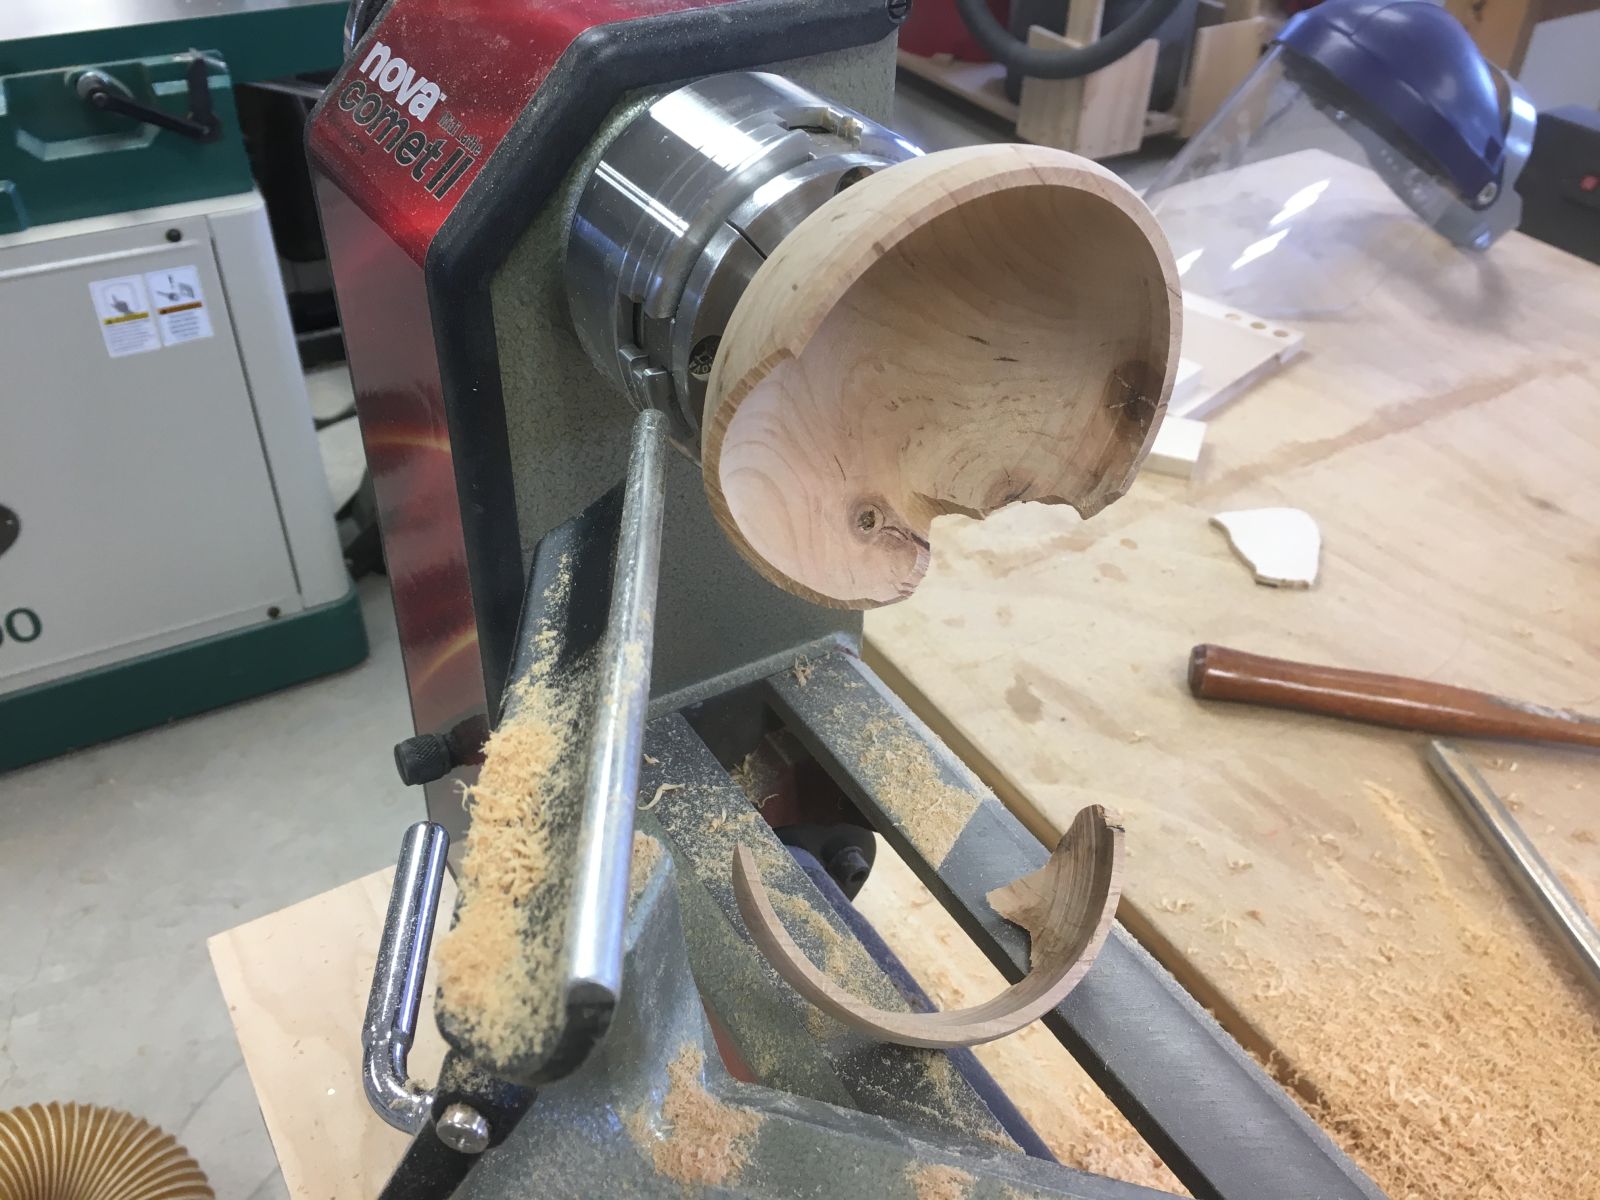
With the new Nova Comet II midi lathe and Nova G3 50mm scroll chuck, I only lacked a couple of decent bowl gouges to get started turning some small bowl forms. I also added a Rikon 1/2 HP low speed grinder and Oneway Wolverine Grinding System to maintain sharp edges on my lathe tools. After watching lots of videos from accomplished wood turners like Stuart Batty and Ashley Harwood, it was time to attempt to turn some firewood into bowls. Then I made my first mistake …
I had two cherry logs from my brother, and decided to turn them into a bunch of bowl blanks for rough turning. My mistake was cutting out over twenty bowl blanks all at one time, and then almost literally watching them split and crack as I turned the first few to prepare them for drying. I should have left the logs intact, only cutting one or two blanks at a time, so I could immediately turn them to a uniform wall thickness in their green state, and set them aside for drying.
I will add to the images below as I learn, practice, and no doubt, make more (hopefully different) mistakes.
Cherry firewood log split in half
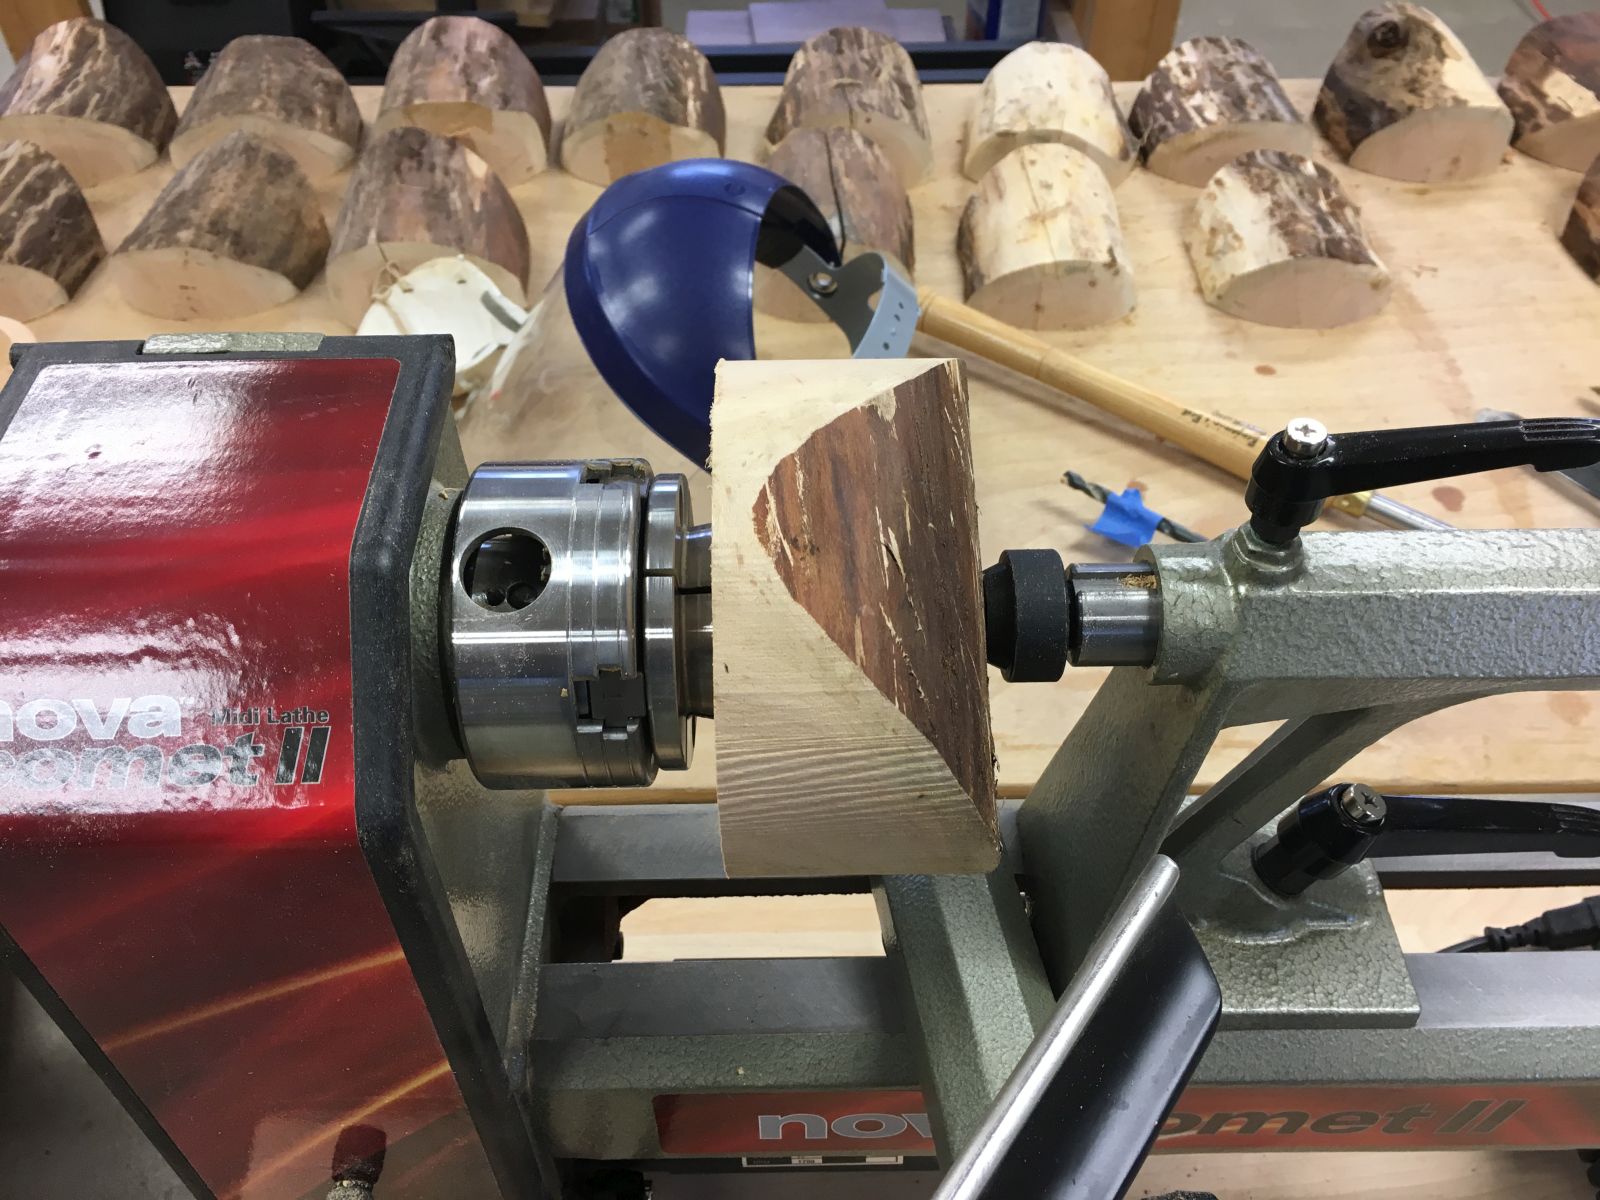
Preparing cherry log bowl blank
Cherry bowl blank mounted on wormscrew and supported by tailstock
Rough shaping a cherry bowl blank
Formed recess for expanding 2″ diameter scroll chuck jaws
Forming the finished bowl without a proper bowl gouge
Spray finished first bowl attempt with Deft
Load of fresh sawn cherry from my brother, John’s house
Large cherry turning stock
Hand sawing cherry logs into lengths for bowl blanks
Several lengths of cherry logs
Sawing debarked cherry log sections on the bandsaw with a board screwed to the side as a guide
Sawn cherry log sections
Preparing a batch of small bowl blanks from small diameter cherry logs
Bandsawing half log sections to bowl blank lengths
Big batch of cherry log bowl blanks ready for the next step. BTW, it was a huge mistake to prepare so many bowl blanks. They should be rough turned immediately after being prepared.
Using the wormscrew pilot hole as a pivot point to bandsaw each blank into a roughly circular shape
With the bandsaw table tilted, a rough outside bowl shape was produced, reducing the amount of material to be removed on the lathe
Pilot holes for mounting blanks on the wormscrew held in the scroll chuck
Rough shaping the outside of a bowl blank, after acquiring my very first bowl gouge
Push cuts with a sharp bowl gouge produced satisfying piles of shavings
First blank rough turned with an actual bowl gouge
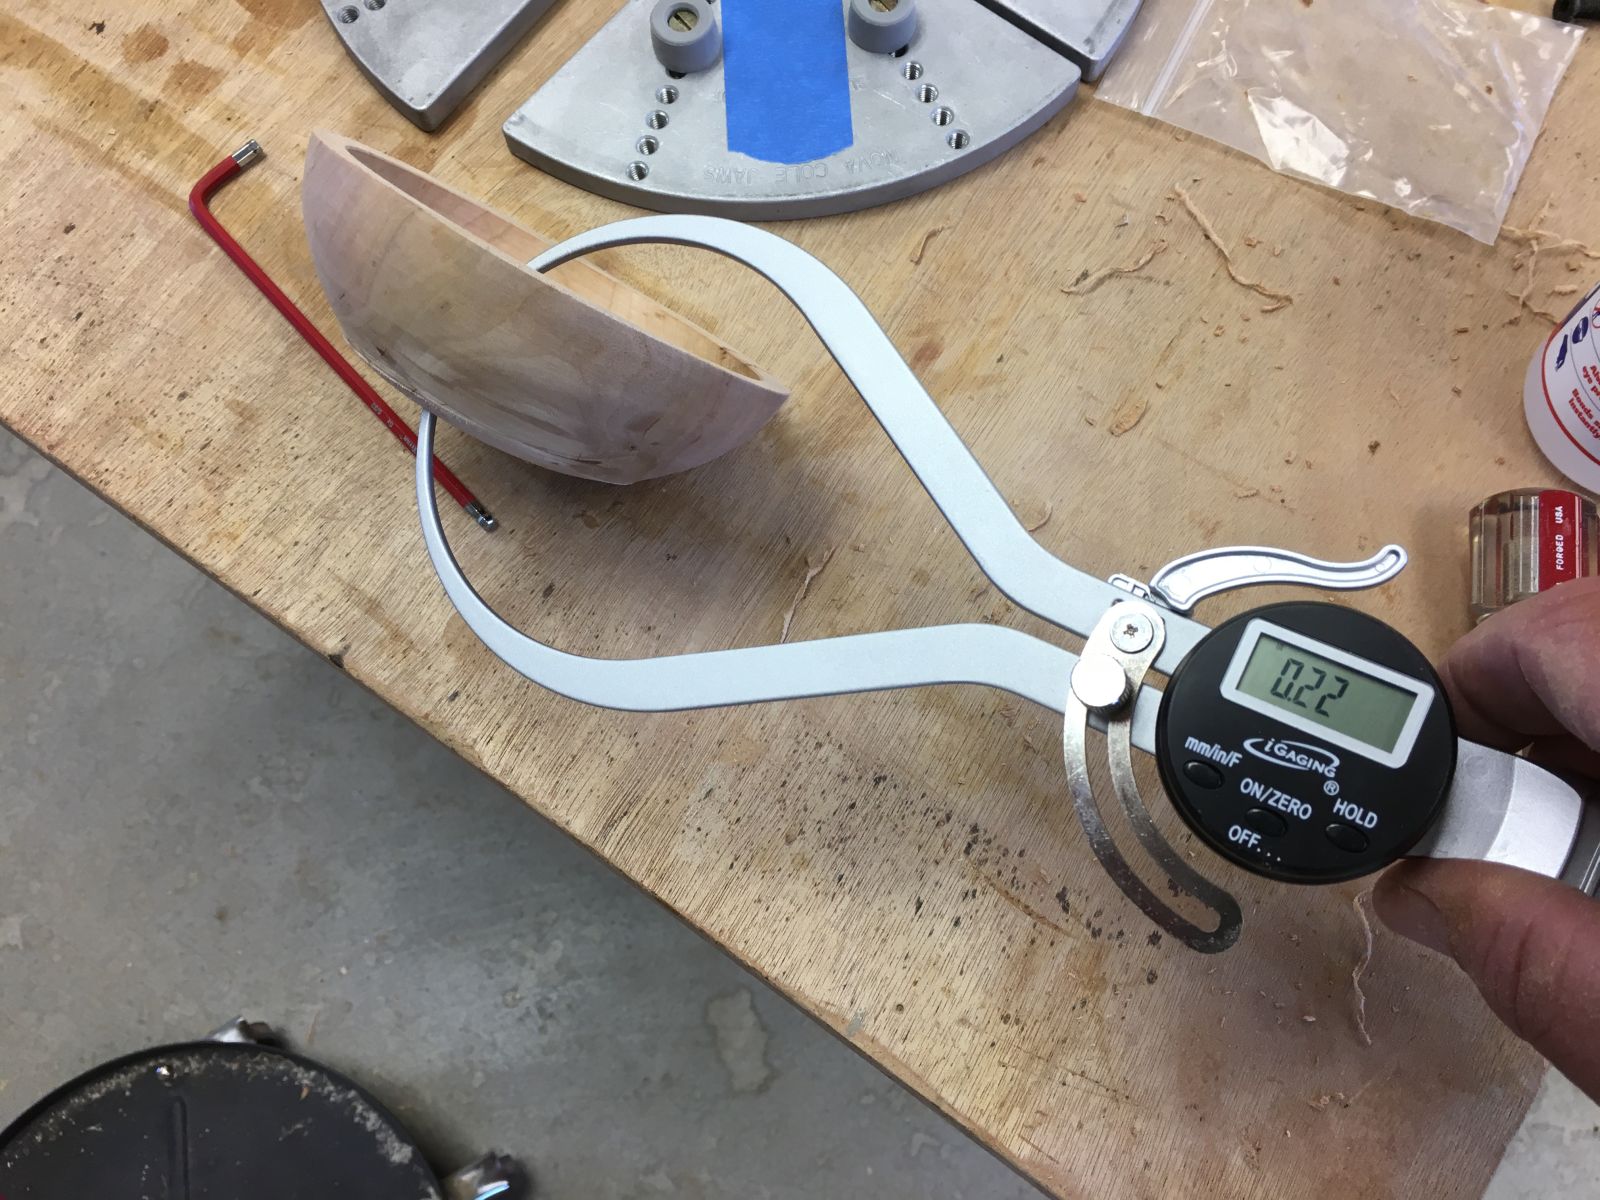
The goal of rough turning is a uniform wall thickness so moisture can escape relatively uniformly
Benjamin’s Best 5/8″ bowl gouge with a swept back wing grind
Not sure I’m making wooden bowls or just piles of wood shavings
Sawdust and shavings have always been a major product of Marietta Wood Works
A second round of rough turned bowl blanks
Outside of a rough turned bowl blank with 2″ diameter tenon for chucking
Second set of blanks, rough turned from the logs that didn’t split too badly, ready for drying in the garden shed
Side view of bandsaw table tilted, with pivot point clamped to table
View of bowl blank with conically bandsawn sides
First batch of rough-turned cherry bowls drying in the garden shed
Temperatures at the upper parts of the garden shed often reach wood-drying kiln temperatures in the summertime
Open wire shelving allows plenty of airflow around drying rough-turned bowl
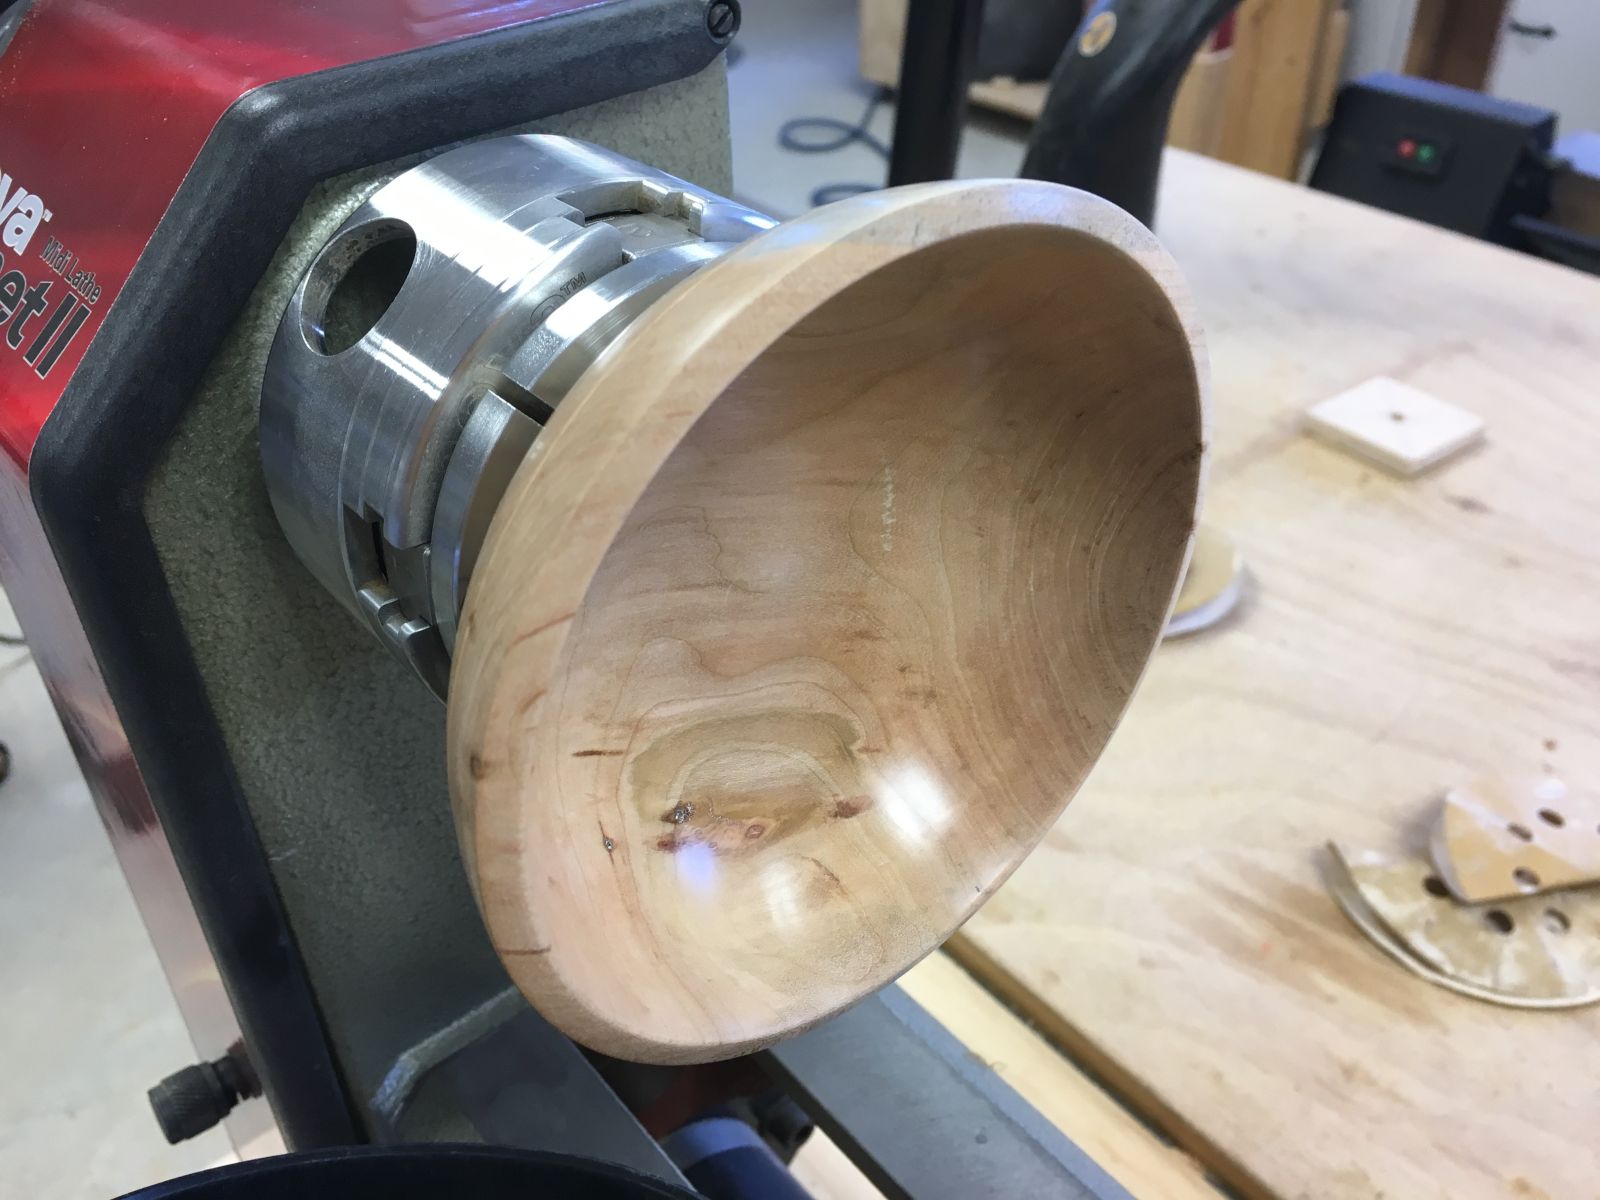
After about three months of drying in the garden shed, the first batch of rough-turned bowls are ready for final turning
More rough-tuned blanks for the second batch of bowls
Reverse view of my work area, with bowl blanks in various stages on the workbench
Rough-turning another bowl blank
Rough-turned and dried bowl blank chucked and ready for finish turning
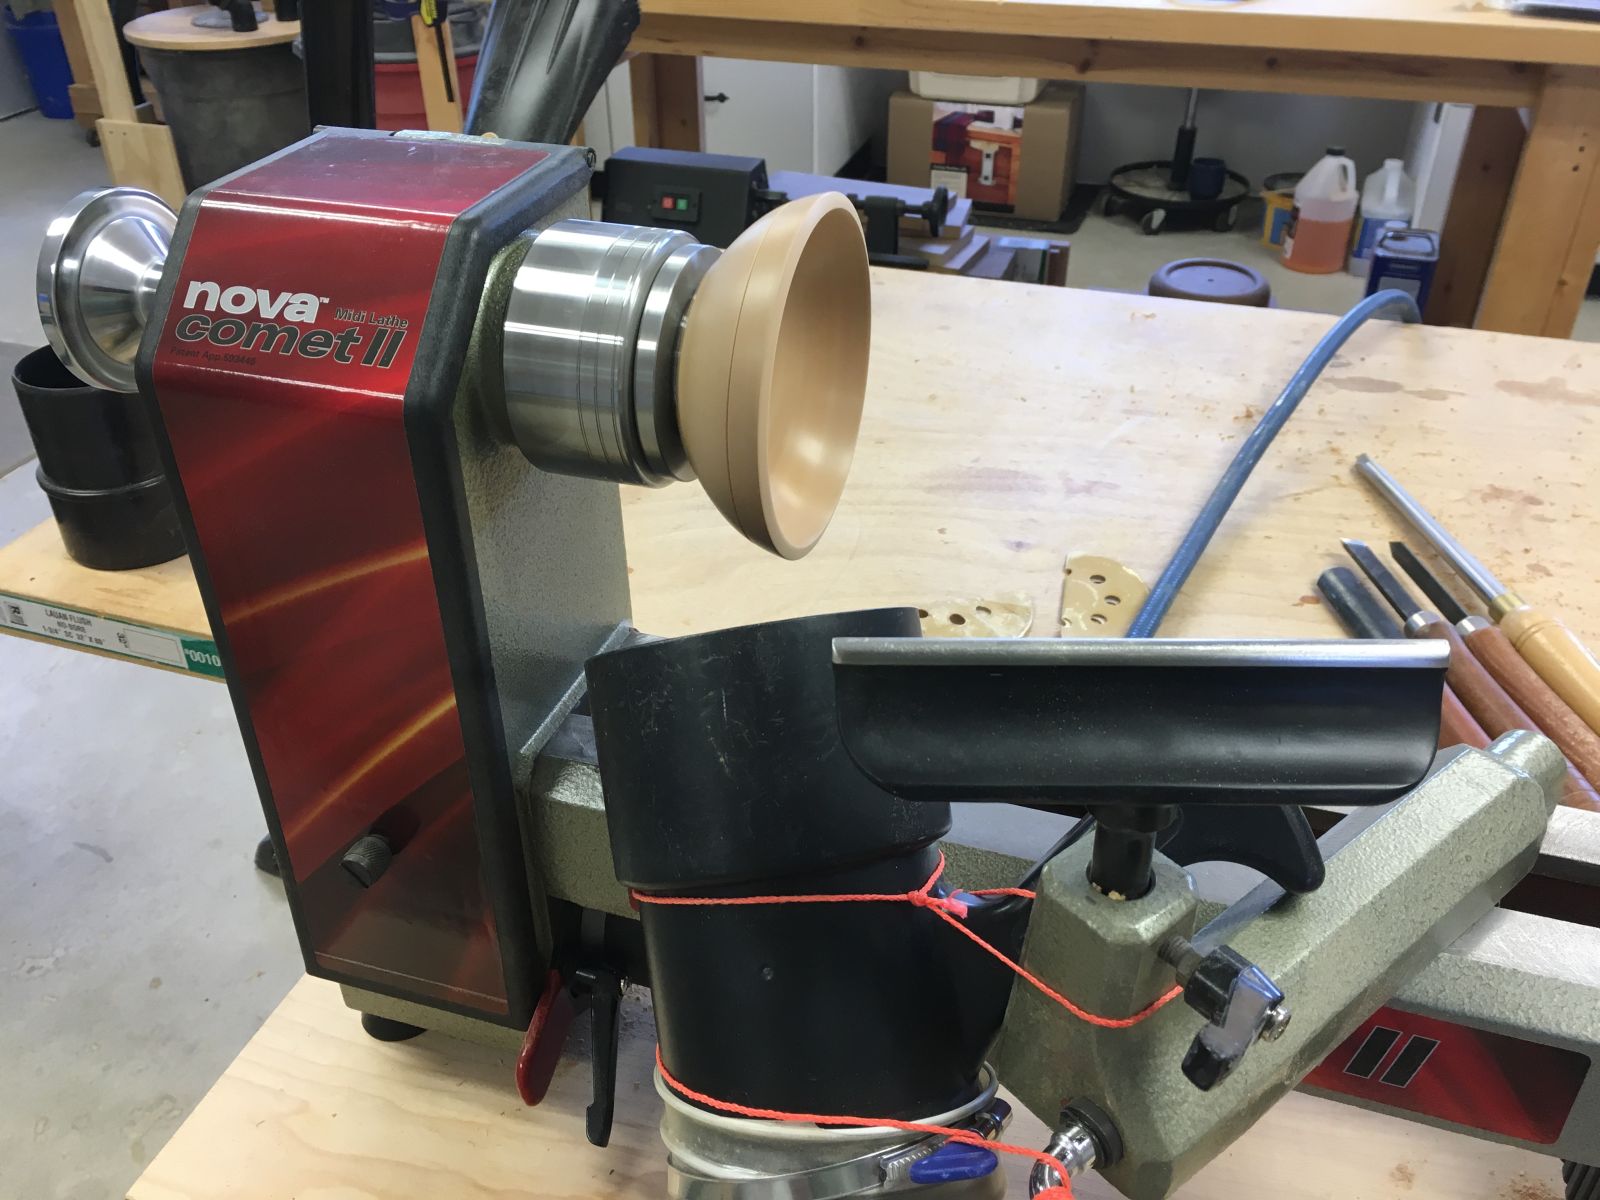
First bowl from a dried, rough-turned blank, cut with a proper bowl gouge,, and friction finished with Aussie Oil
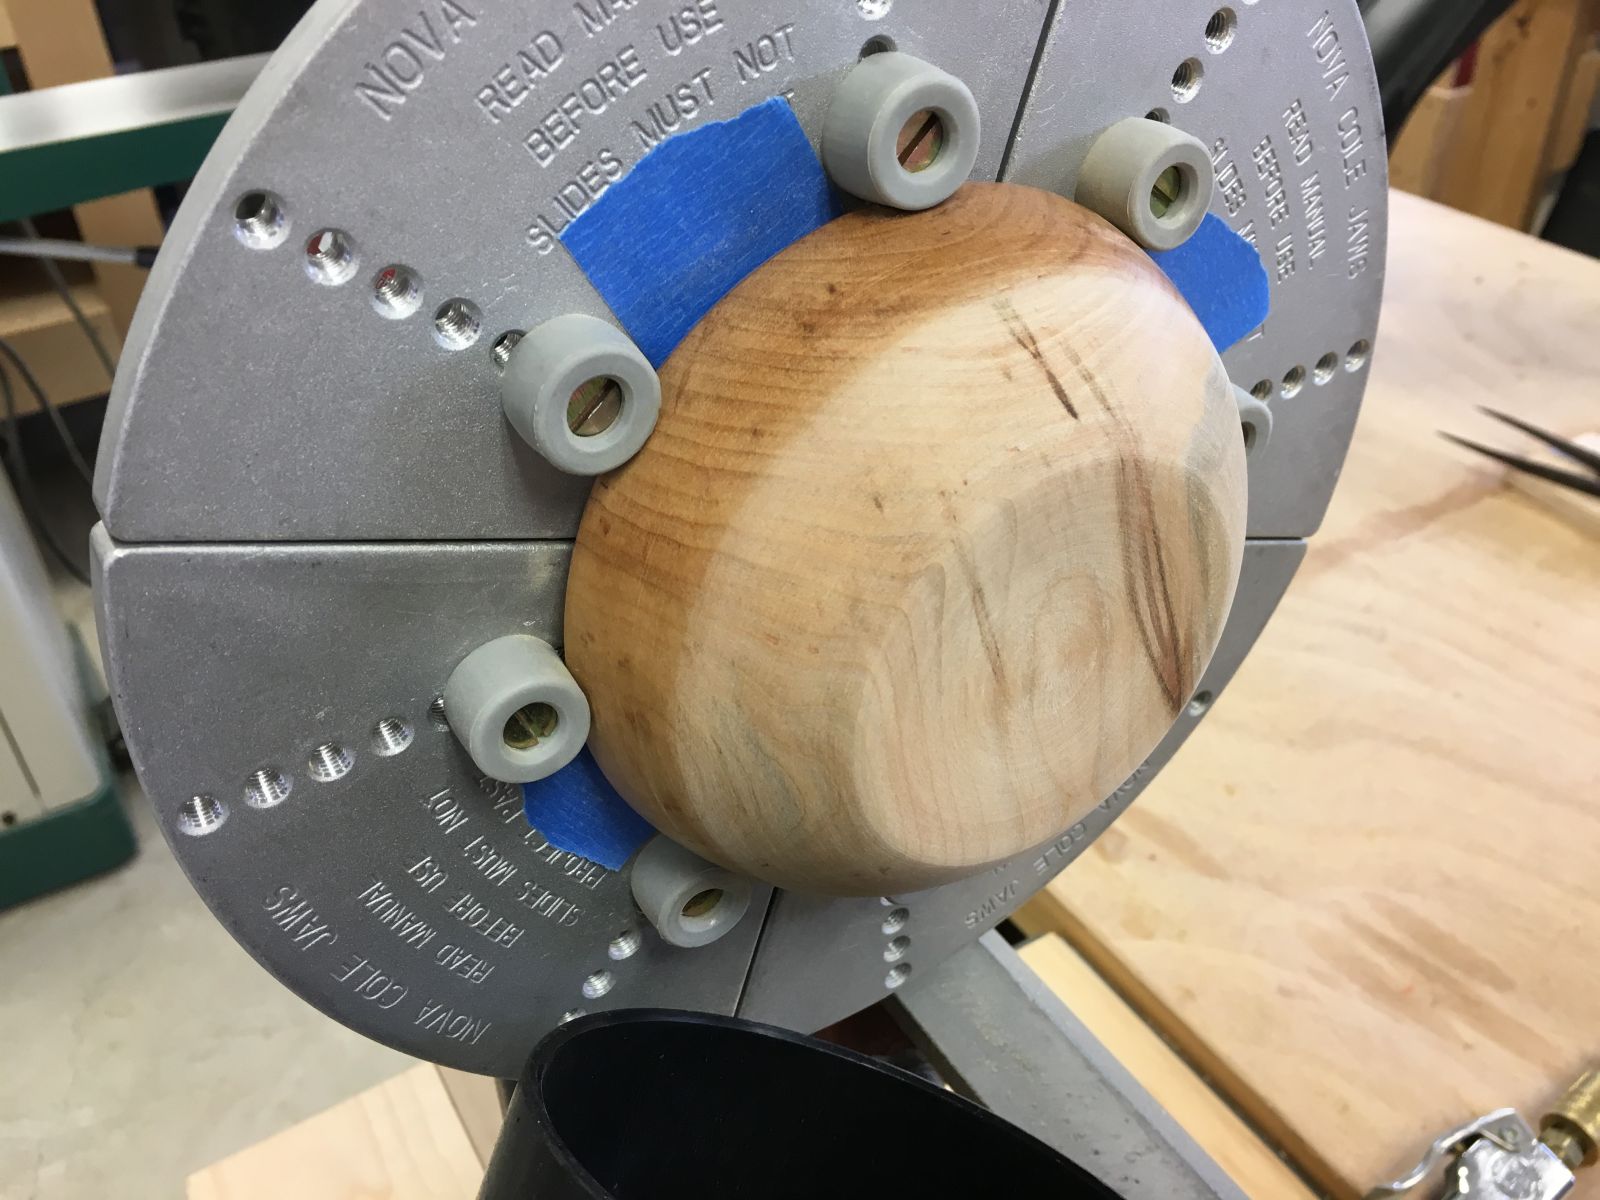
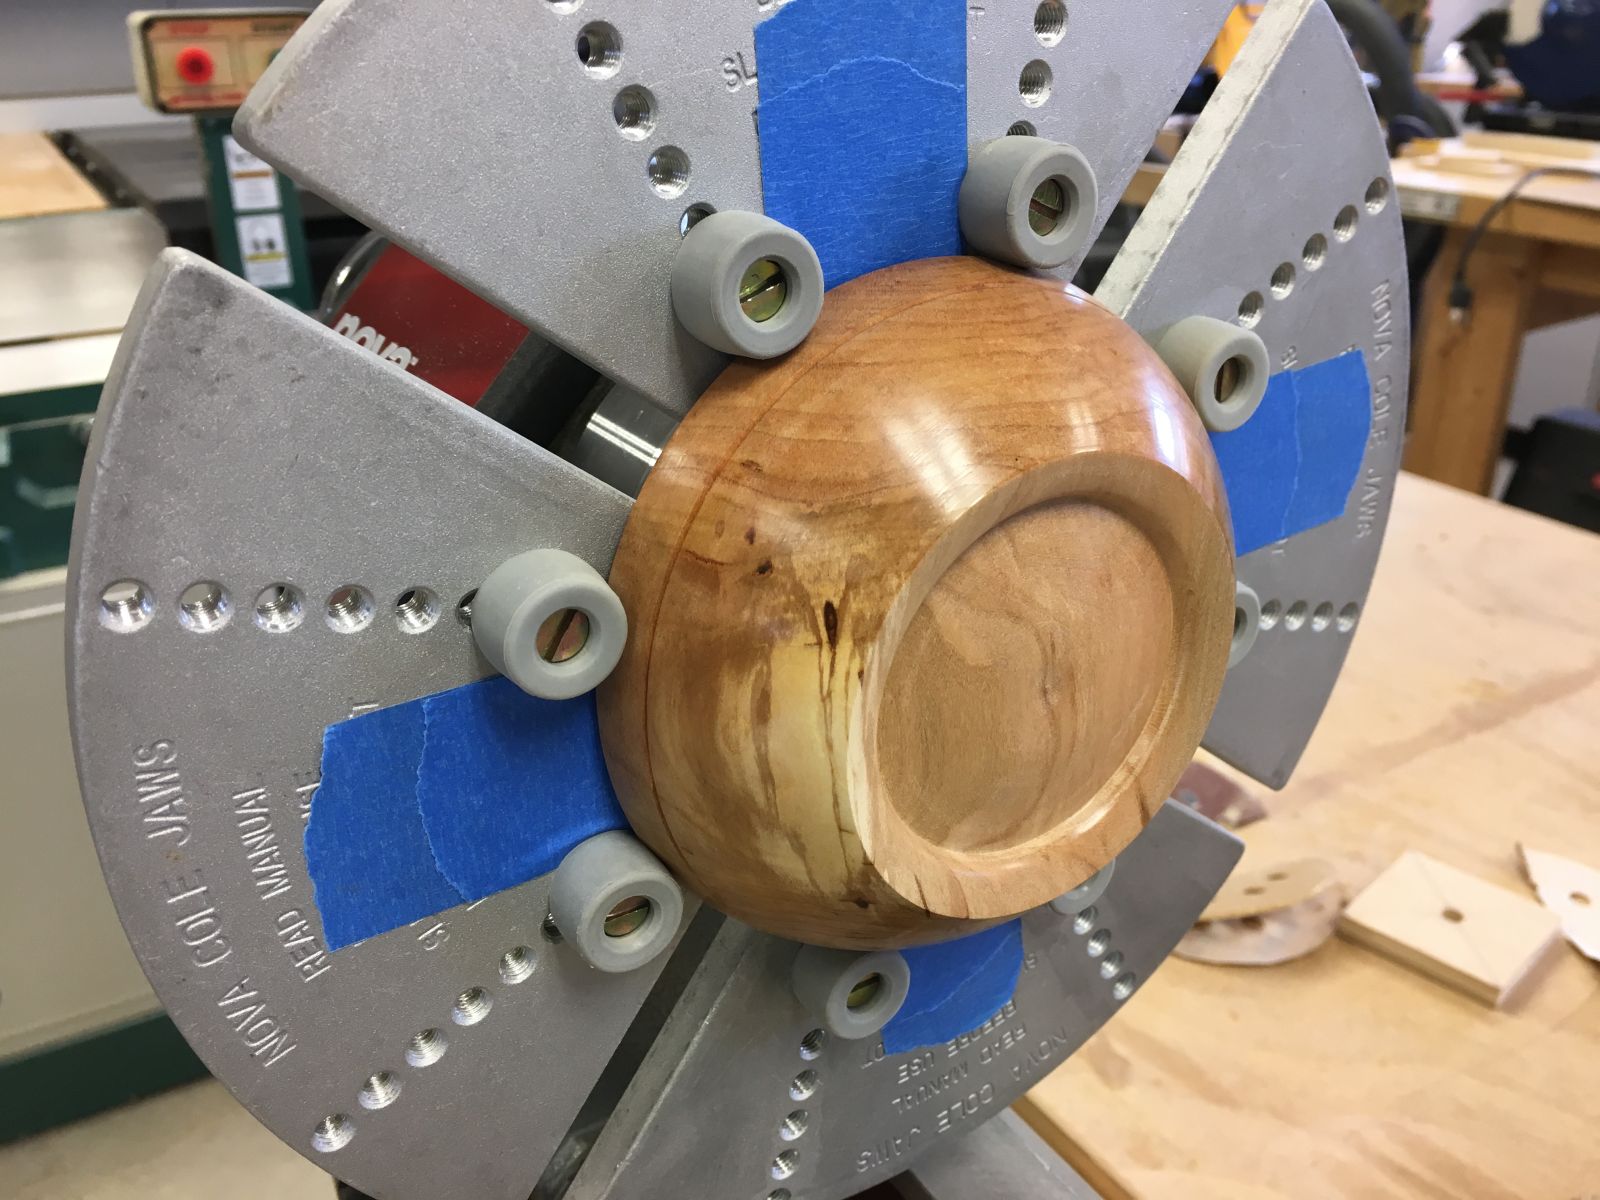
New Cole jaws mounted on the Nova G3 scroll chuck
Finished bowl mounted in Cole chuck for turning and finishing its bottom
Side view of finished bowl mounted in Cole jaws
Bottom tenon removed and bottom of bowl sanded and ready for friction finishing
Completed bowl bottom
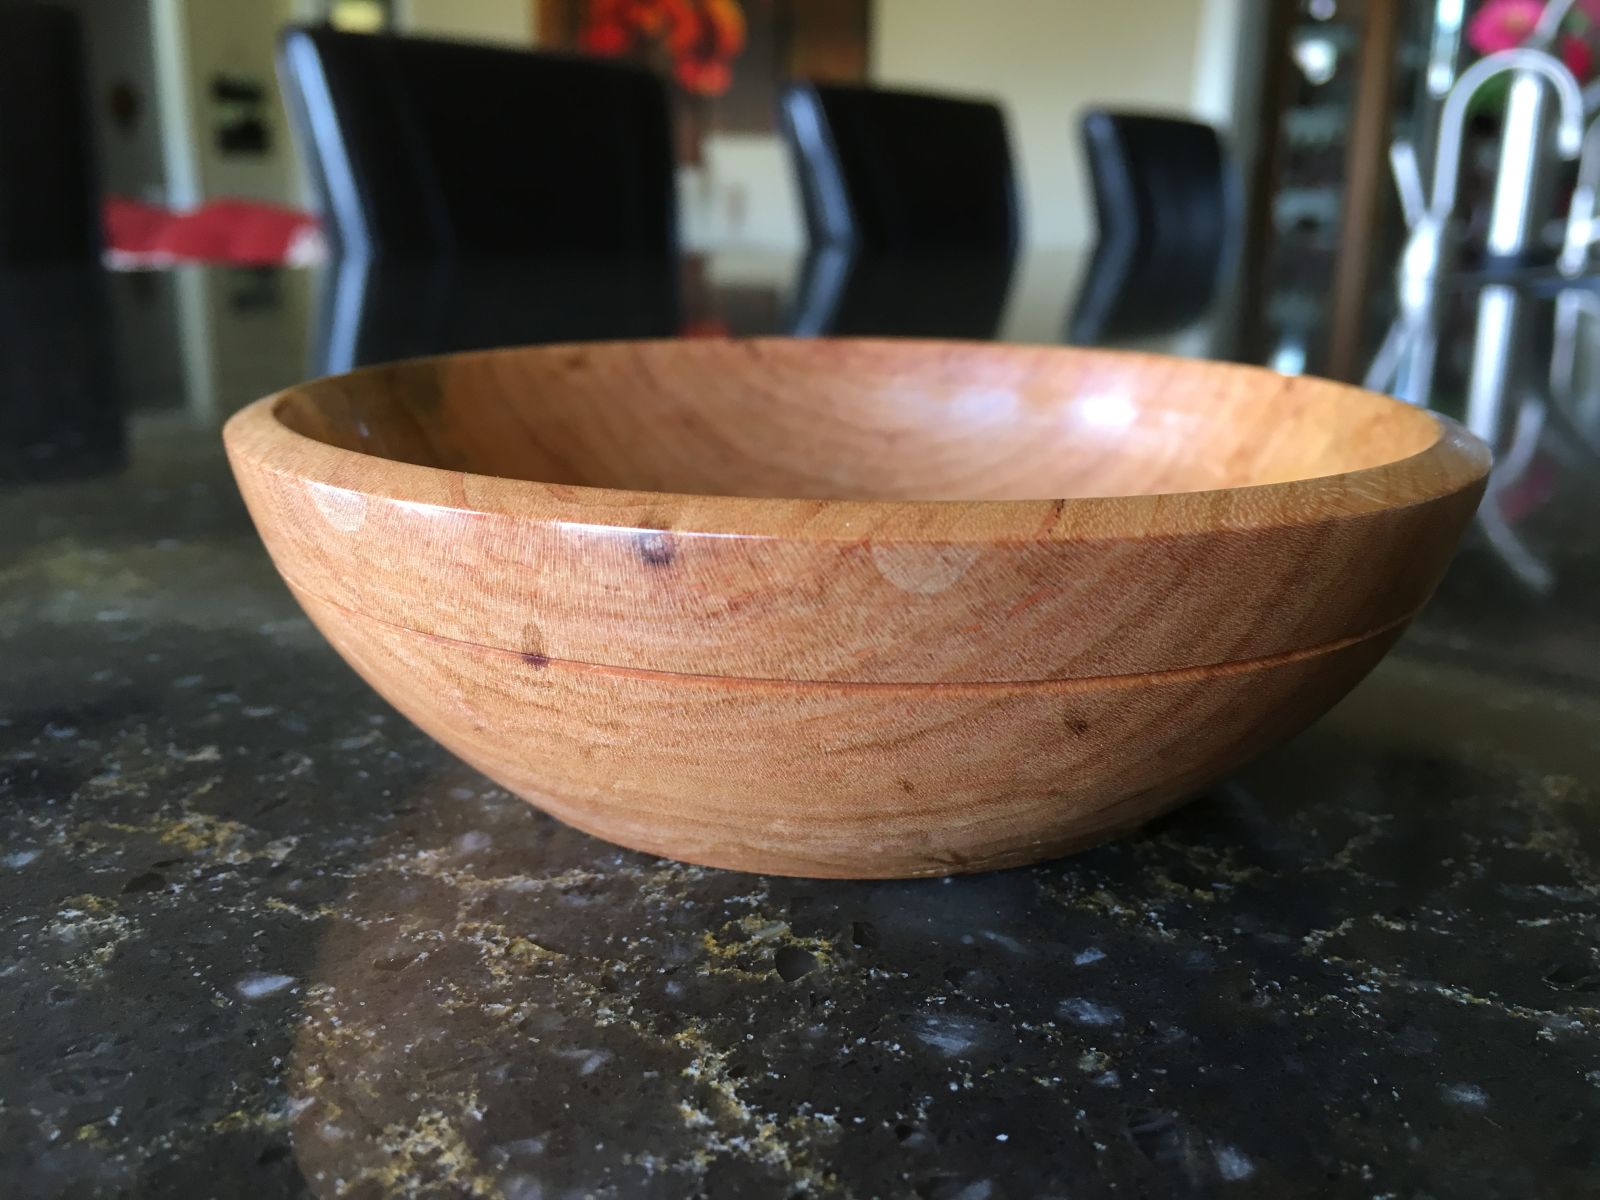
First completed bowl using a more proper sequence of roughing, drying, and final turning
Side view of ~5″ diameter cherry bowl
Reverse view with various blanks and tools
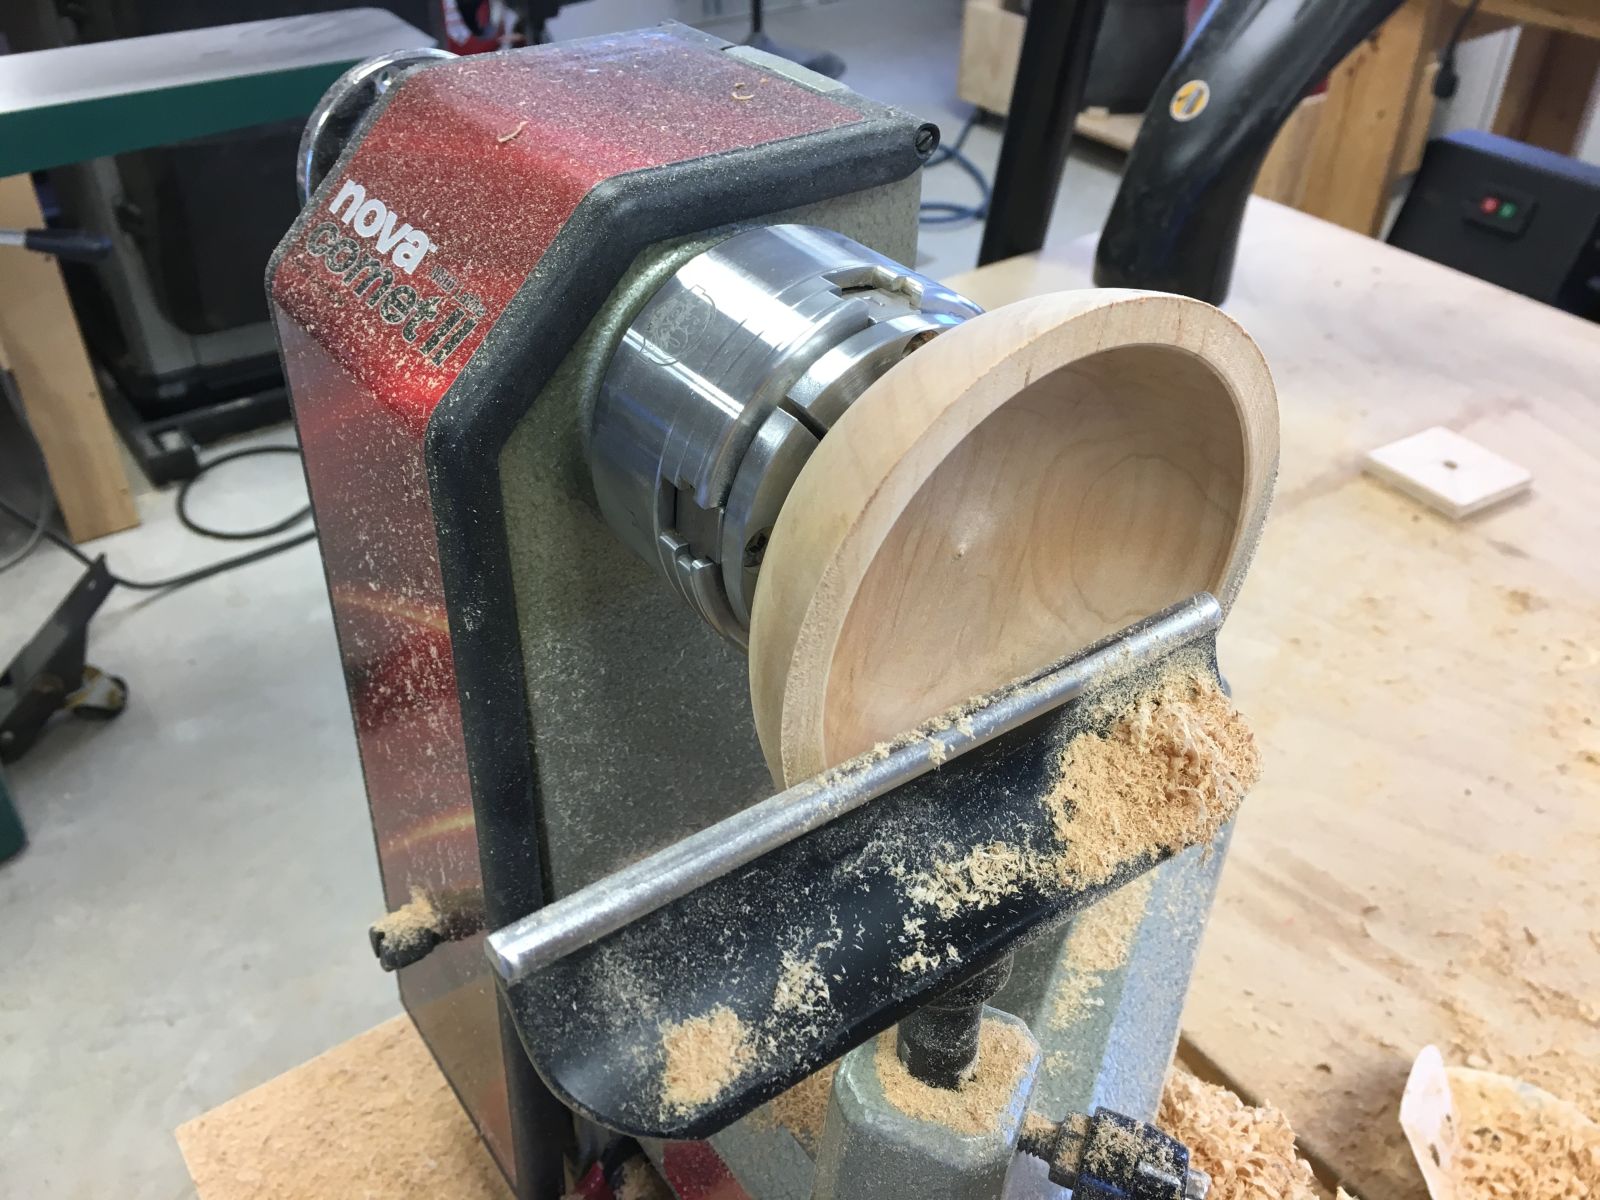
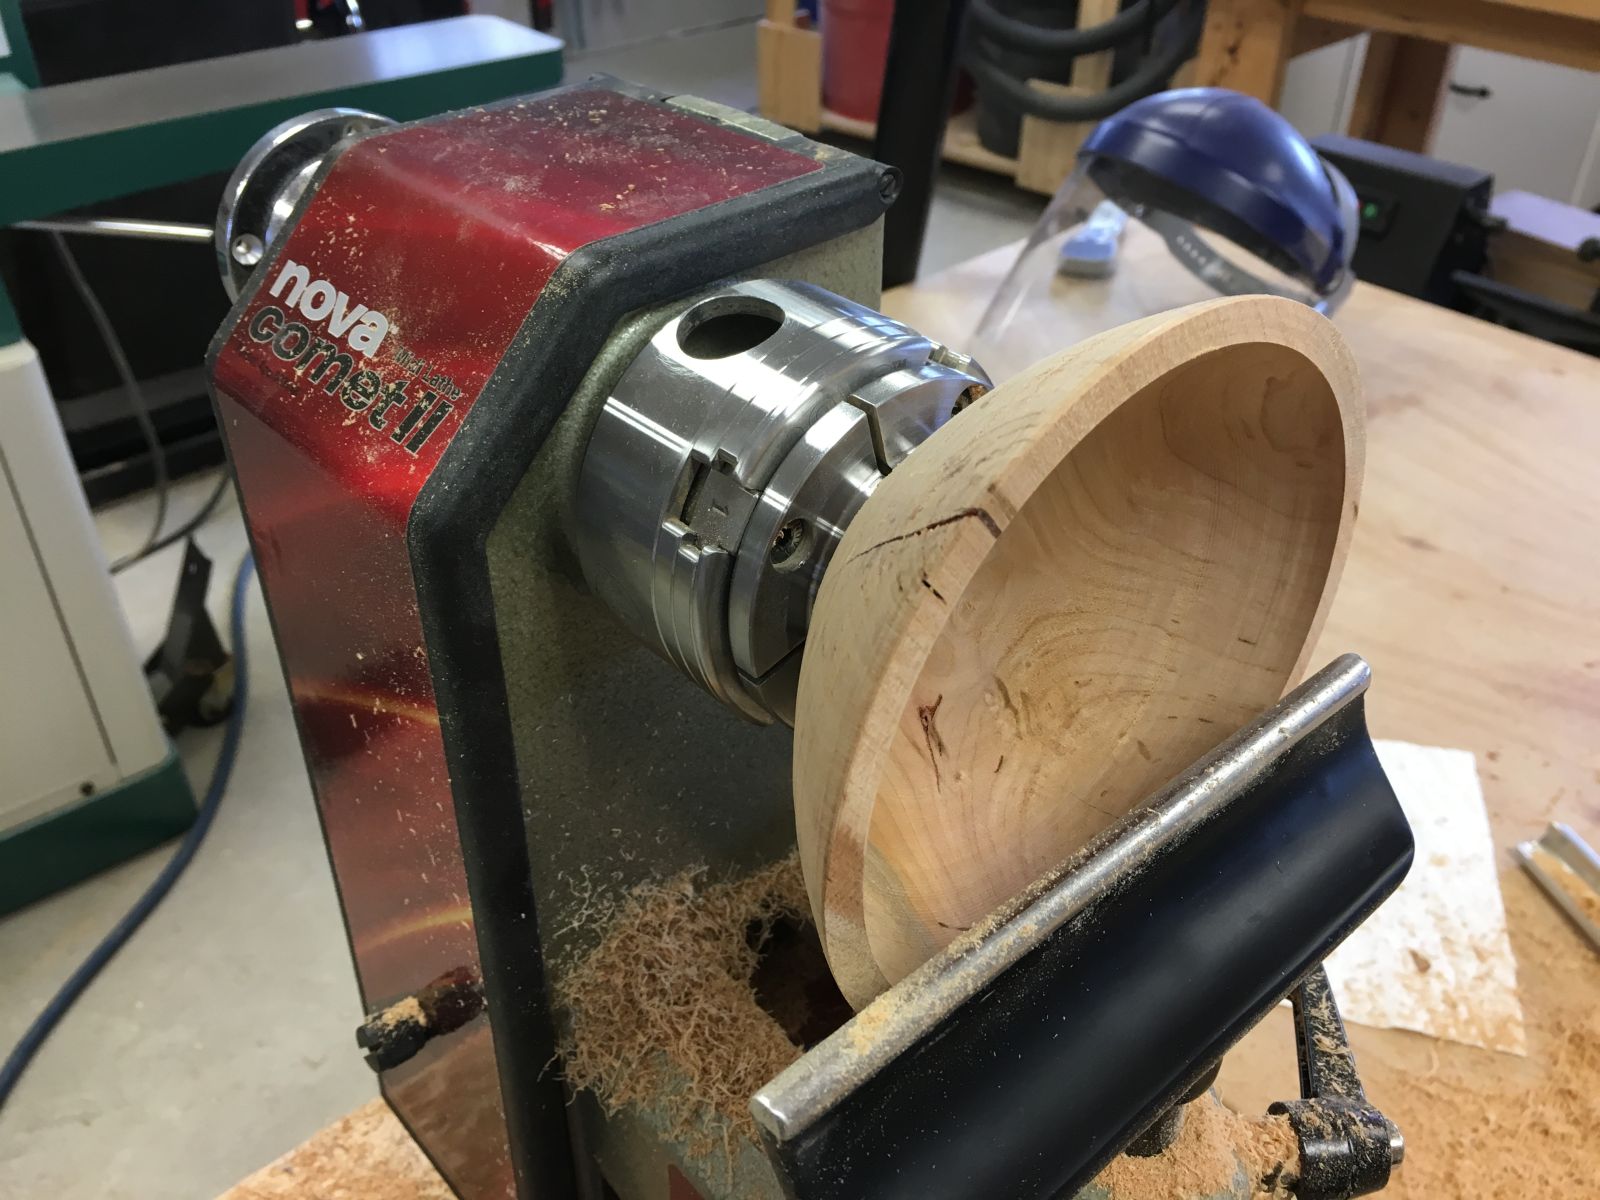
Finish turning another cherry bowl in process
Ready for final cuts on the inside
Finished bowl chucked in Cole jaws for bottom finishing work
A lot of work and process steps go into making a finished bowl from a log destined for the fireplace!
Finished cherry bowl with Aussie Oil friction finish applied
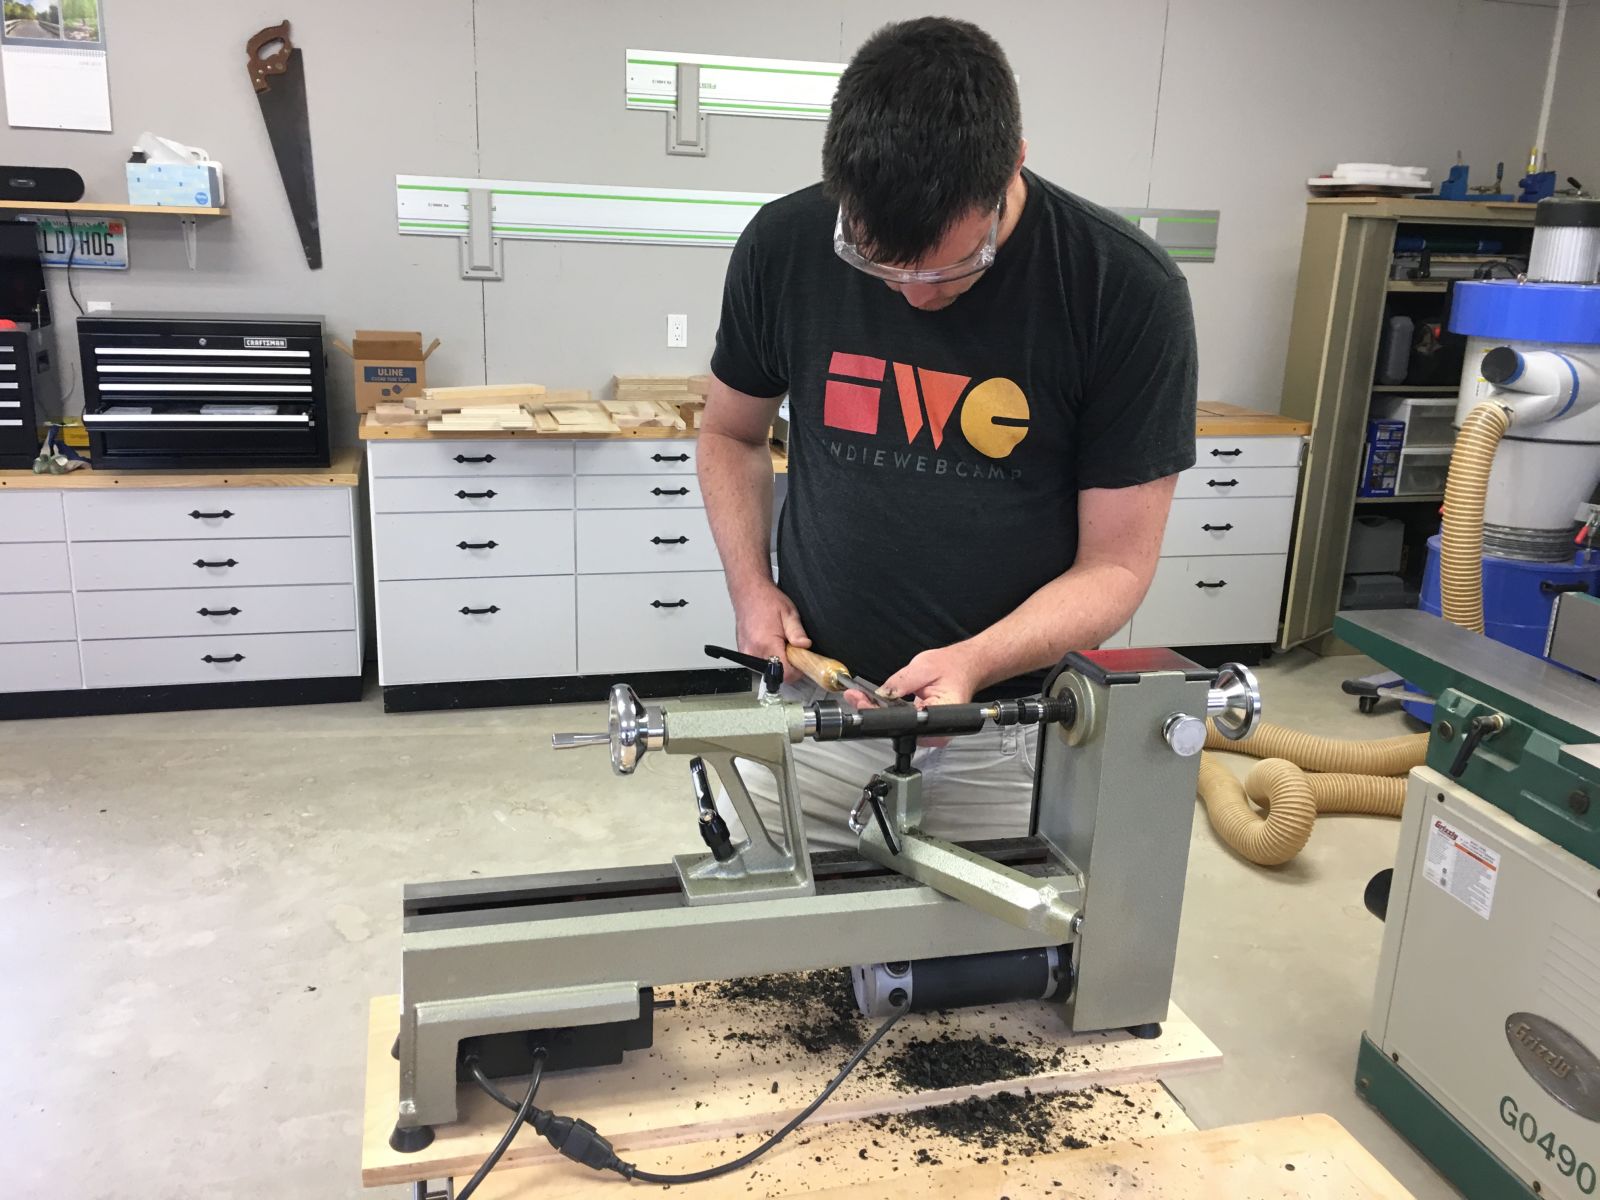
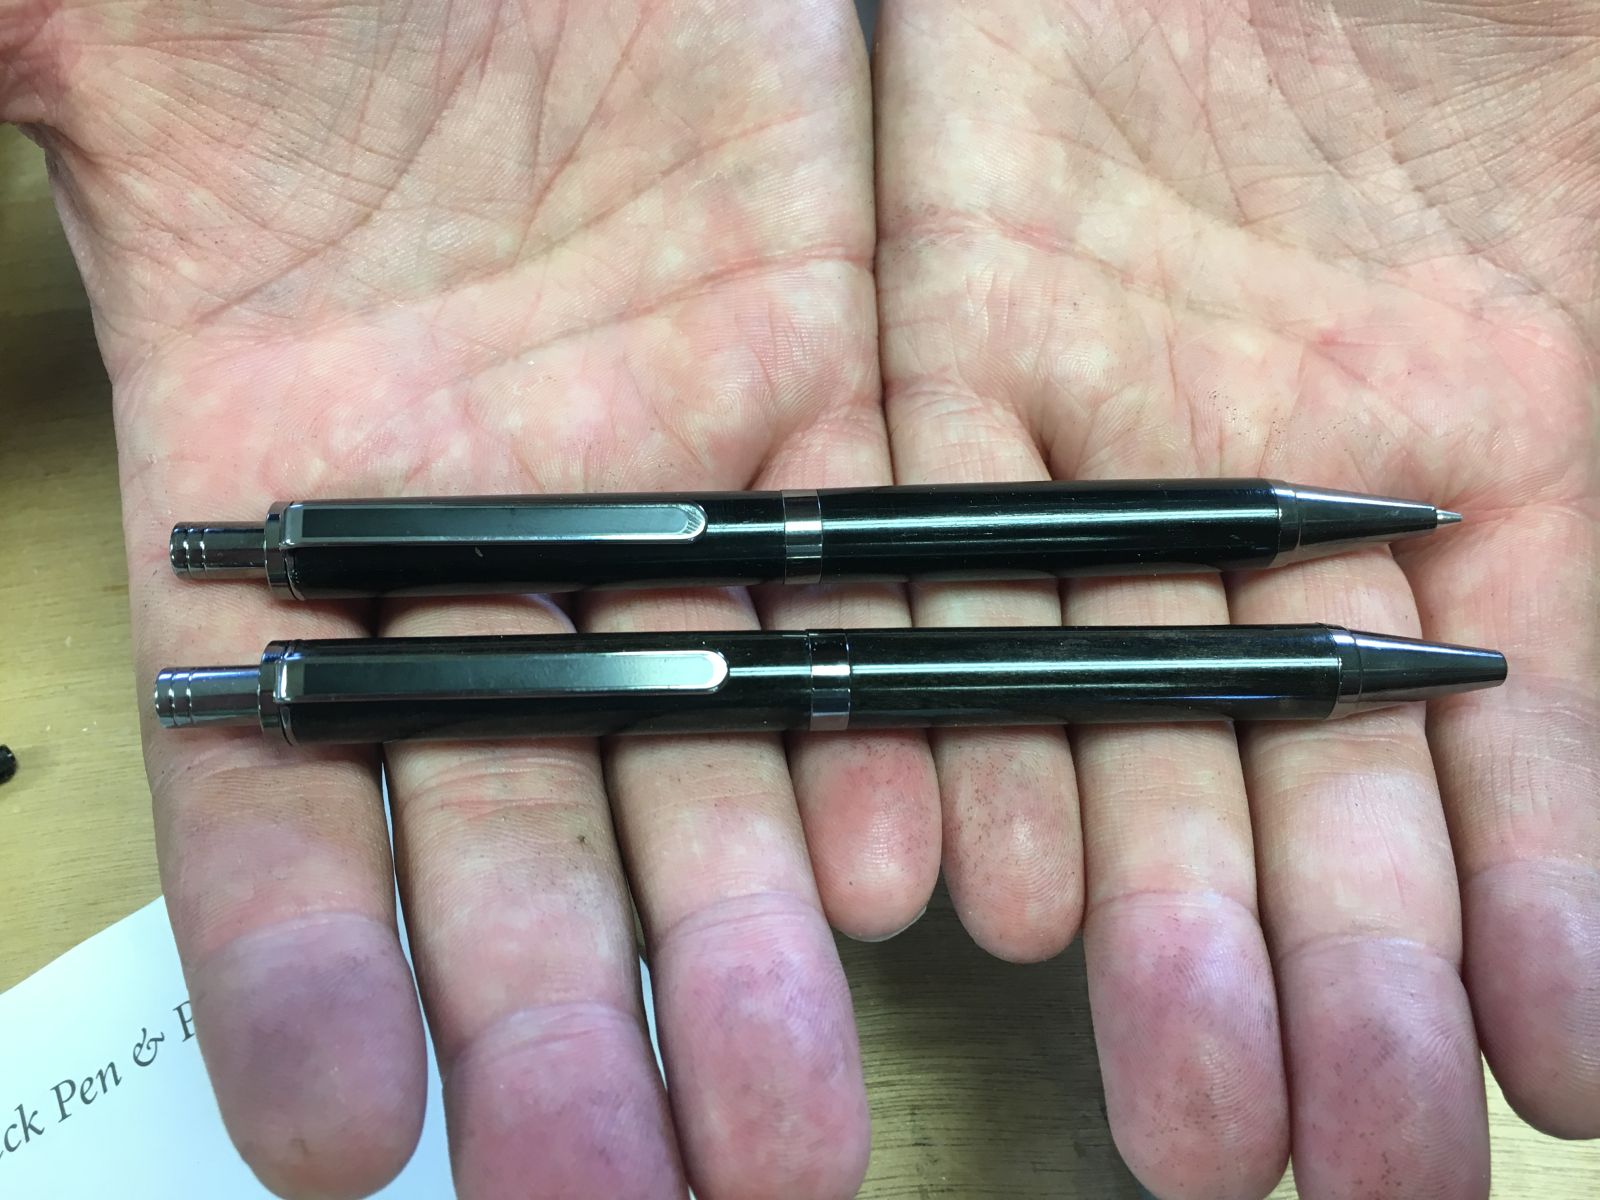
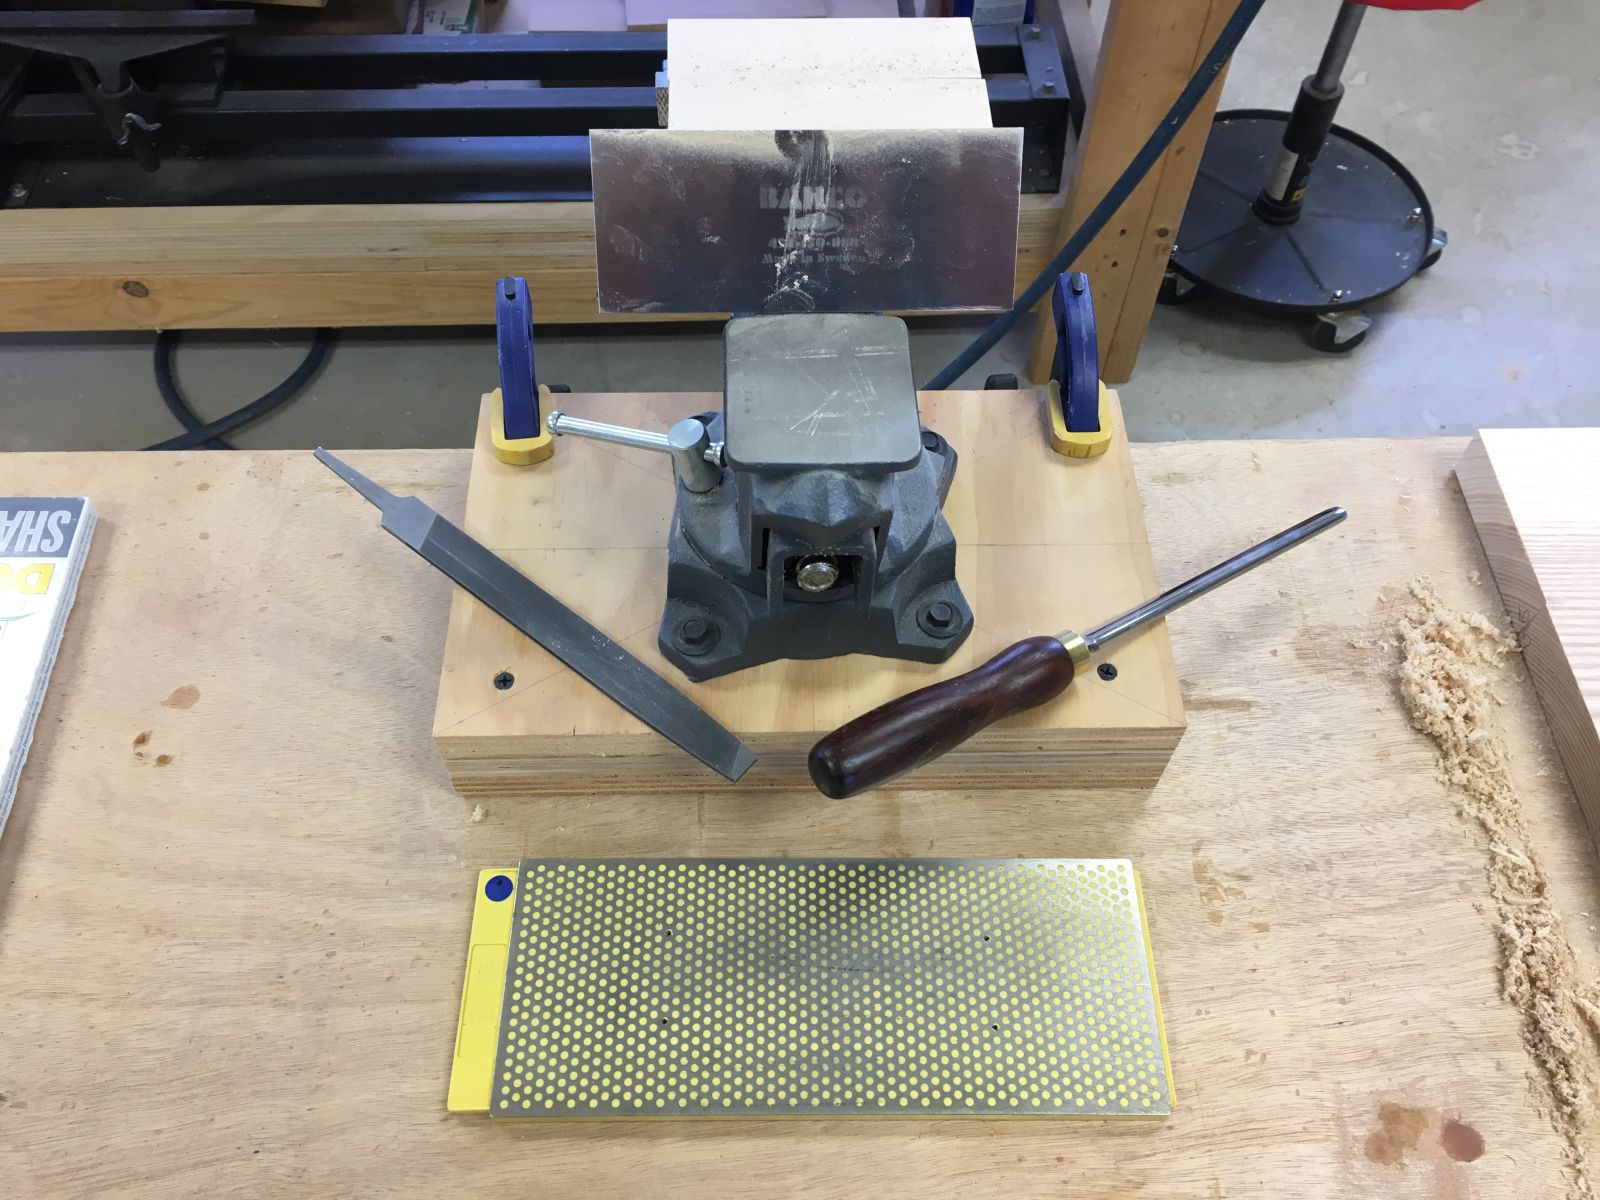
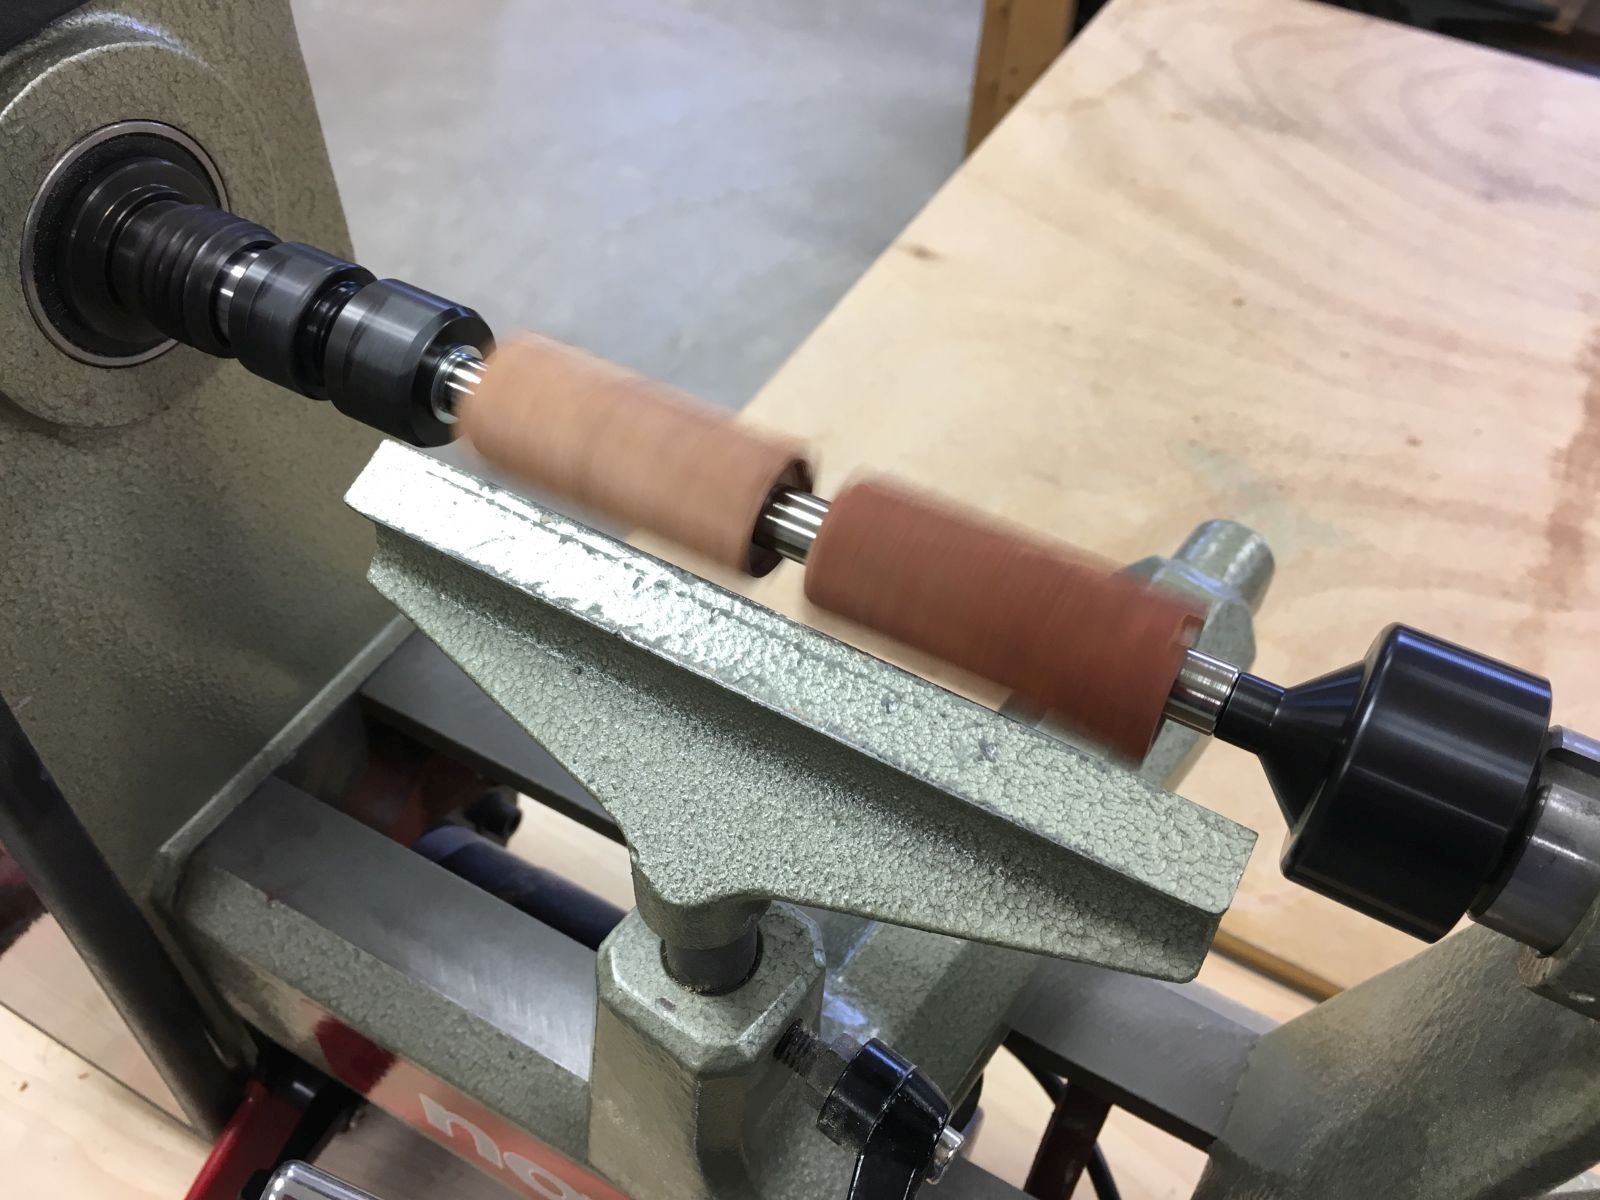
It’s been years since I’ve turned any pens. With a new Nova Comet II midi lathe, an MT2 pen mandrel and a Mandrel Saver live center, turning out beautiful pens and pencils is more enjoyable than ever. So far, all of my pen kits and supplies are from Penn State Industries (PSI), but I hope to branch out to some of the other suppliers and try their kits and supplies, too. Being frugal, and I thought it would be a fun challenge, I designed and built my own self-centering Pen Blank Vise for drilling out pen blanks on the drill press. It works well, but I also ordered a set of pen blank jaws for the Nova G3 scroll chuck, so I will probably be drilling most of my pen blanks right on the lathe. This is an ongoing project page, so check back once in a while for updates!
Gluing barrels into Brazilian Cherry blanks with CA.
This barrel trimmer is a new piece of kit for me. It works great if it’s fed slowly. I accidentally blew out the end of a cocobolo blank, but I was able to save it with CA glue and the vise.
Blanks trimmed down to the barrels.
Blanks mounted on the MT2 mandrel system, with compression provided by the Mandrel Saver in the tailstock.
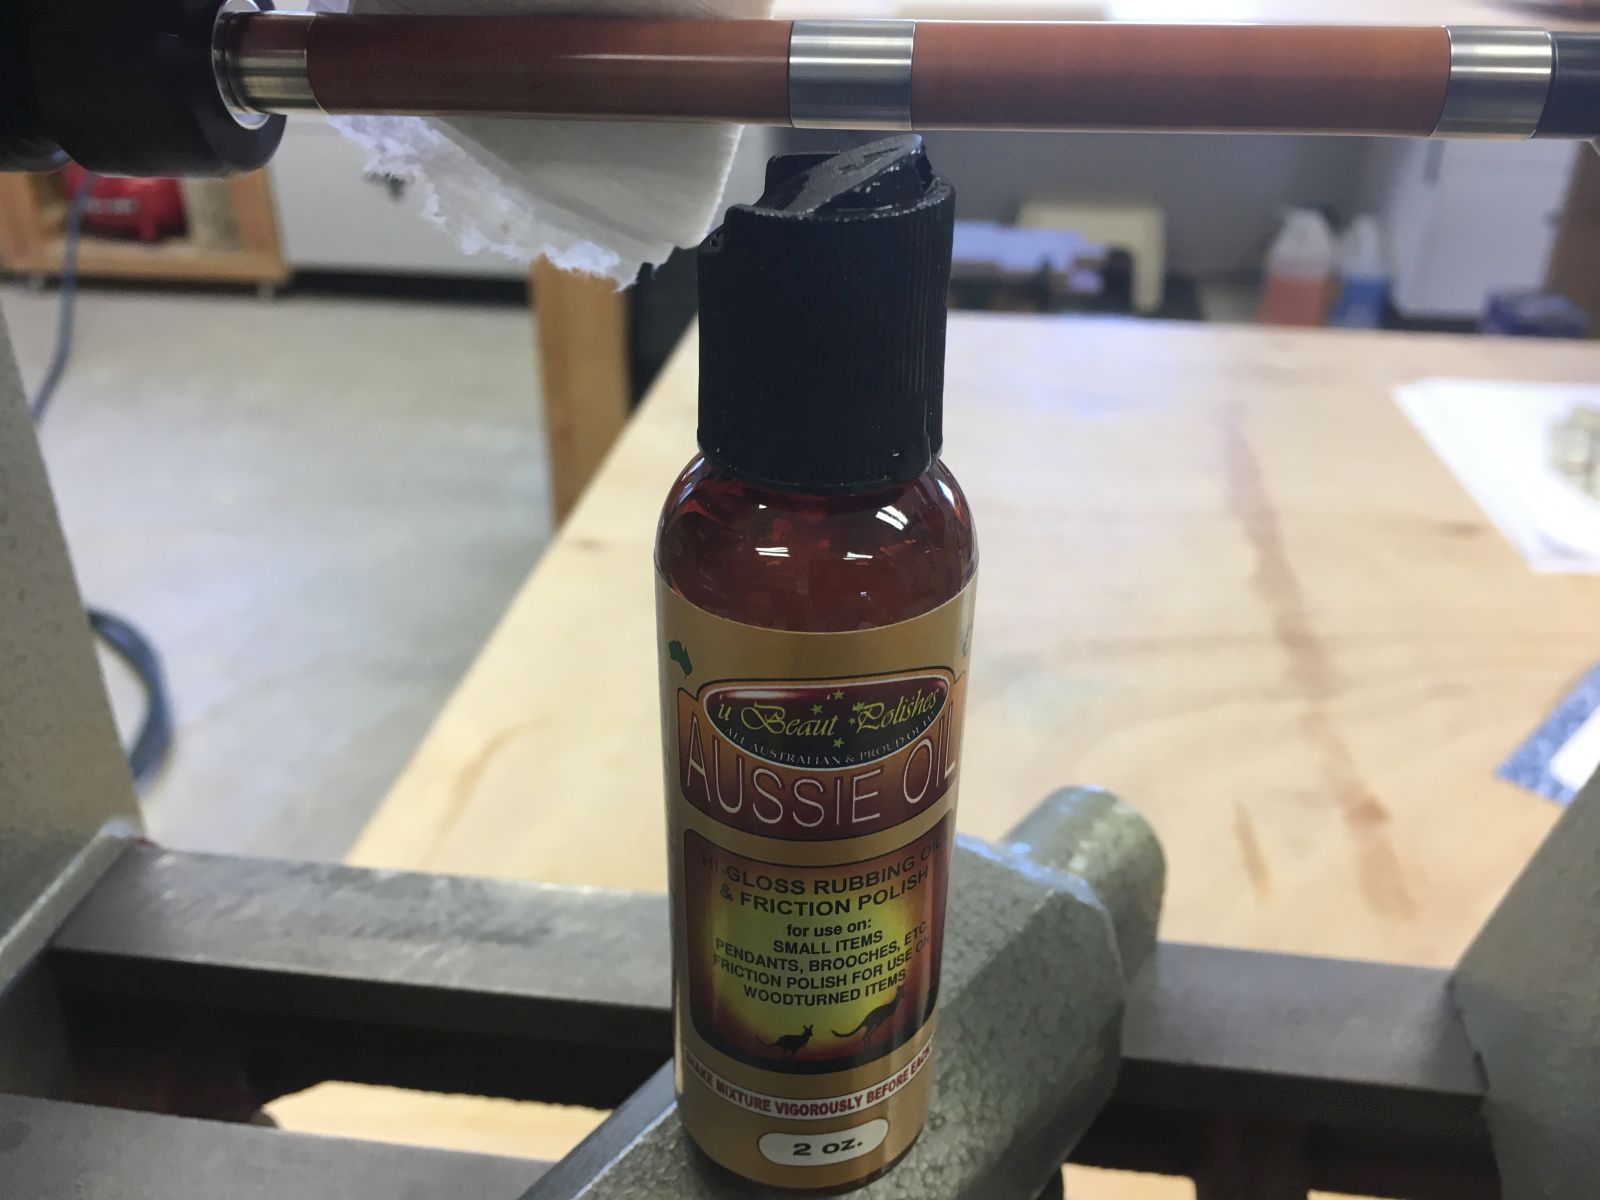
After sanding to about 1200 grit, six coats of Aussie Oil put a beautiful shine on the blanks.
My first experience with Aussie Oil, a friction finish done right on the lathe. I think it’s basically a 1:1:1 mixture of shellac, denatured alcohol and linseed oil.
Components for a Slimline Pro click pen kit.
Completed Slimline Pro click pen with Brazilian Cherry barrels and an Antique Brass finish.
Walnut blanks from a log my brother gave me several years ago.
Finished walnut barrels.
Completed Slimline Pro click pen with walnut barrels and an Antique Brass finish.
Finished barrels from a special piece of cocobolo.
Completed 5mm Sketch Pencil with cocobolo barrels and a Chrome finish. This kit uses a fat 5mm lead.
Cross cutting Brazilian Cherry blanks to length for a couple of pen and pencil sets.
Blanks drilled and ready for CA gluing in the Slimline Pro barrels. I appreciate how the barrels are coming from PSI already roughed up, eliminating the need to hand sand each of them for better adhesion.
Aligning my home made pen blank drilling vise with a length of 1/2 brass rod.
Drilling the pen blanks with an 8mm brad point bit.
The 8mm brad point bit produces a very clean bore in this Brazilian Cherry.
Making a Brazilian Cherry pen and pencil set for Linda’s Mother’s Day, I realized that the SlimLine Pro has both pen and pencil kits, so I wouldn’t have needed to buy two pen kits and a pencil conversion kit
Finished barrels setting up over night
Second set of barrels setting up on the lathe
Lots of pieces from the kits to keep straight
My woodworking vise has worked great for assembly so far
SlimLine Pro 24kt Gold Pen and (converted) Pencil set
Pen and Pencil set tip details
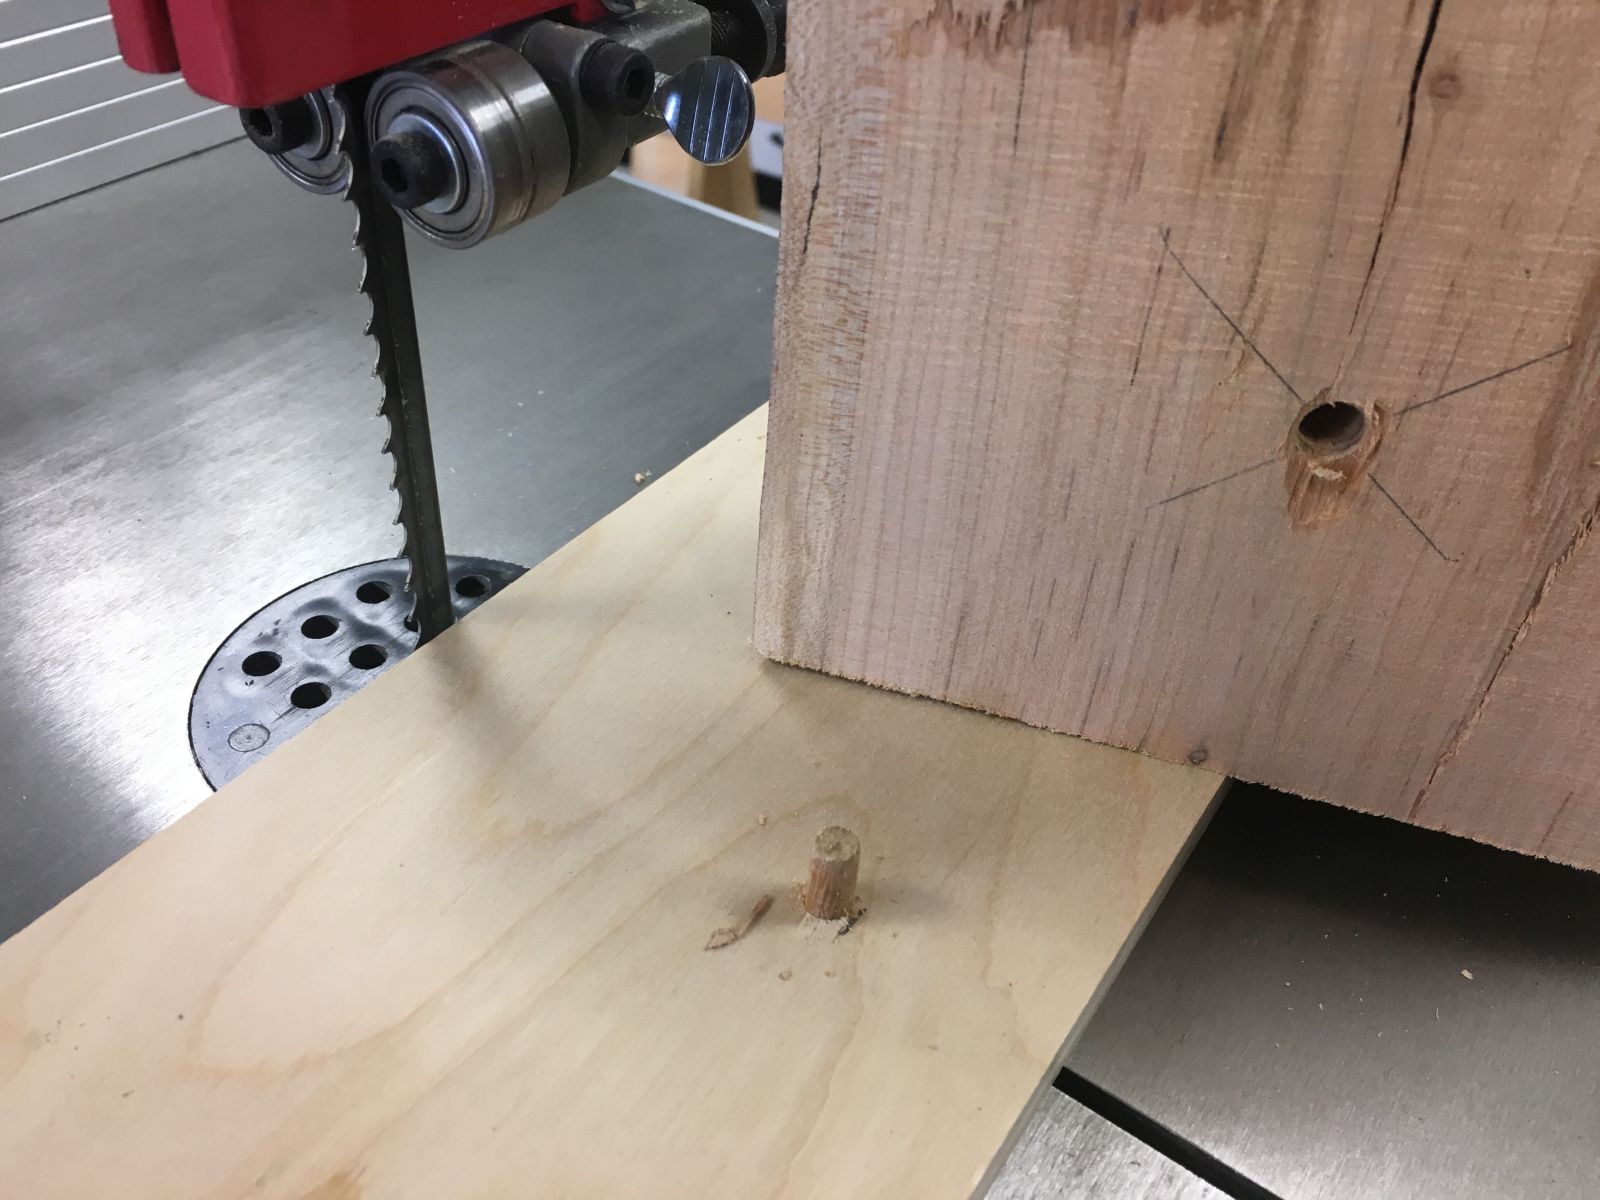
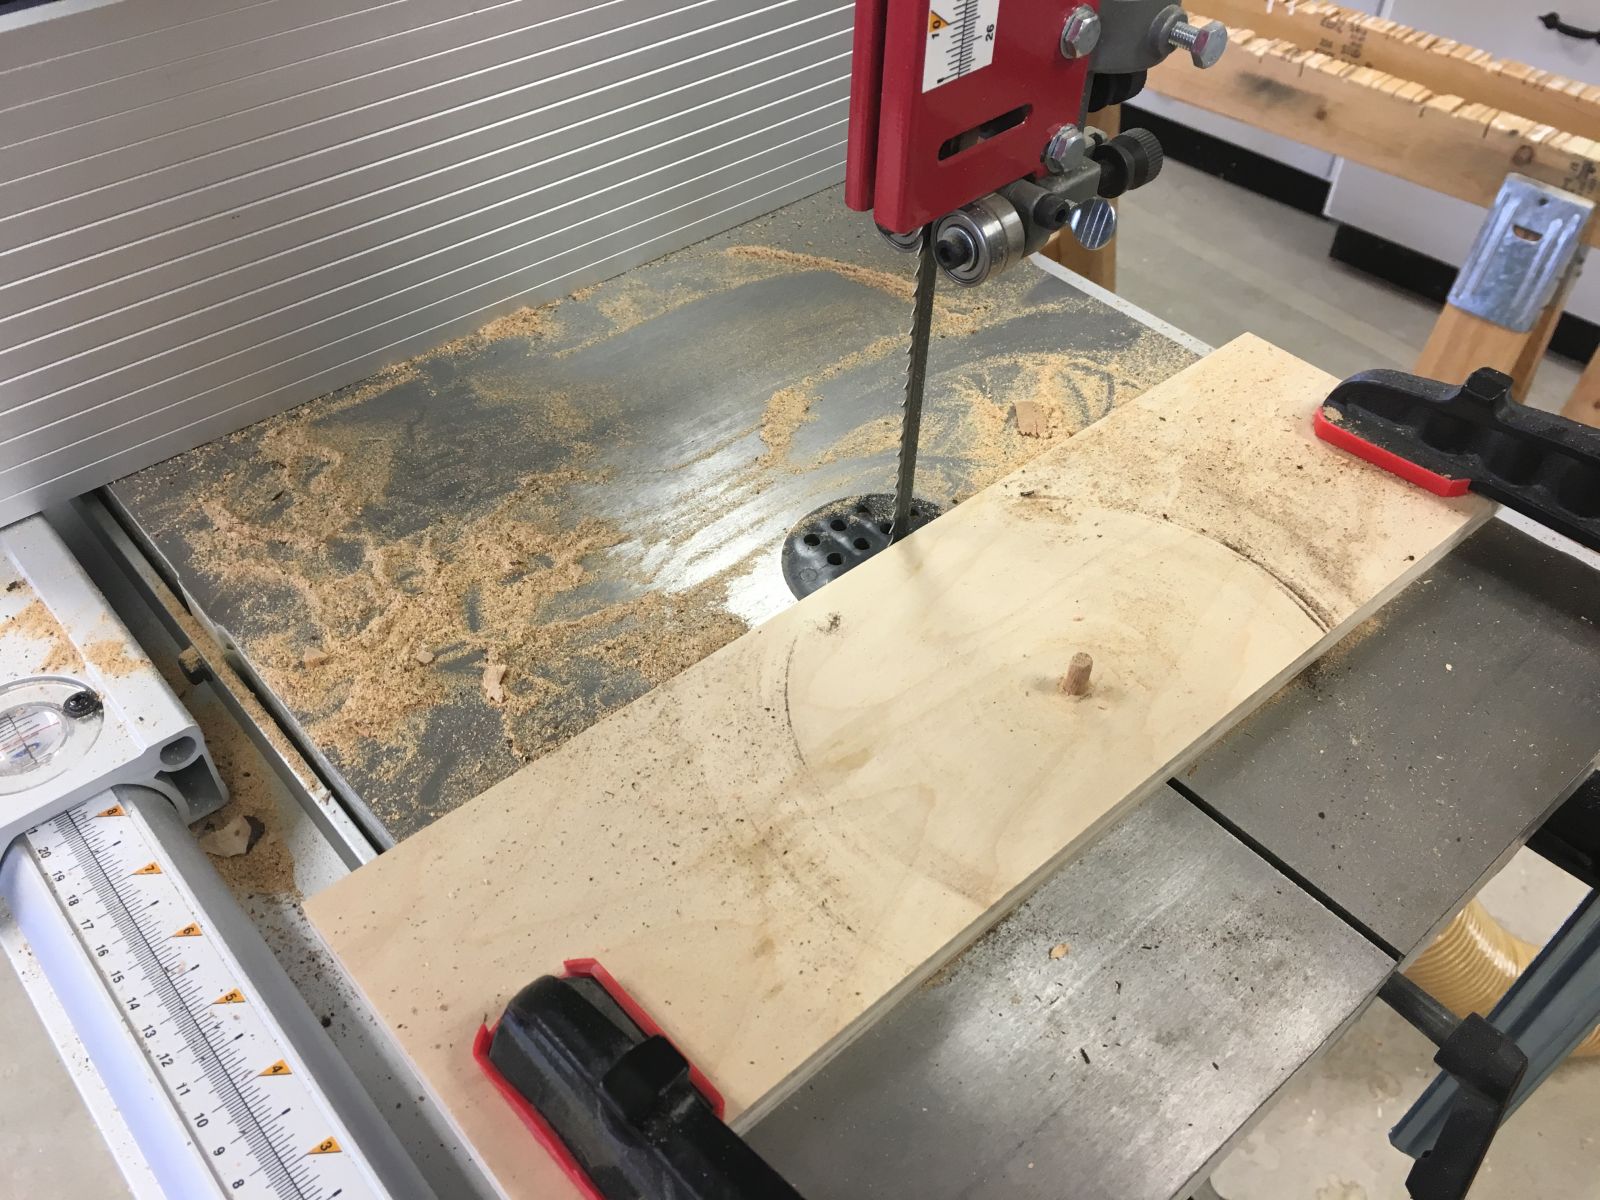
A DIY jig makes cutting 3/4″ x 3/4″ pen blanks safe and efficient
Drilling pen blanks on the lathe with pen blank jaws mounted on the G3 scroll chuck
An 8mm brad point bit in the drill chuck mounted in the tailstock
The barrel insertion tool ended up being more trouble than it was worth
Trimming pen blanks with the carbide barrel trimmer mounted in the tailstock of the lathe
Ebony pen bodies ready for sanding and finishing
A sharp roughing gouge and a light touch produce pen bodies ready for sanding
Dust collector positioned to capture ultra fine sanding dust from micro mesh sanding pads
Ebony and gold pen and pencil set completed
Ebony and titanium pen completed
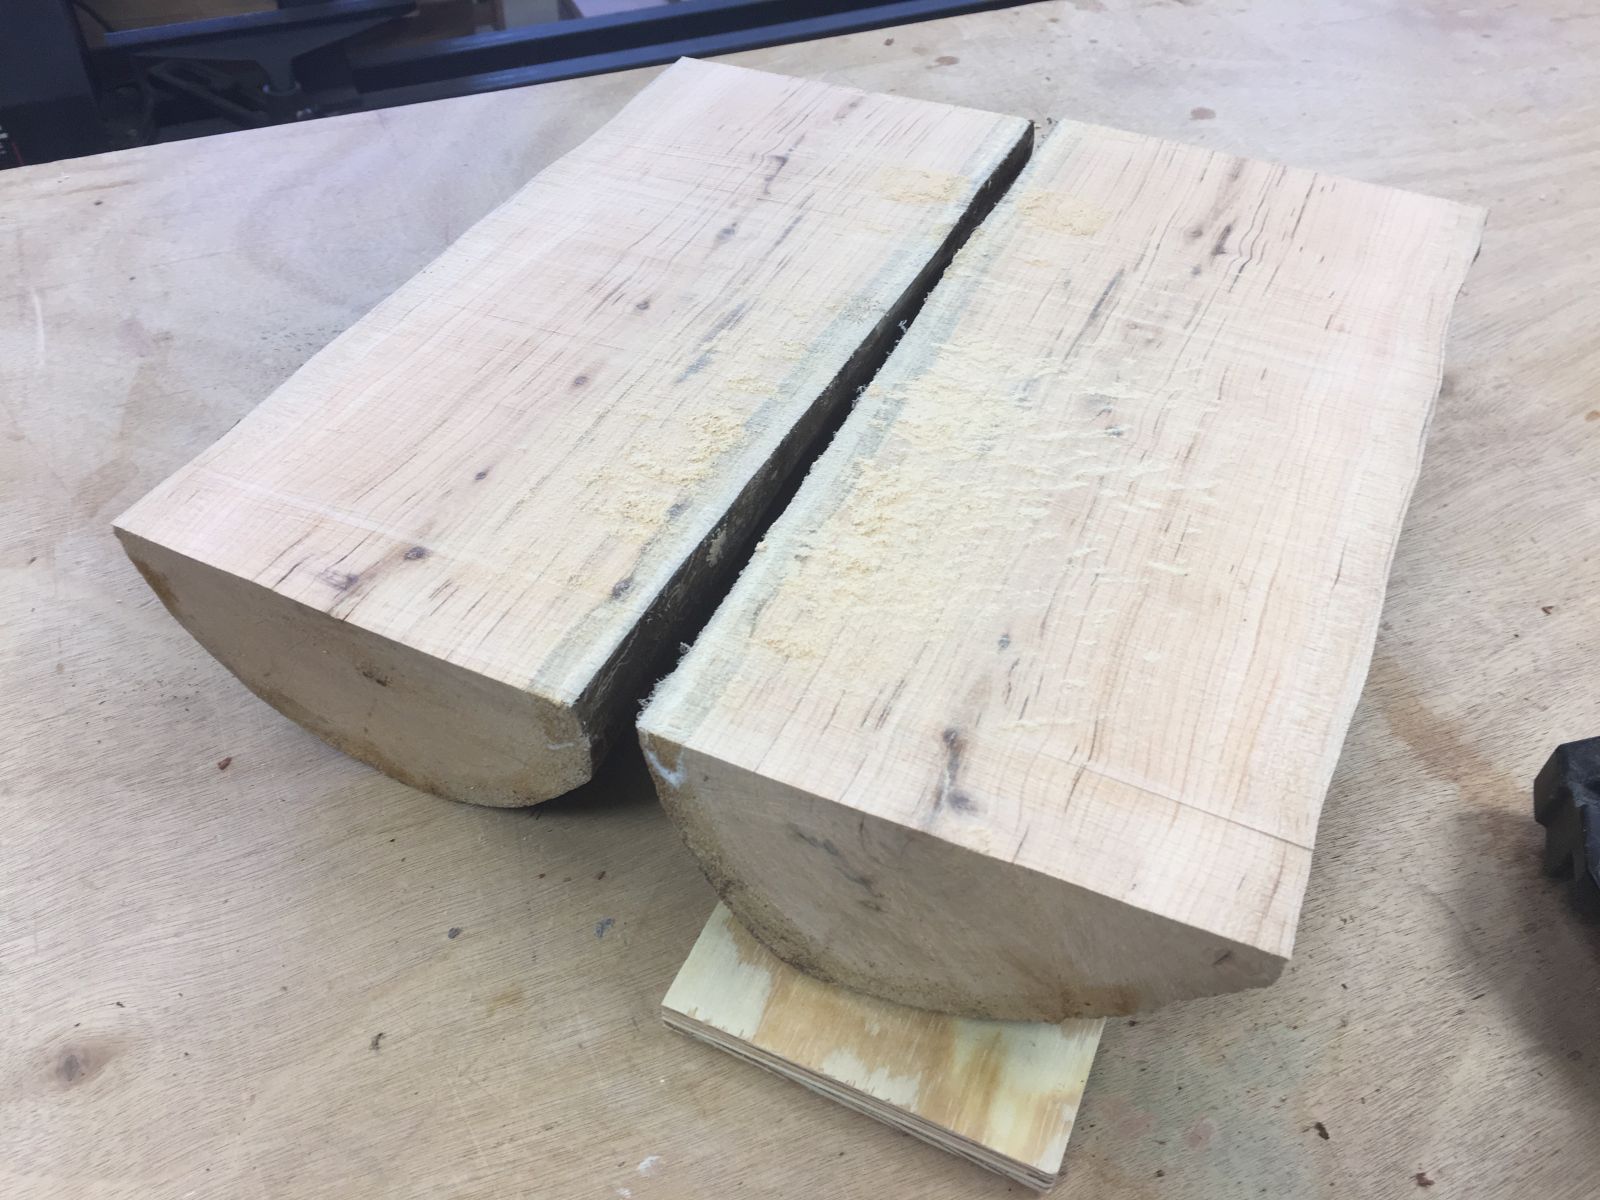
Batching pen blanks from zebrawood, Brazilian cherry, and a sample of finger-jointed maple
Cutting pen blanks to length with the Incra miter gage and stop block set up
Pen blank sets marked to maintain grain orientation
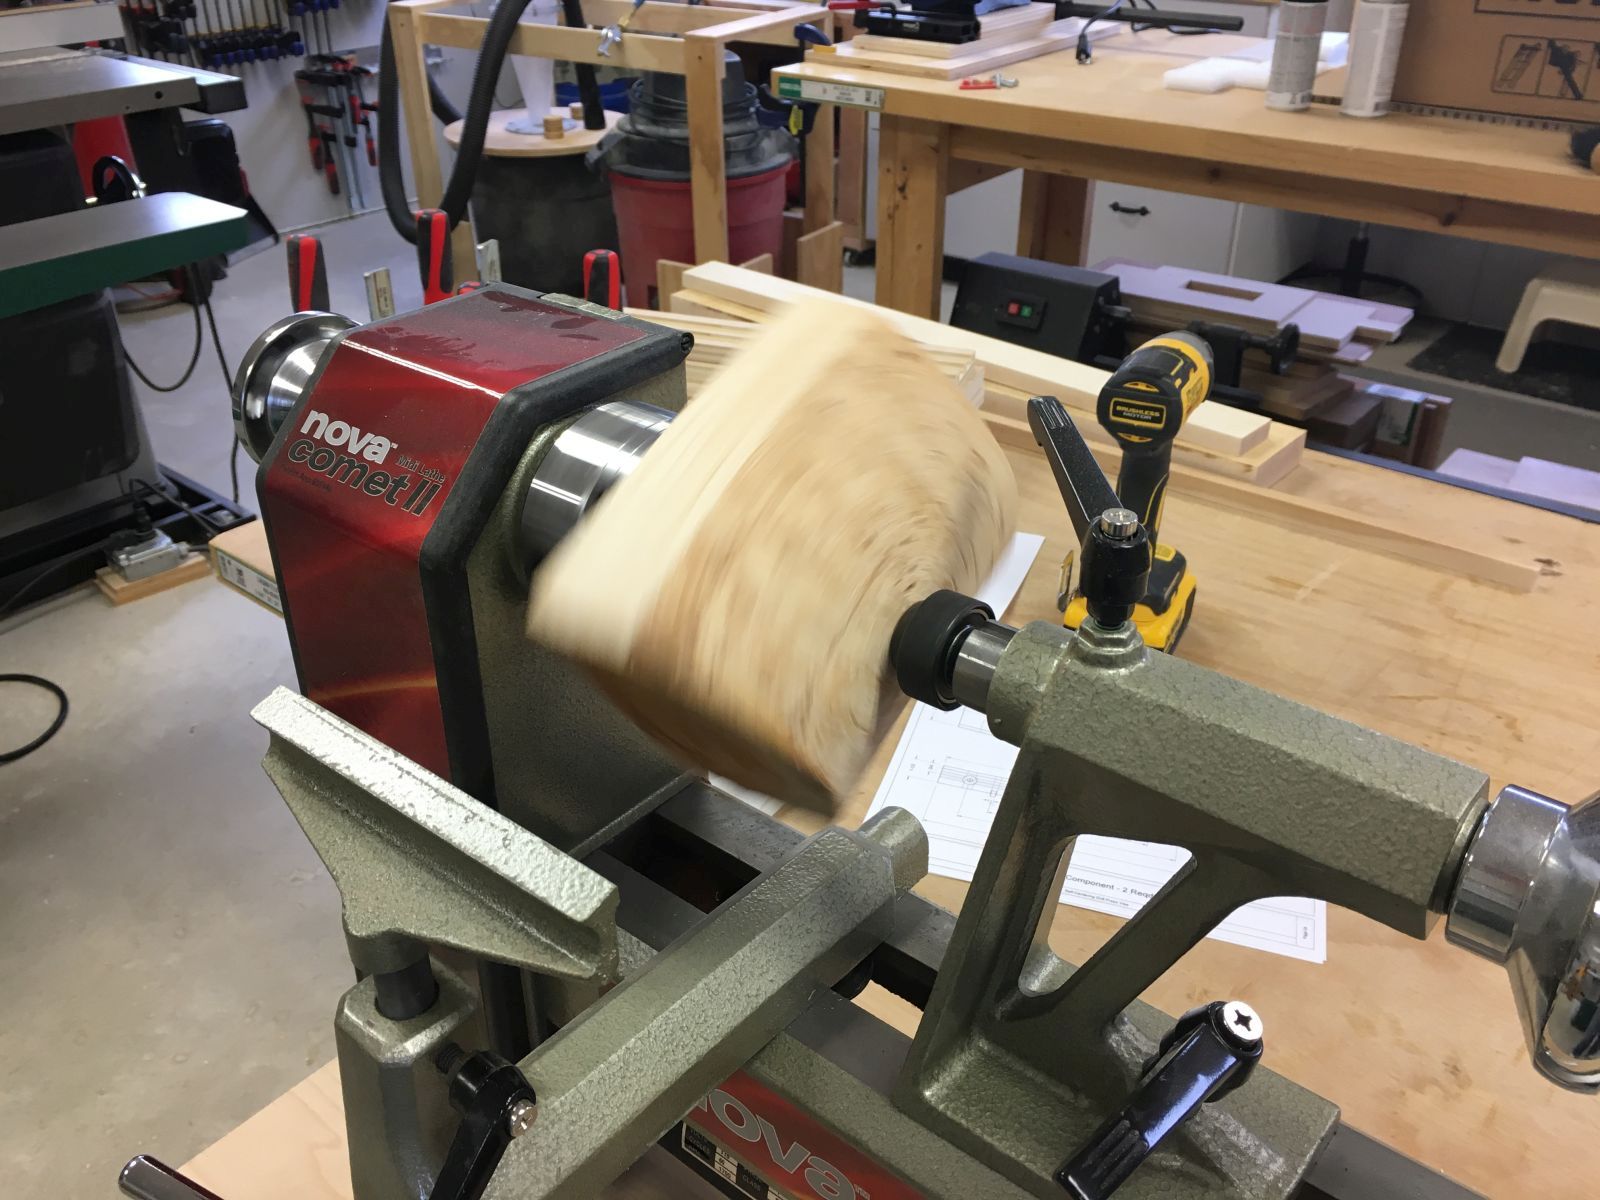
Drilling a zebrawood pen blank on the lathe
Ready to glue in a batch of brass tubes
Watching for tiny brass shavings on the barrel trimmer indicates the proper depth of trimming
A trimmed maple blank in the pen blank jaws
A satisfying pile of chips after roughing several pan blank sets
Another set ready for sanding and finishing, with other sets in the background
Wiping on six coats of Aussie Oil friction finish
Six sets of finished pen barrel sets ready for assembly
Three projects in the shop at one time
Pen kit finishes selected for each wood species
The wood working vise works well for pen assembly
Maple and Antique Brass click pen
Maple pen showing finger jointing in gift box
Brazilian cherry and titanium click pen and pencil set
Brazilian cherry set in gift box
Zebrawood and gold click pen and pencil set
Zebrawood set in gift box
Three birthday gifts, ready to go
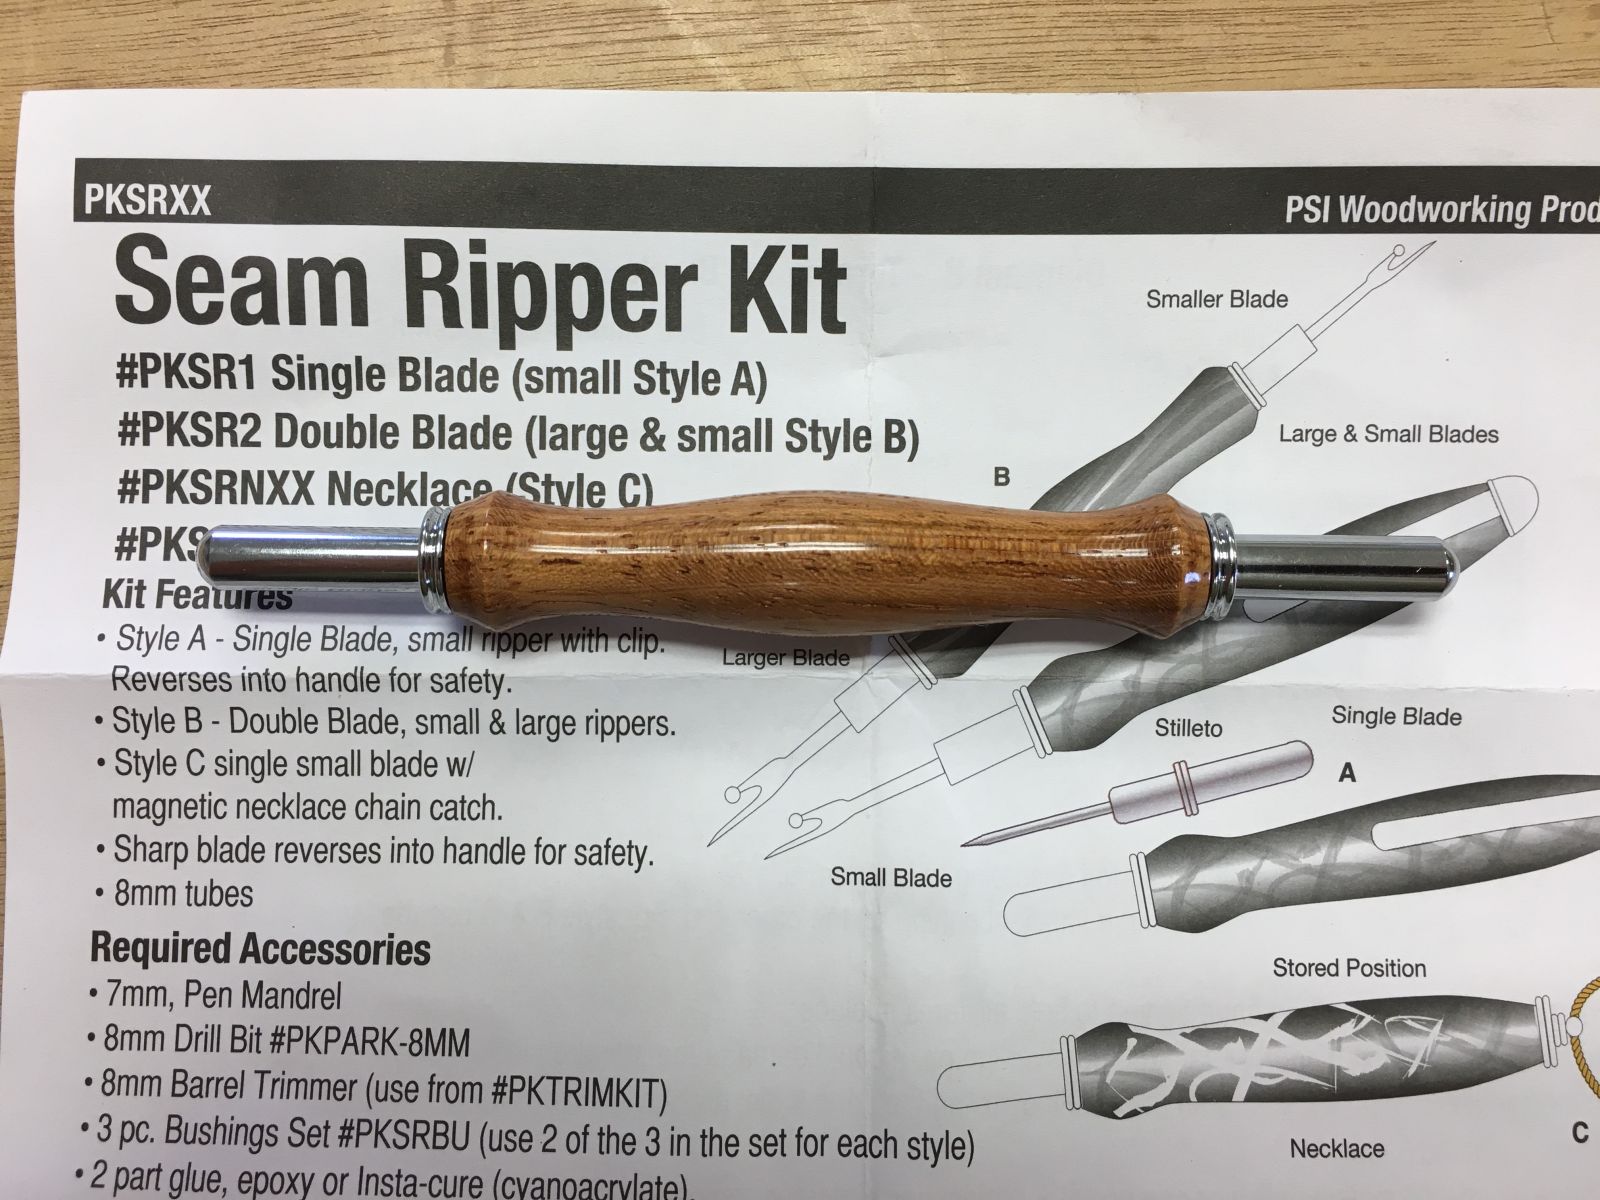
Brazilian Cherry blank for a Seam Ripper Kit
Sanding steps with dust collection in place
Final sanding is glossy, even before any finish applications
Seam Ripper body finished with six coats of Aussie Oil
Double-ended Seam Ripper Kit with seam ripper and stiletto ends
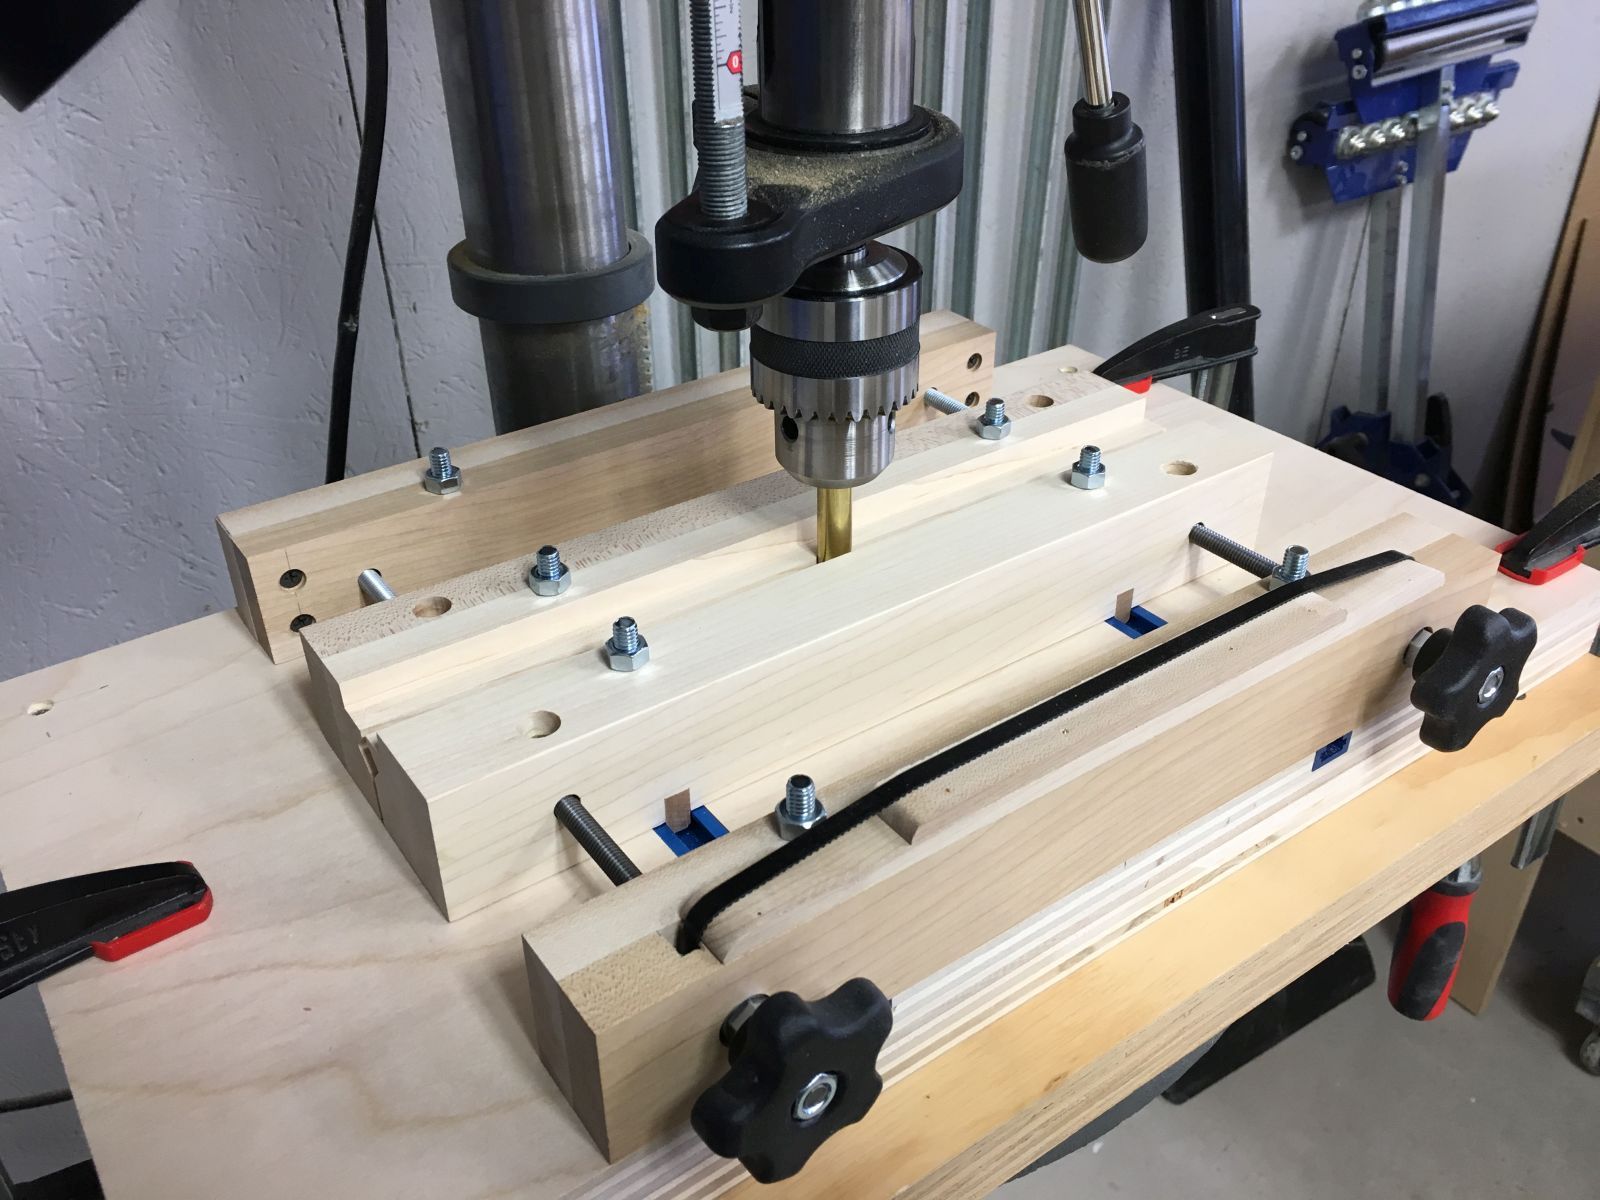
This self-centering drill press vise design is inspired by the components of traditional woodworking hand screw clamps. The entire vise will “float” to clamp onto a drill rod clamped in the drill press chuck. Once the jaws are centered, the base will be clamped to the drill press table. Subsequent pen blanks or other stock clamped in the vertical V-groove in the jaws should be centered on the drill press chuck.
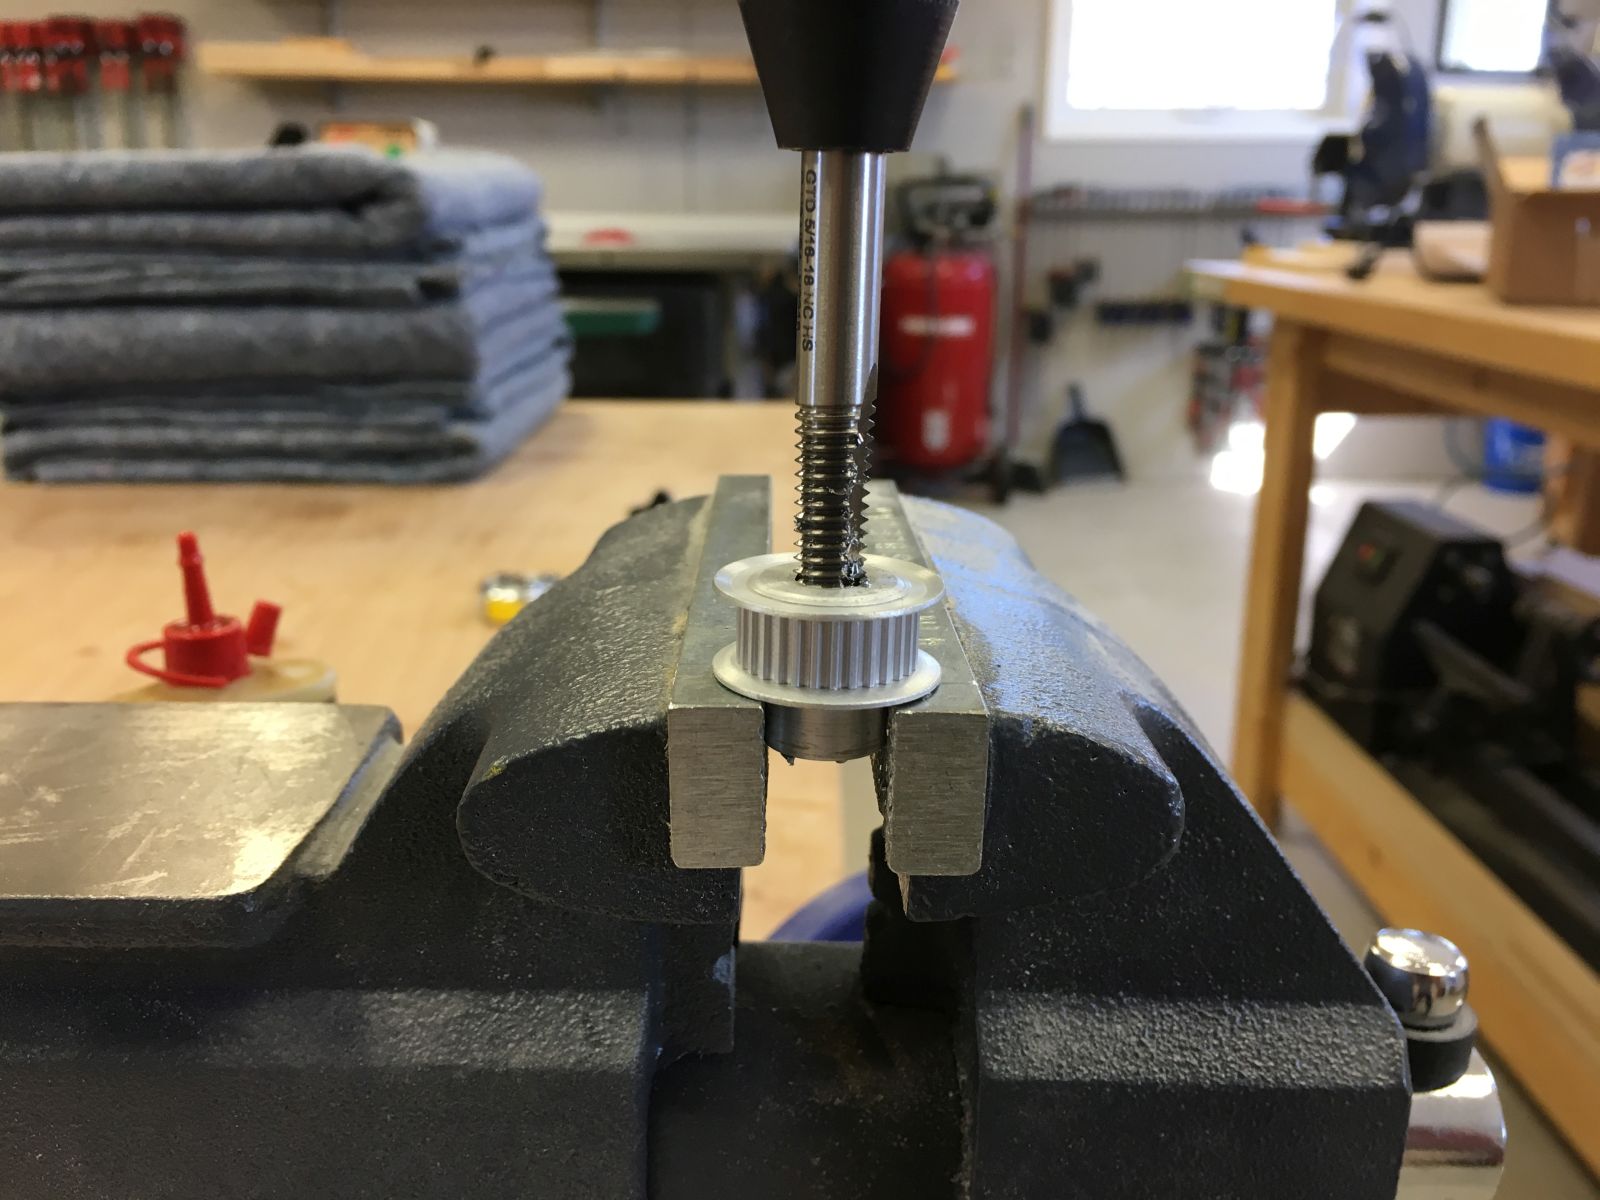
To couple RH and LH threaded rods, aluminum bushings were drilled and tapped with 5/16-18 RH and LH threads, and then a wrench flat was milled on the side.
Timing belt pulleys were also drilled and tapped with 5/16-18 RH threads.
Determining the center-to-center distance to accommodate the timing belt proved to be difficult, as I blew it and had to buy a slightly larger belt and compensate for the additional length.
The center-to-center distance looked okay in a mockup, but an updated design should include a belt tensioning feature.
Hard maple for Timing Belt Anchor Block and Rear Anchor Block.
Self Centering Pen Blank Vise shop drawings.
Gluing up hard maple stock for vise jaws.
Threaded Rod Assembly details.
Cutting the RH threaded rod to length with a hacksaw.
First iteration of RH – LH threaded rod couplers.
Home made aluminum threaded rod couplers.
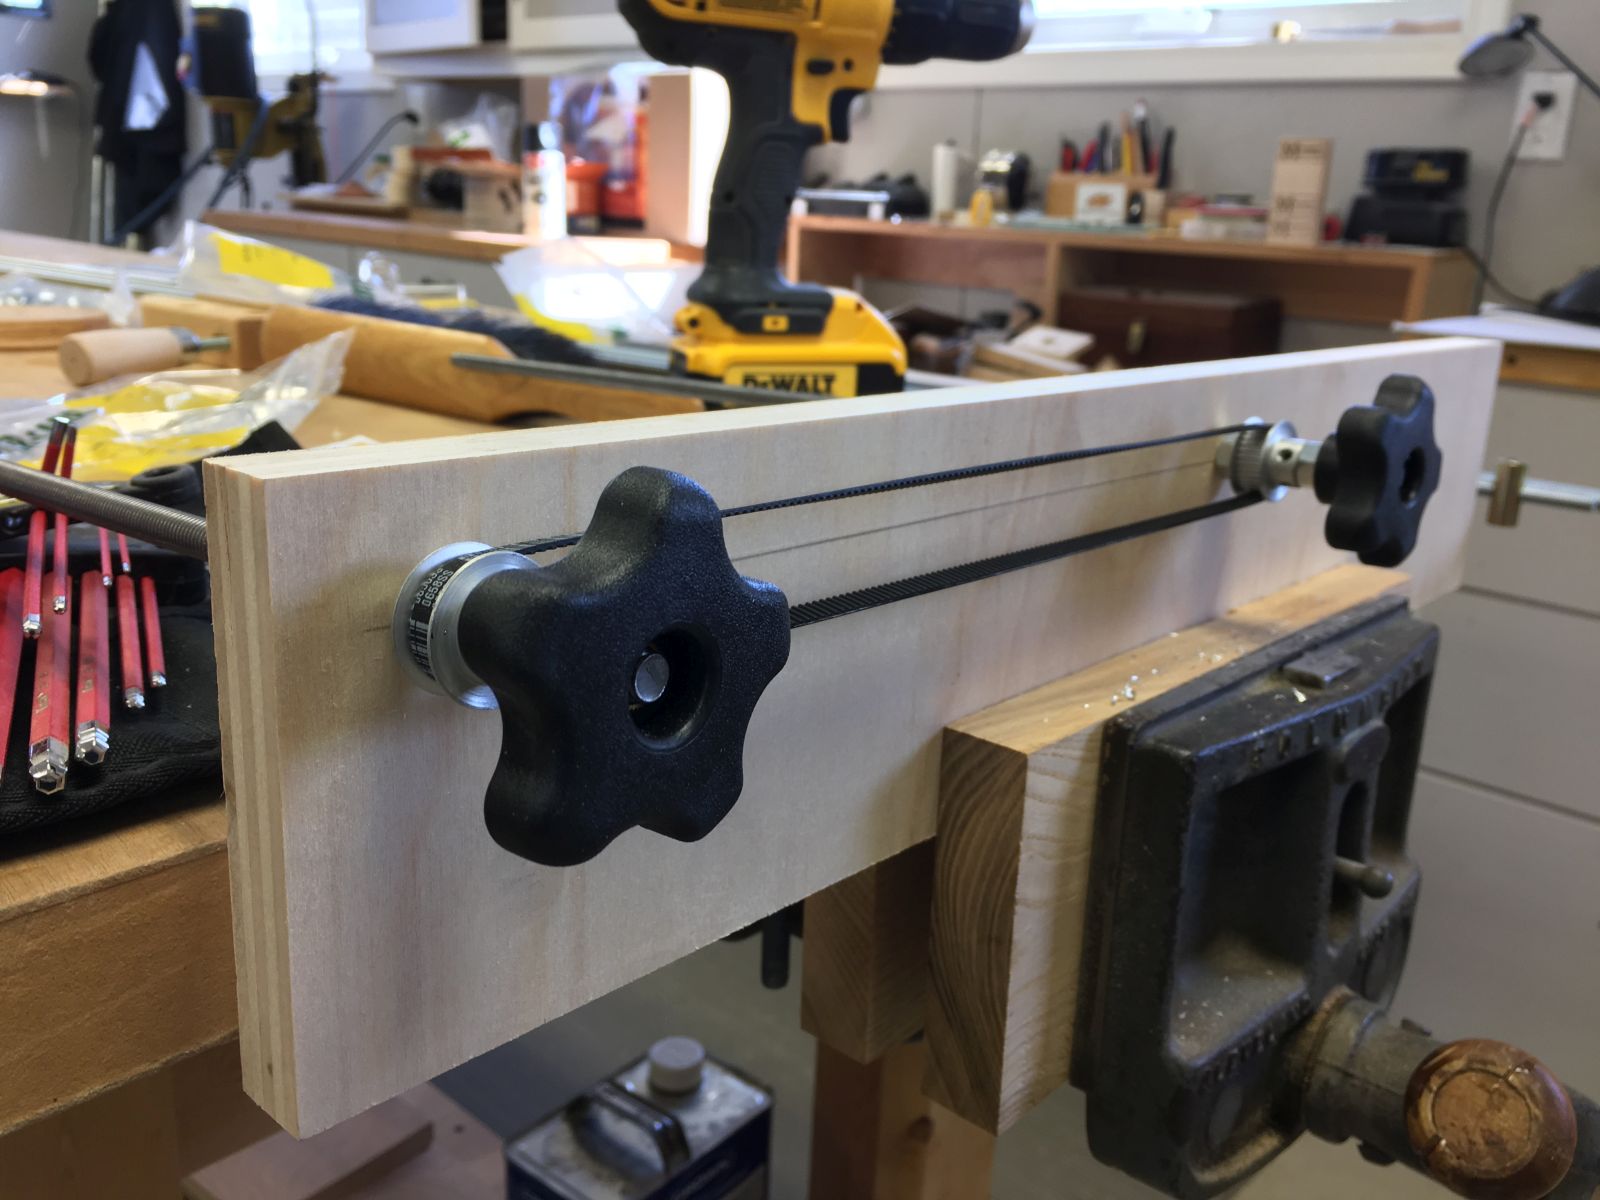
It’s beginning to look a lot like … the design!
Basic layout of components.
The wooden hand screw clamp that inspired this vise design.
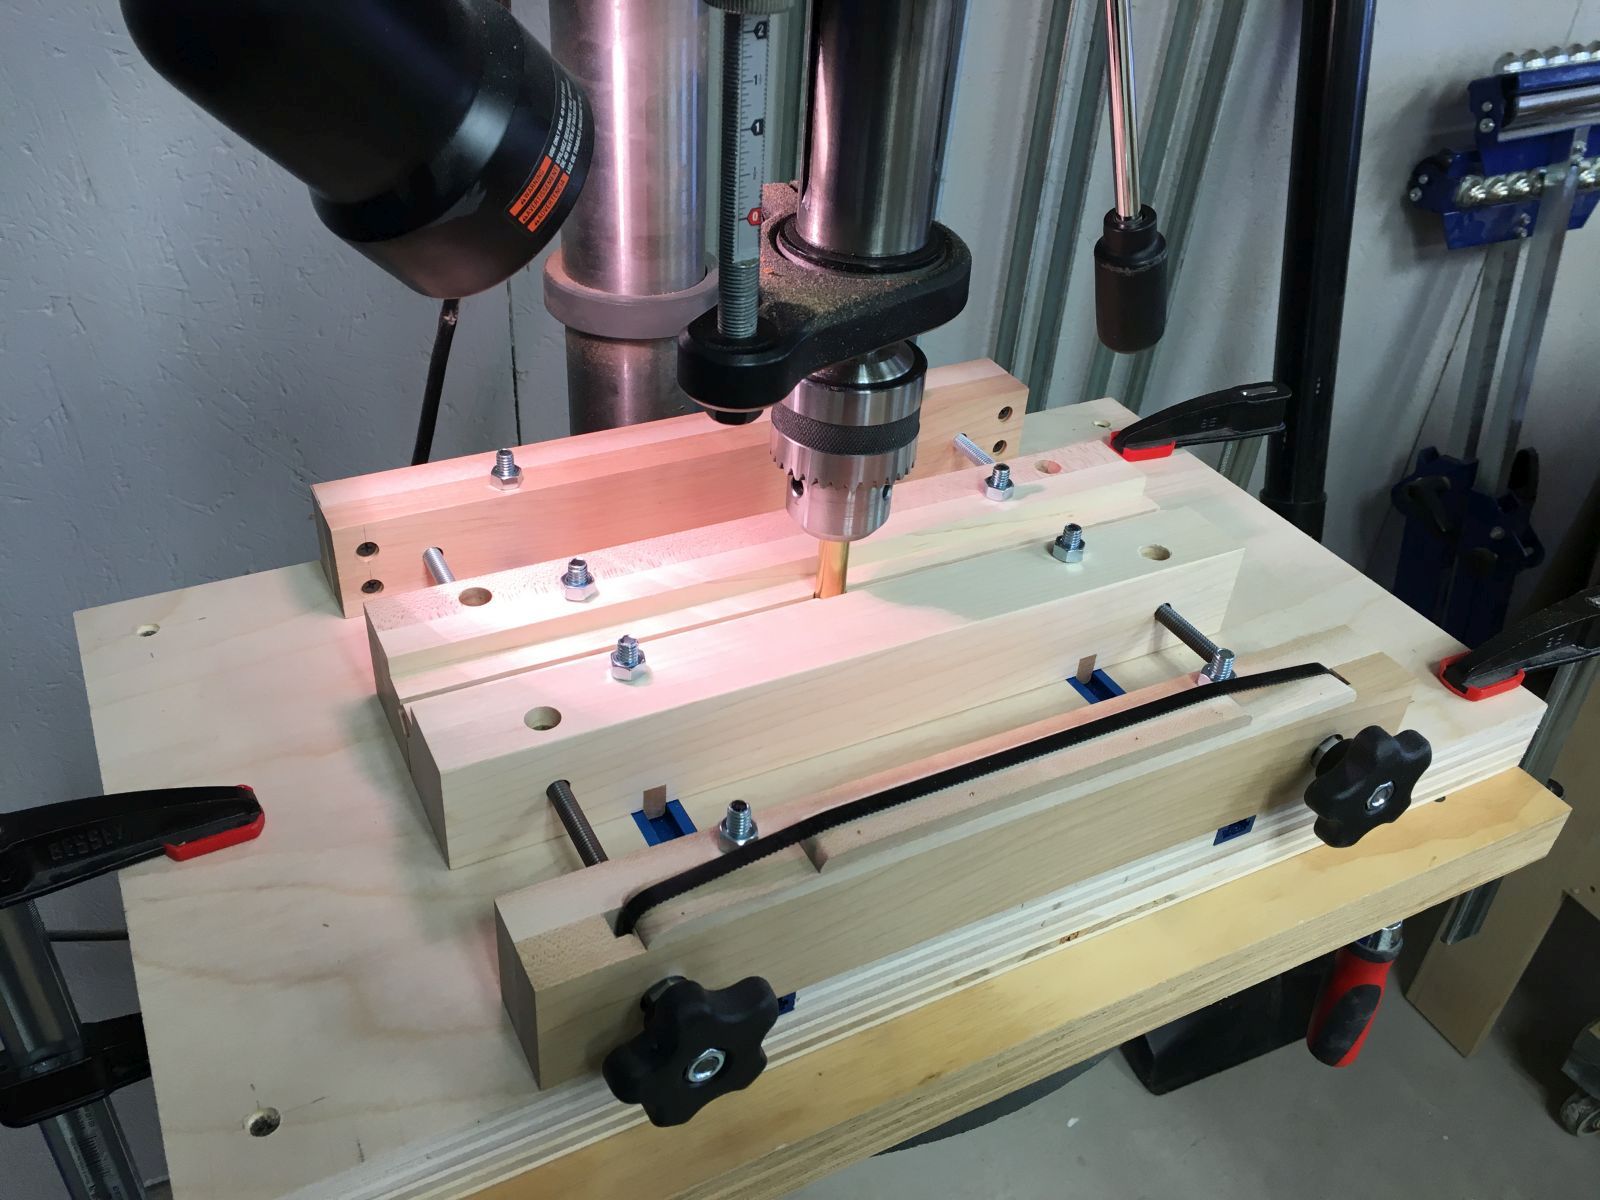
Most of the machining on the jaws and anchor blocks was done on the drill press. The jaws were completed on the table saw.
Forming the cavity which will house the timing belt and pulleys.
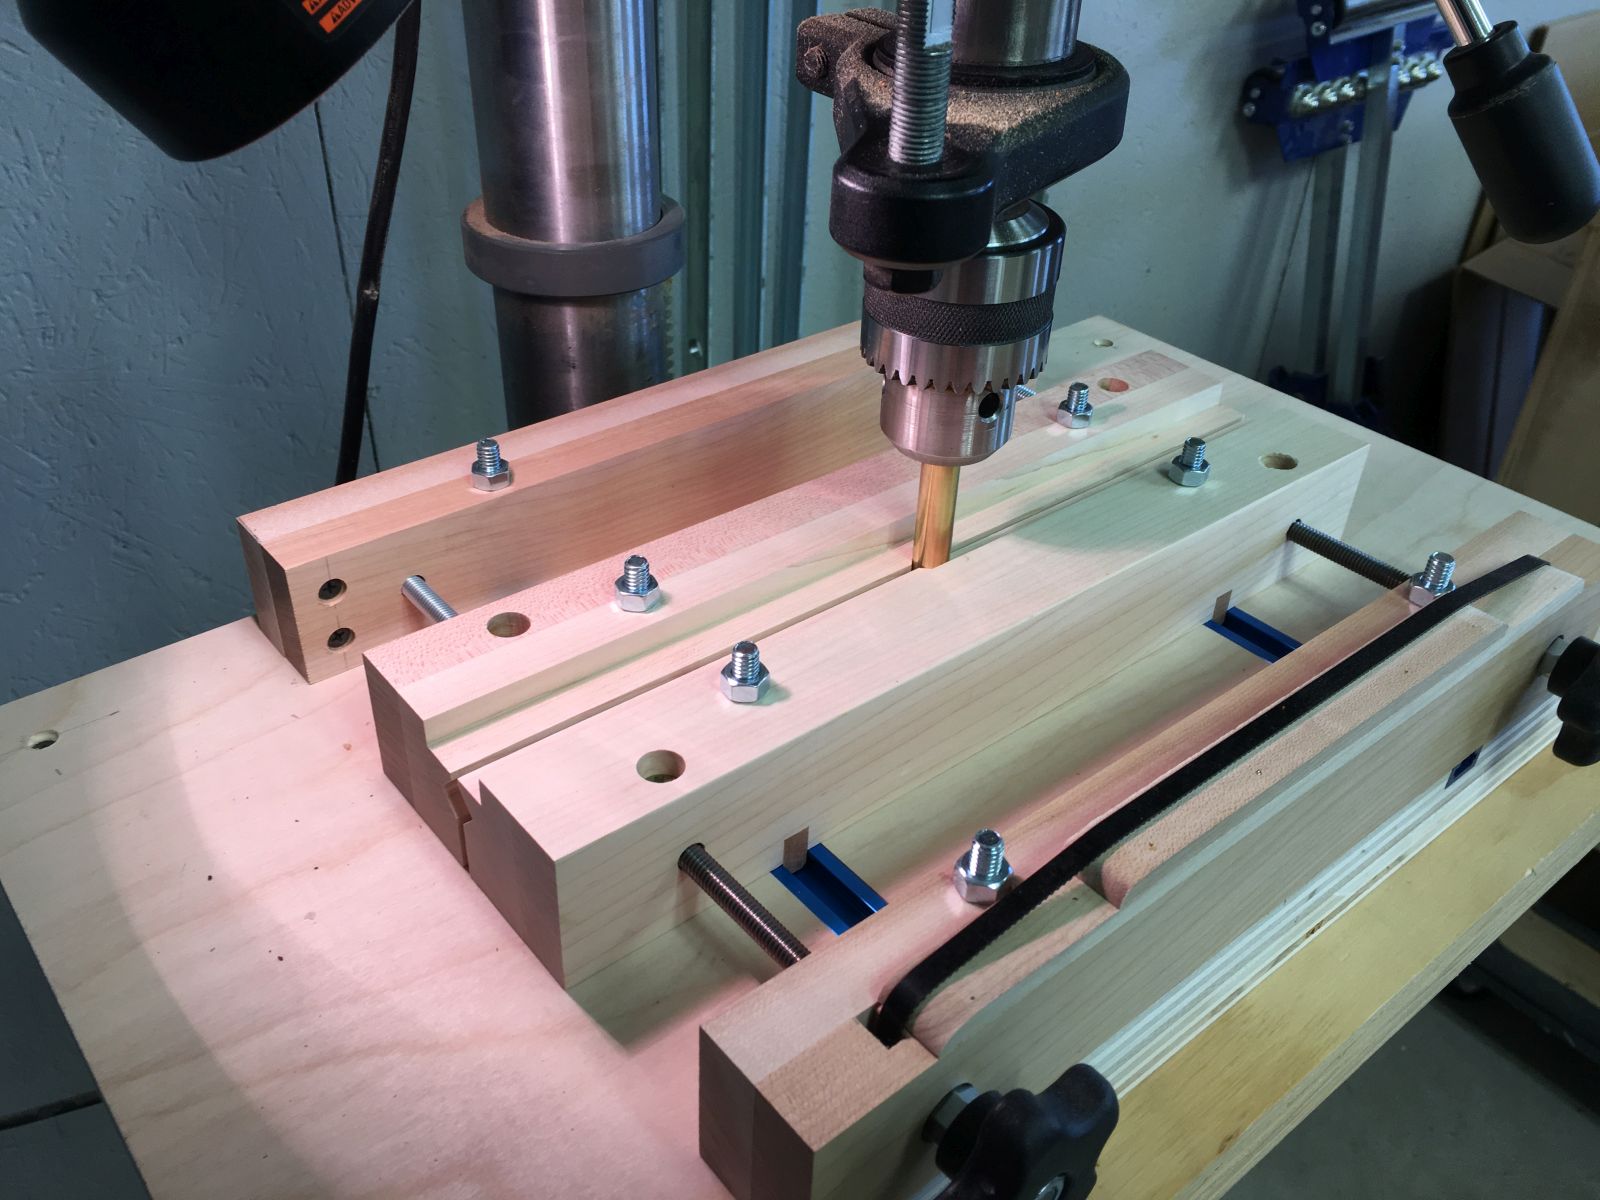
Test drilling a 3/4 x 3/4 maple pen blank with an 8mm brad point drill bit.
Successfully drilled hole centered on the square blank.
The vise maintained the centerline, while the piece was incremented manually.
Testing the parallel feature cut into the vise jaws.
A spring steel card scraper was used to clean up and level the glue joints.
Glued up field is ready for squaring up and forming a centered 3/8 tenon on each end.
The trickiest thing about using a card scraper is rolling over a proper cutting burr with a burnishing tool. I’m still perfecting this skill.
A 1/2 inch brass rod chucked in the drill press aligns the vise jaws. Once aligned, the entire mechanism is clamped to the drill press table.
Center drilling a Brazilian Cherry pen blank.
A new 8mm brad point drill bit cuts cleanly using a peck drilling technique to clear chips from deep in the blank.
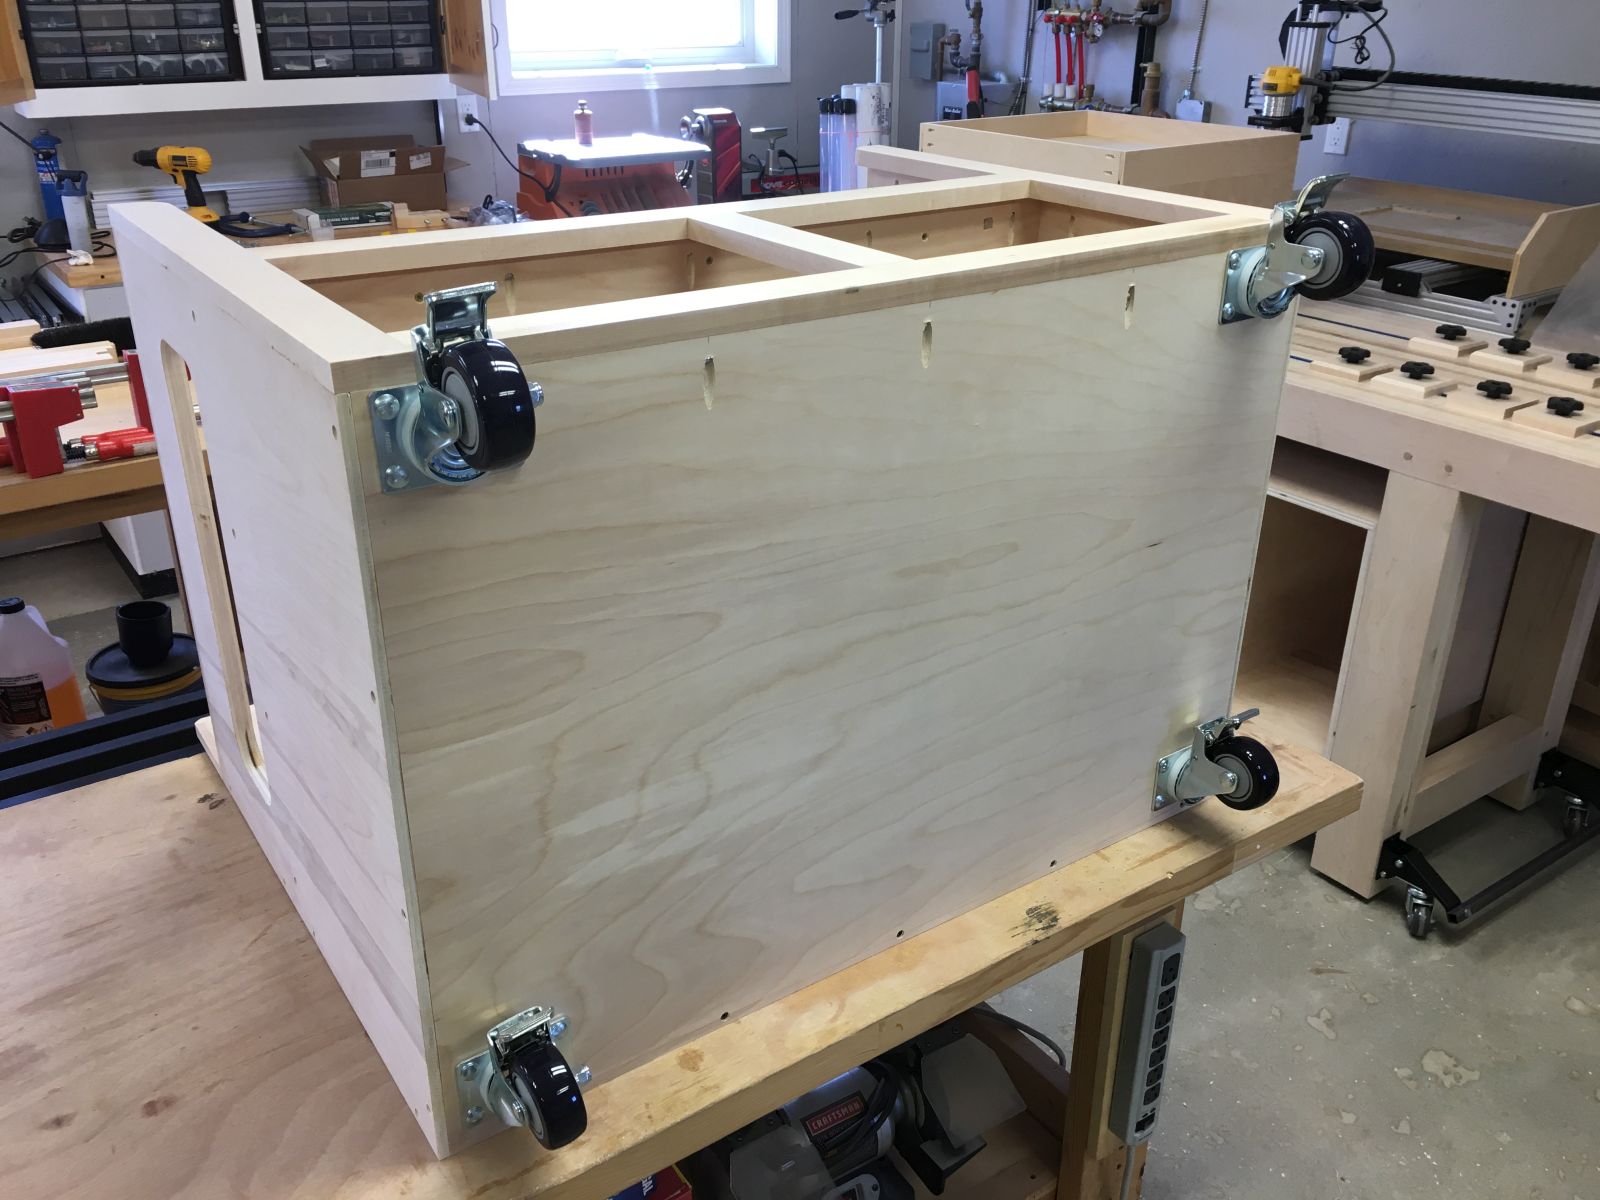
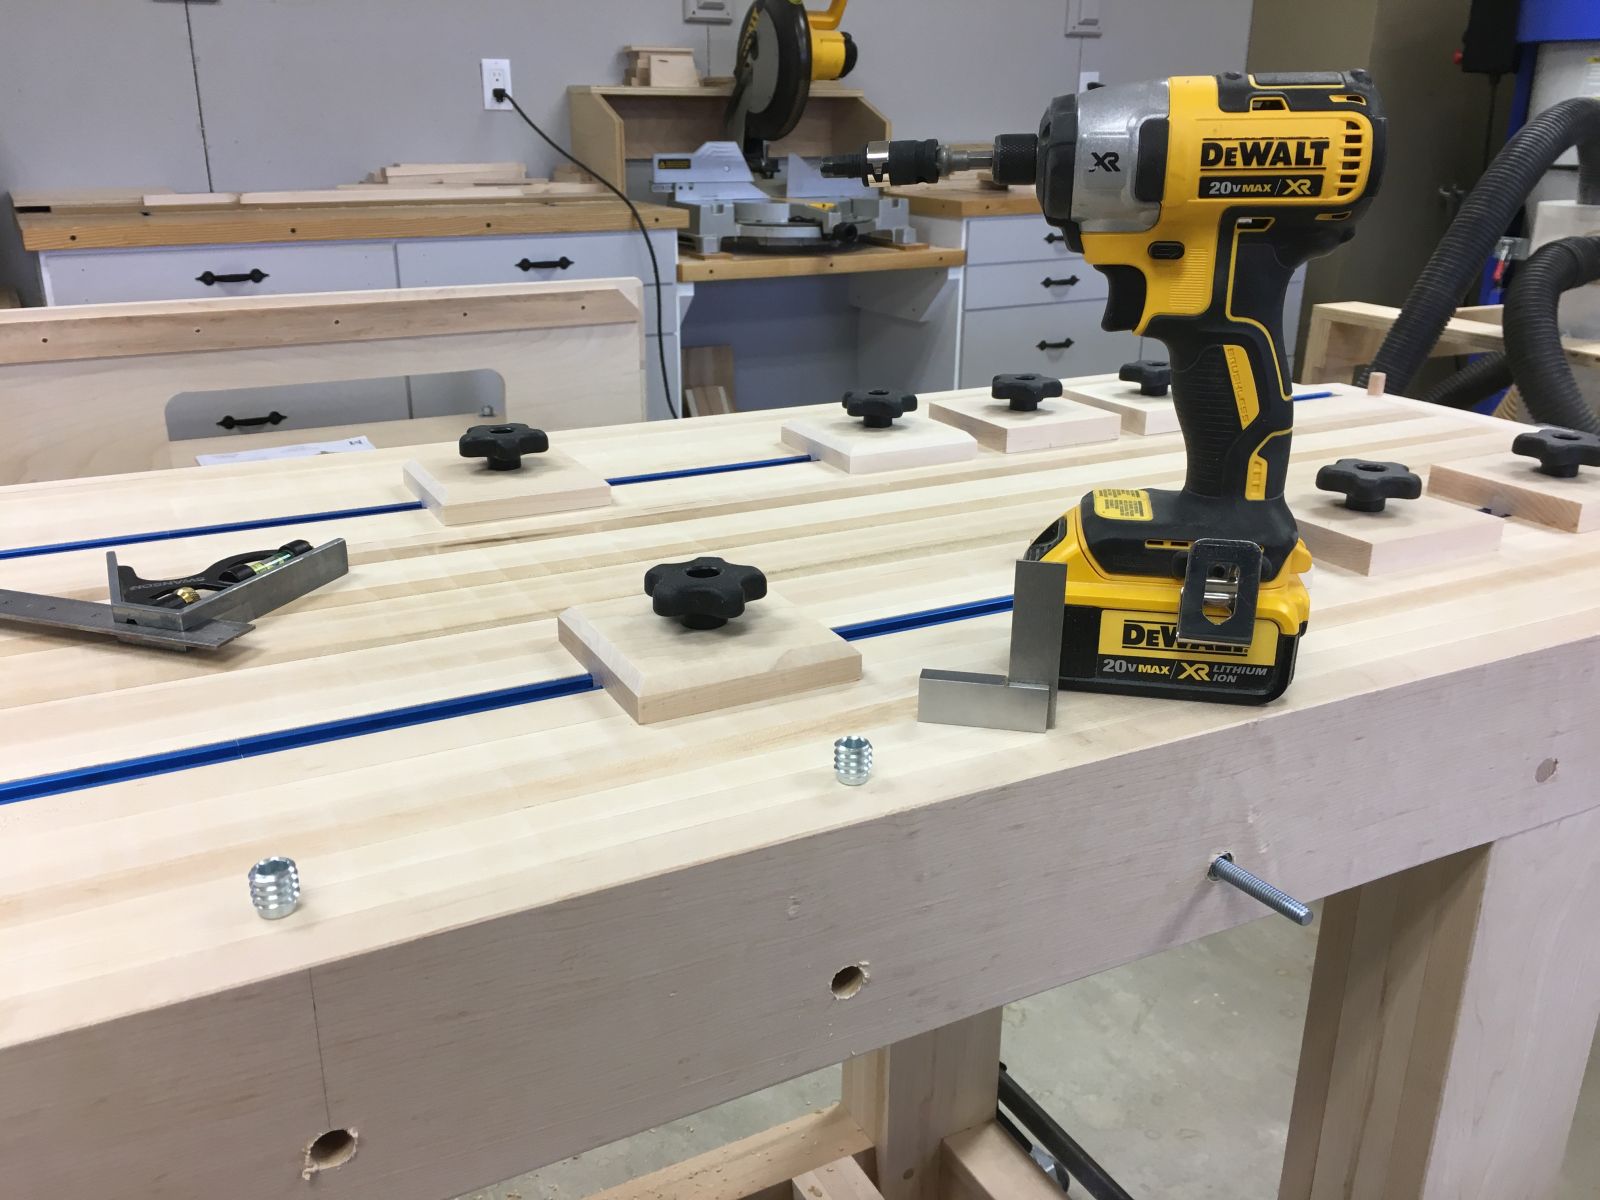
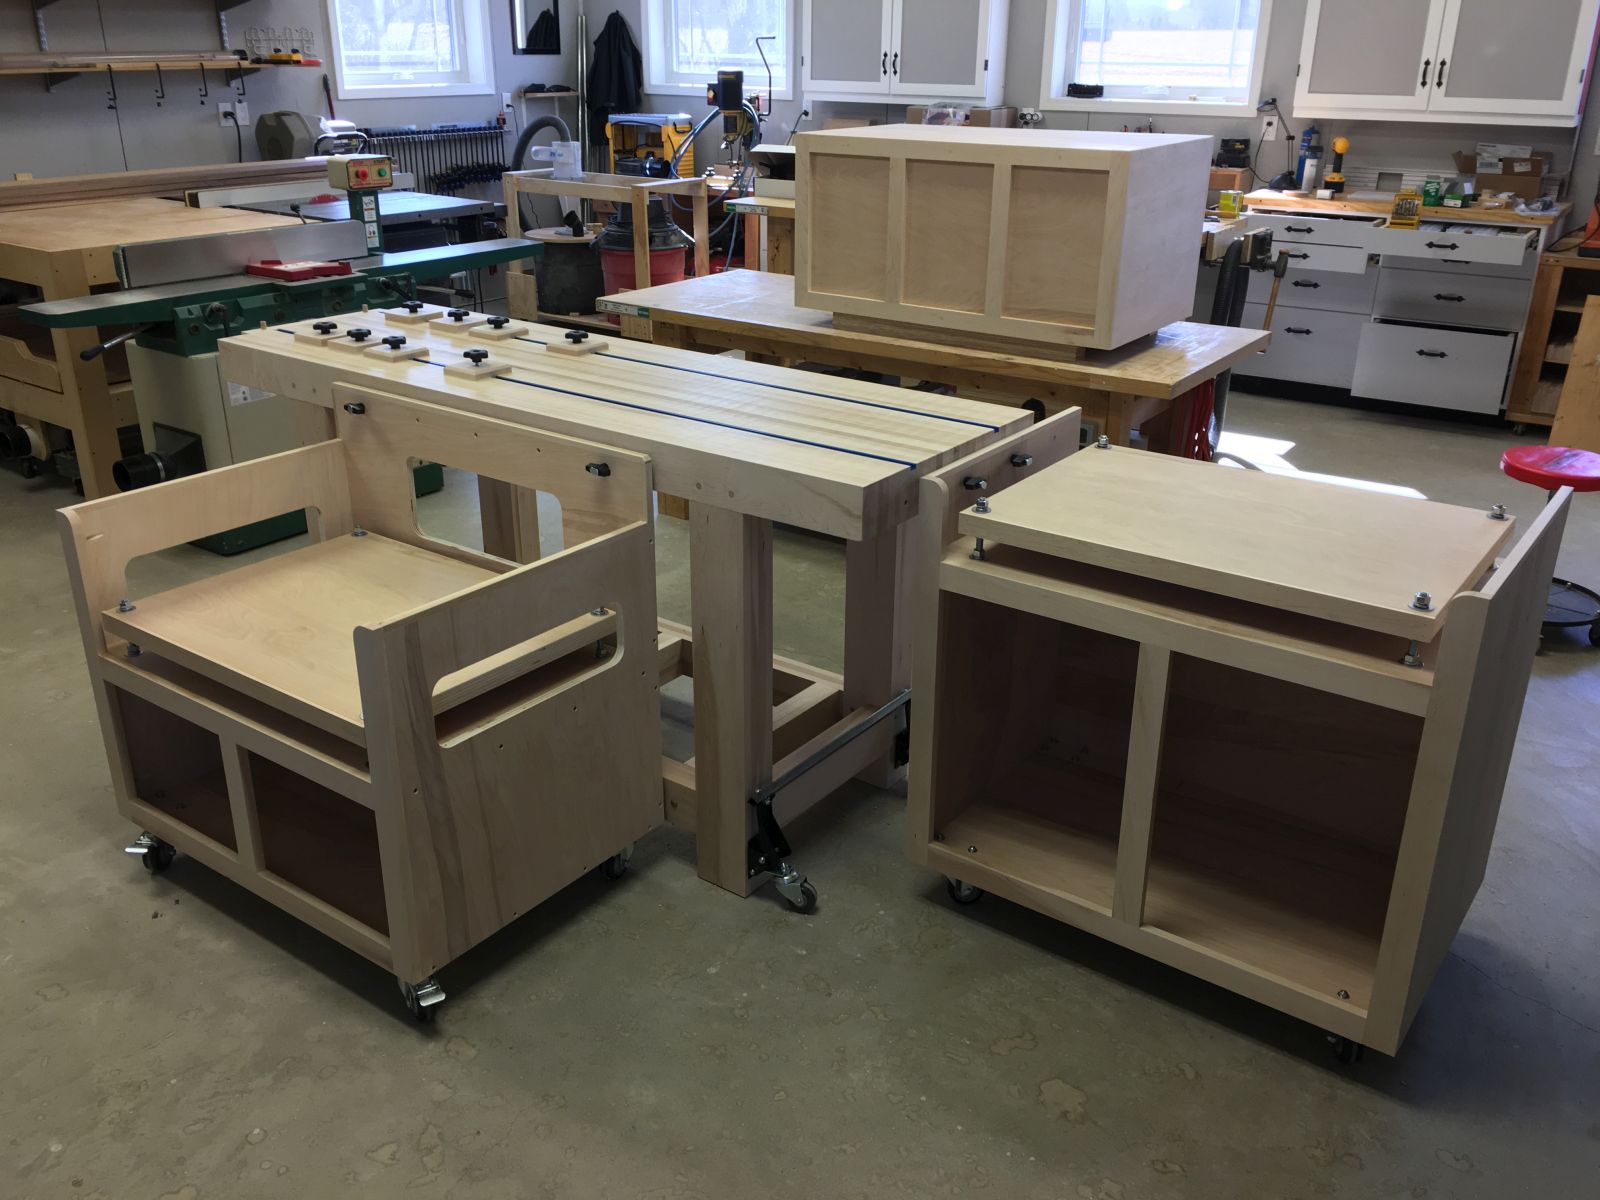
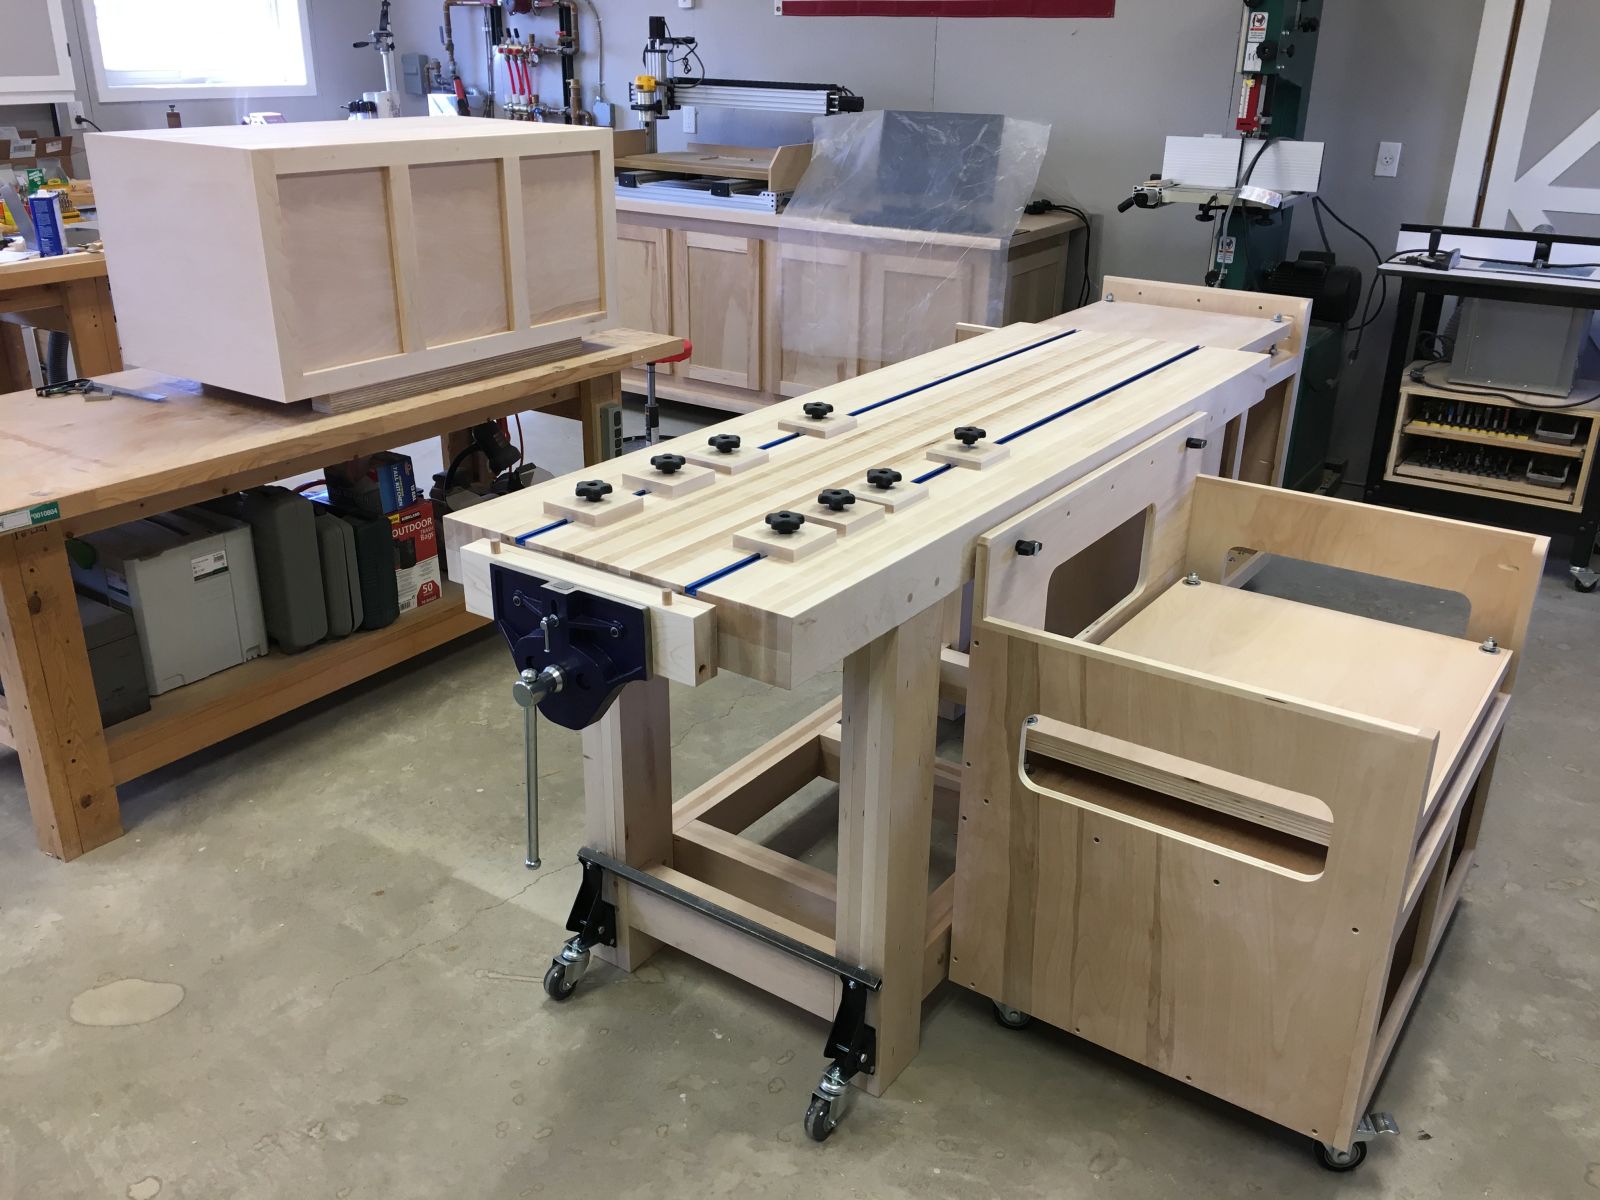
This workbench cabinet, chop saw stand and bench saw stand were designed to work with the Classic Workbench project. The workbench cabinet will sit on the leg stretchers of the workbench and features three soft close drawers and one small cabinet area behind a Shaker style panel door. The two saw stands were designed with specific saws in mind, so that the work surfaces of the saws would be at the same 36″ height of the workbench. The saw stands will easily attach and detach from the workbench with 5/16″ threaded studs and star knobs.
With future expansion and some adjust ability in mind, both of the saw stands feature 1 1/2″ thick adjustable leveling plates that will accommodate some variation in the shop floor. The leveling plates will also accommodate future chop and bench saws with different mounting-surface-to-working-surface dimensions. Standard 1/2″ hardware was used to provide both sturdy support and adjustment capabilities.
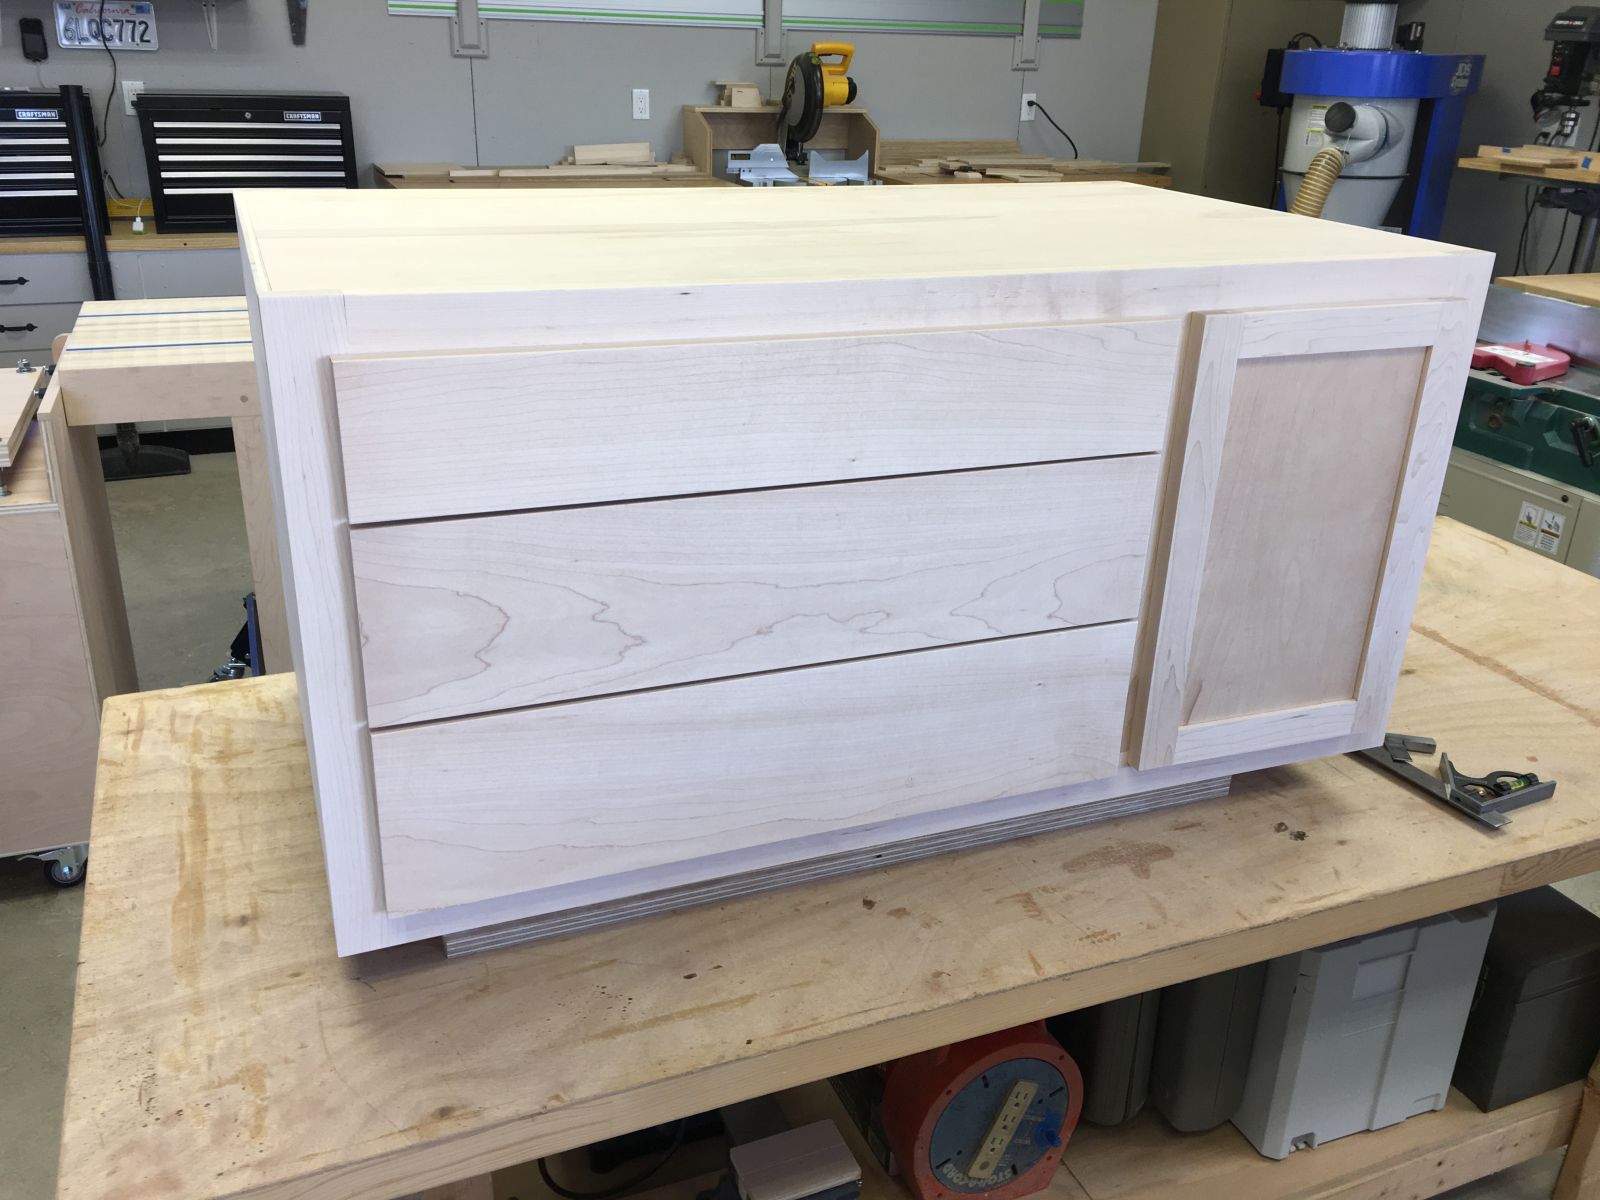
All three cabinets are made of 3/4″ birch plywood carcasses, with hard maple face frames.
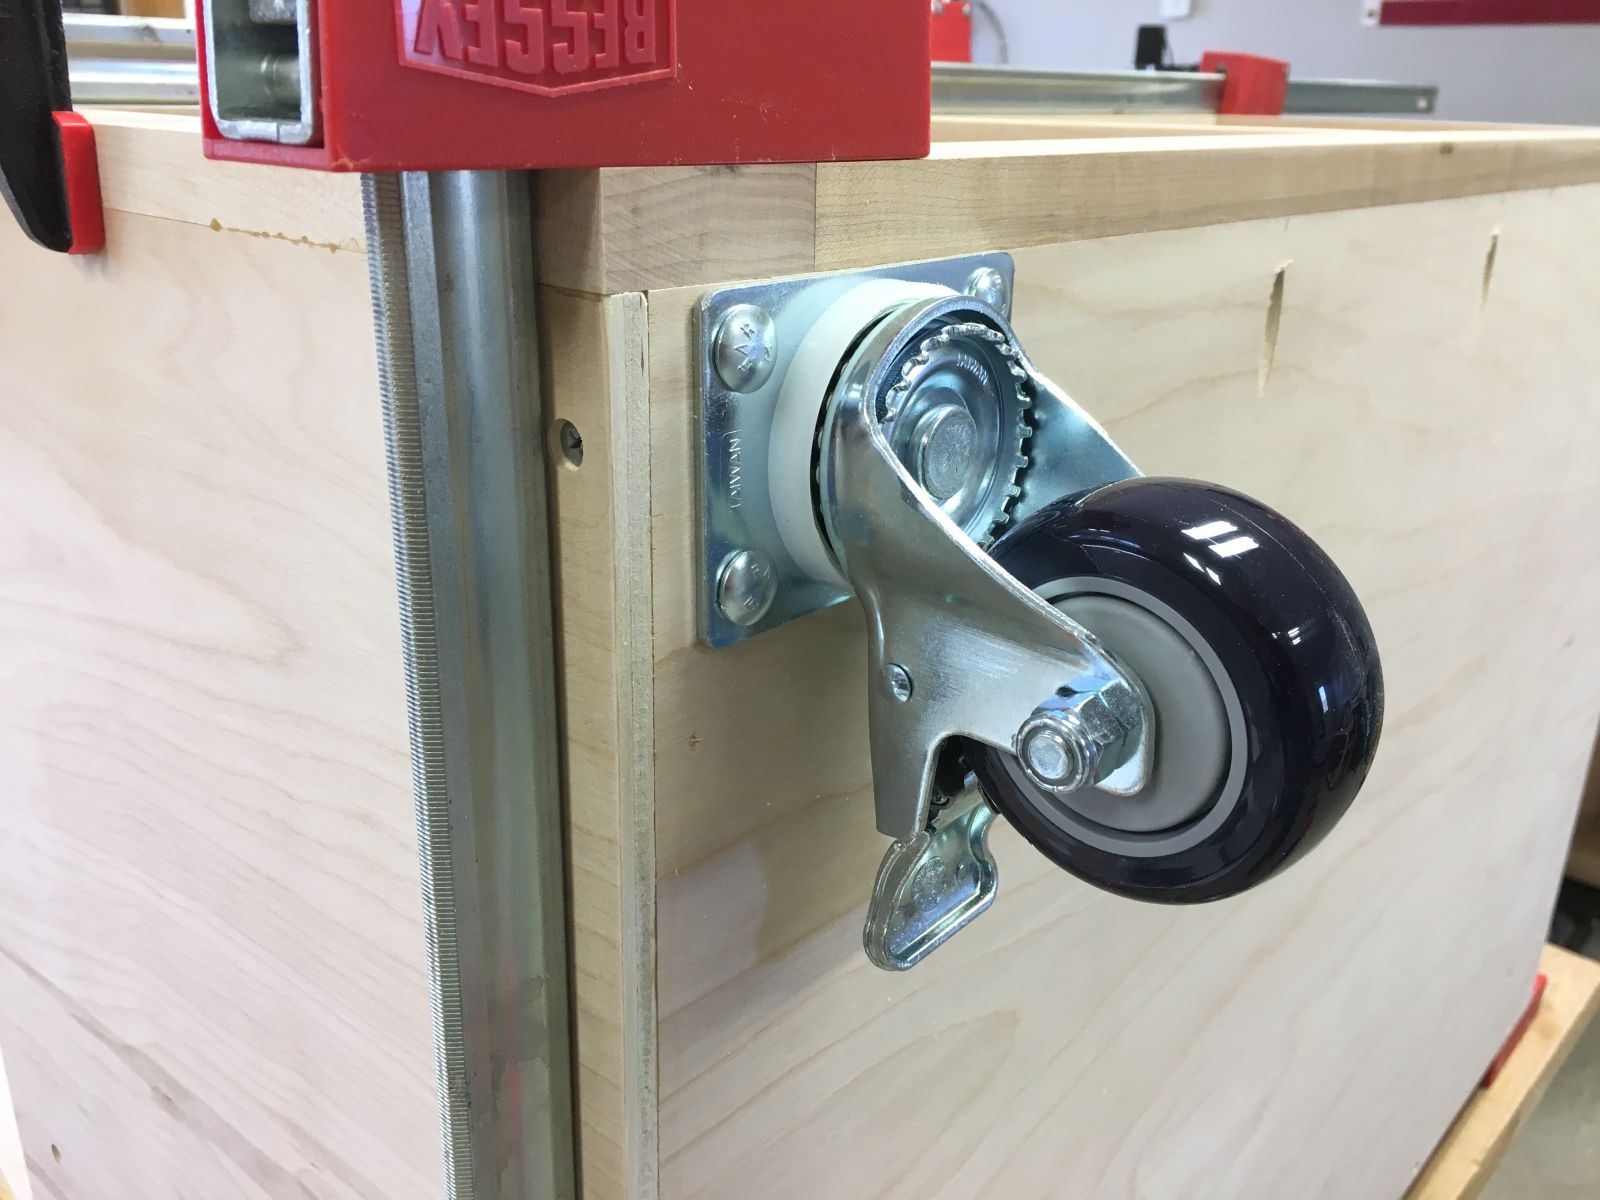
Rockler 3″ locking swivel casters
These casters are for the two saw stands
Birch plywood from Chelsea Lumber
Initial plywood breakdown with track saw
Shop drawings produced with SketchUp Pro and LayOut
Ripping to final widths on the table saw
Sizing panels with shop made cross cut sled
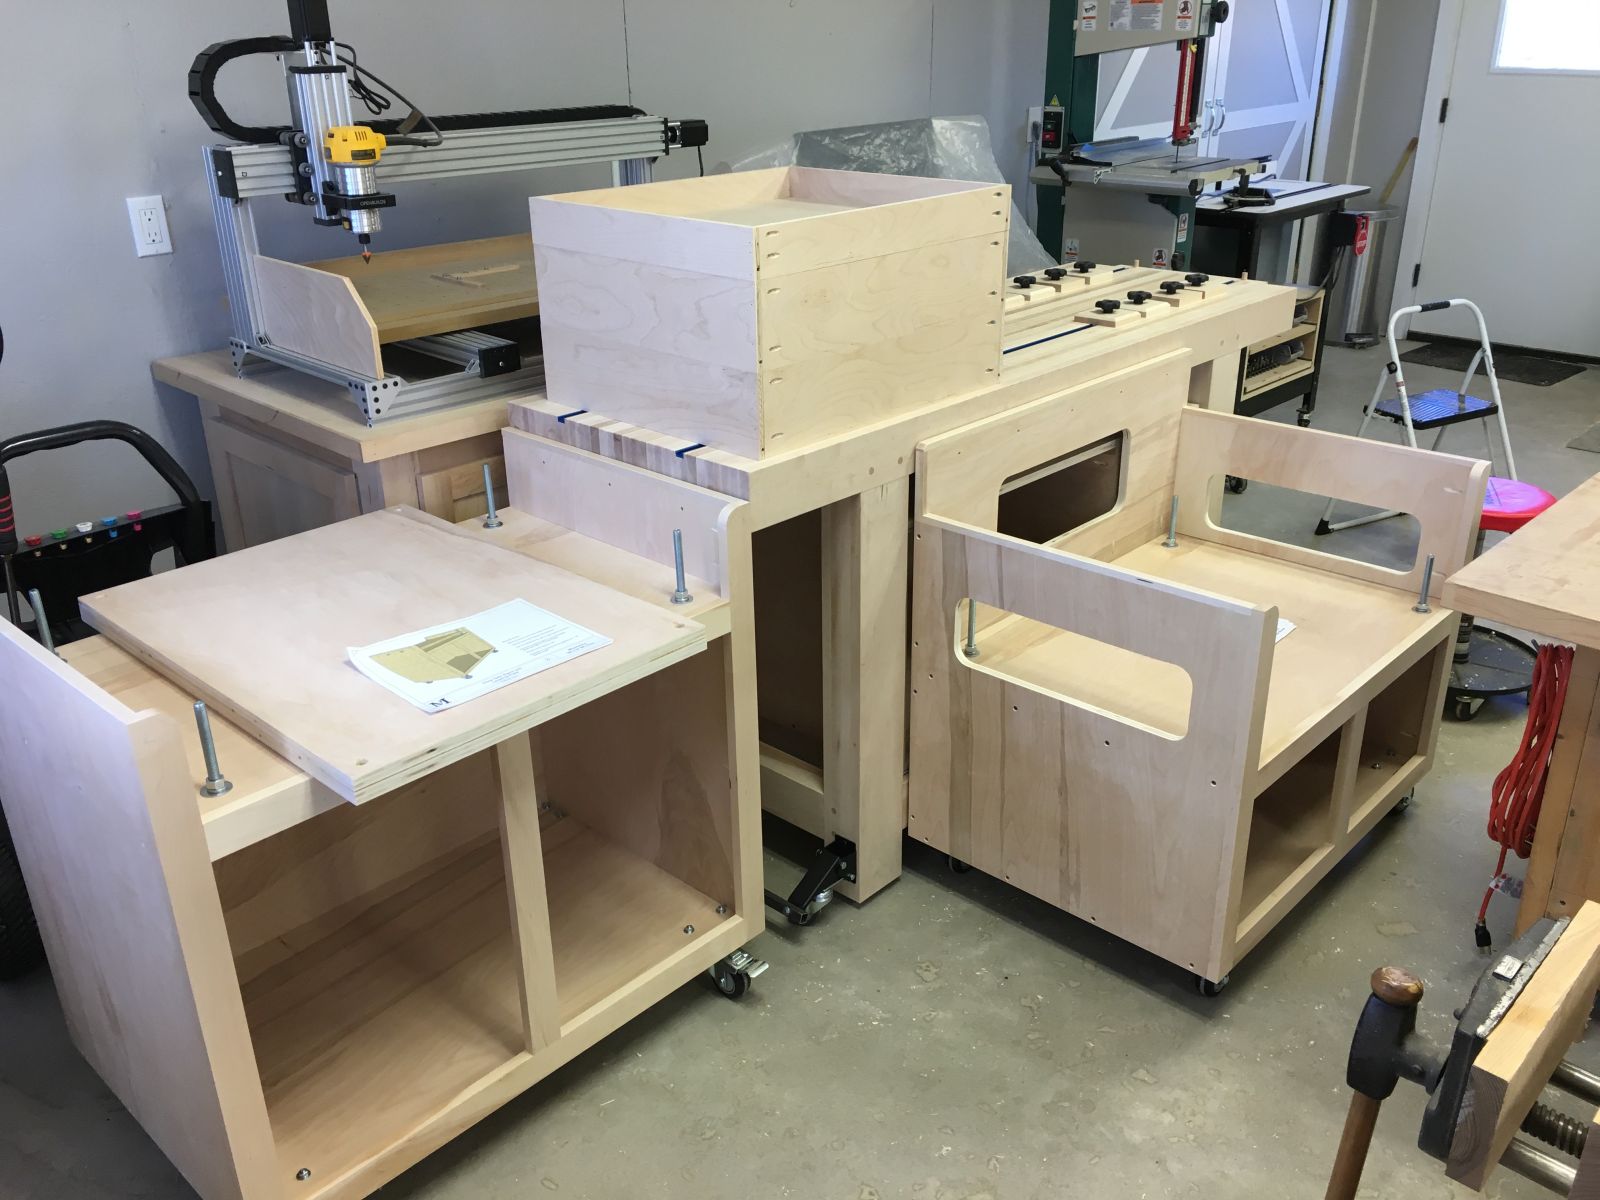
Workbench cabinet components
Bench saw stand components
Chop saw stand components
Kreg jig setting dado set for 3/8″ cut depth
Machining rabbets for cabinet joinery
Gluing up saw stand tops and leveling plates for 1 1/2″ thickness
Using 1 1/4″ screws to reinforce glued up panels
Transferring leveling plate holes to saw stand tops
Using quick shop mad jig to mark centers of 1 1/8″ radii
Cutting corner radii with 2 1/4″ hole saw
Corners cut from both sides to minimize chip out
Kreg jig to drill pocket screw holes for later attachment of face frames
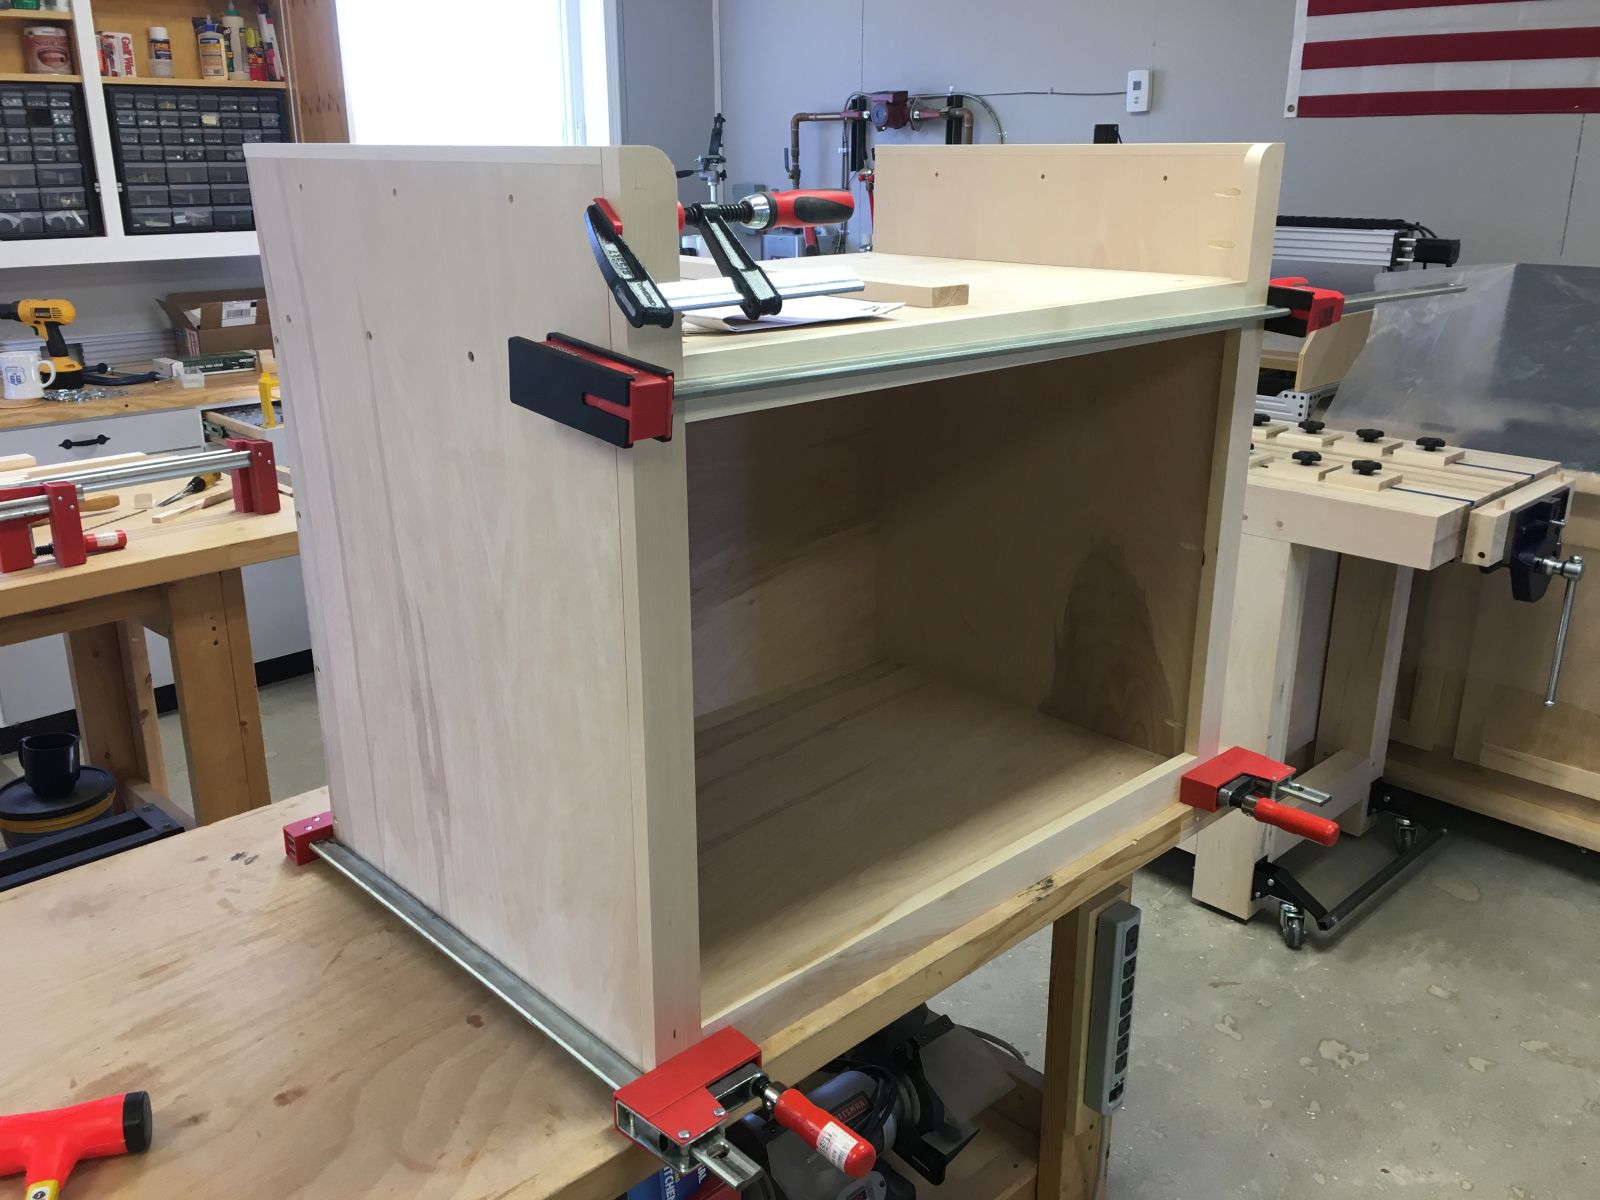
First dry fit of bench saw stand carcass
Drilling caster mounting holes in saw stand bottom panels using another shop made jig
Leveling plate adjustment tower – fancy name for a 1/2″ x 7″ carriage bolt
Bench saw stand carcass and leveling plate complete
Blum Tandem soft close drawer slides
Assembling chop saw stand carcass
Chop saw stand carcass and leveling plate complete
Assembling workbench cabinet
Workbench cabinet carcass under the Classic Workbench
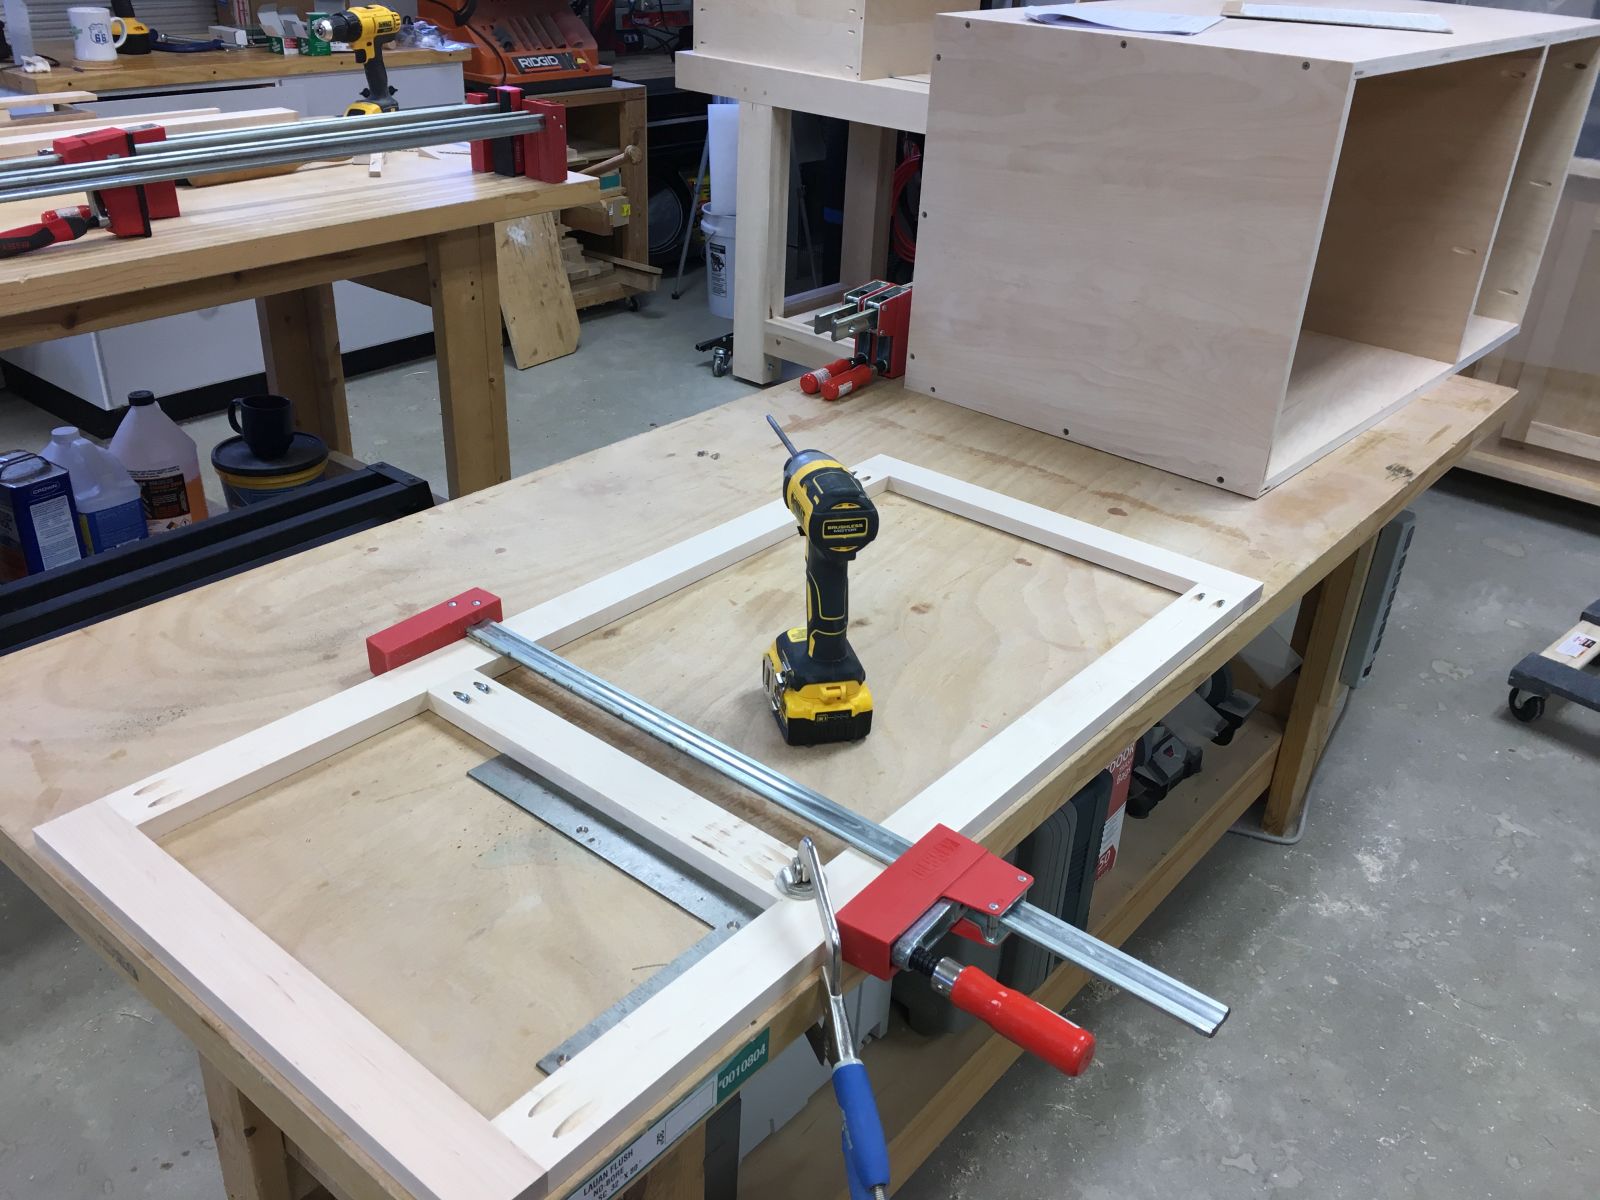
Three sets of drawer box components
Drawer box assembly with glue, nails, and pocket screws
Pocket screws reinforce drawer box corners
Three drawer boxes stacked in workbench cabinet
Adding 1/2″ plywood strips to reinforce 1/4″ plywood drawer bottoms
Since last fall, Linda has been sewing beautiful rope rugs with fabric colors and patterns lovingly selected to fit with each recipient’s preferences and decor. For each rug, over 800 linear inches of 2-1/2″ wide batting and fabric are folded over and sewn into a rope form. The long rope is then zig zg stitched together in either a circular or an oval pattern to form the rug.
A great example of Dream :: Design :: Do, Linda brought me a dimensioned sketch of a “helper” she thought of for her sewing room. The “helper” would first help with rolling up the long strip of fabric. Then both the fabric roll and the batting roll would be mounted on the “helper” and keep them from getting twisted and tangled as they were unspooled and sewn into the rope form.
And that’s how this fun and useful Rope Rug Fabric Unspooler came into being!
DREAM :: Linda’s idea sketch with needed dimensions
DESIGN :: 3D design rendered in SketchUp
Here are a few of the rope rugs Linda has completed
DO :: Fabrication started with 3/4 birch plywood from the scrap pile
Plywood base assembled
Spool blanks cut from 12/4 cherry
Turning spools bewteen centers in the lathe
This was the first project my new Nova Comet II midi lathe was used for
Spools sized for a light friction fit with cardboard cores
Boring 1/2 inch center hole with spool mounted in four jaw check
Stationary drill bit mounted in Jacobs chuck mounted in tailstock
Testing upper spool with wooden dowel axle
Final axle / winding handle from 1/2 hex bolt
Spools mounted on bolts spun freely
First test of unspooler located under sewing table
Linda nearing the end of the rope forming step
The colors were lovingly selected to compliment a very handsome kitty cat
The unspooler can be a distance away from the sewing machine


 and one coat of epoxy resin (R)")


")
")


 dry fit")


 dry fit")


 dry fit and clamping trial")


 with blocking details")


 clearance to allow for wood movement of the top inside the breadboard end")


")

")


")


")


 Pencil set")