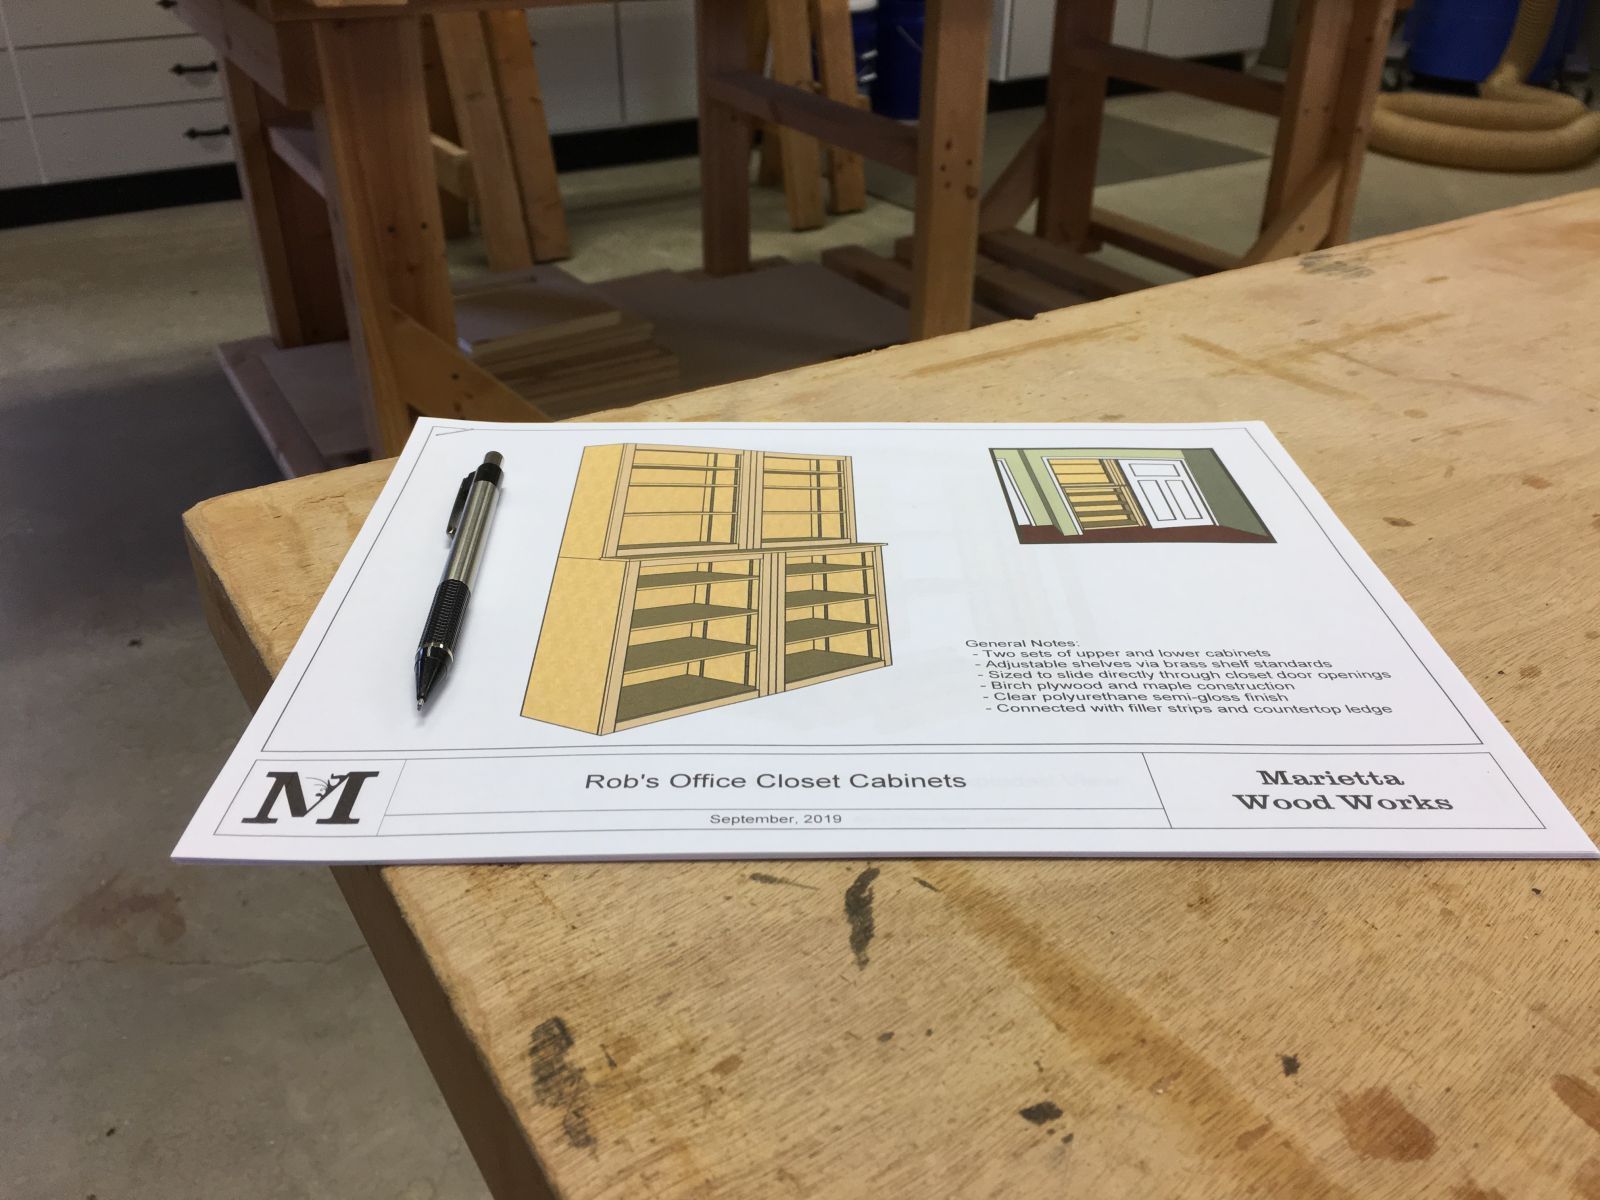
My home office isn’t “exactly” cluttered, and I recently rearranged it to let a lot more natural light in. So, in keeping with the improvements theme, I tackled a build that’s been in the Future Projects folder for quite awhile. Four bookcase units will be ganged together in the closet to replace the commercial wire shelving units that only utilize about half the volume of storage space available. The sliding bypass doors on the closet, which I don’t want to remove and reinstall, presented the minor design challenge of coming up with units that would slide through the door openings and still use most of the storage volume available.
The four units I came up with will slide straight into the existing door openings and take up the majority of the closet volume, both from side to side and from bottom to top. The upper units will be partially behind the closet door header, but at only twelve inches deep, those top shelves will be for seldom accessed but un-tossable kit! Rather than breaking out my shelf pin drilling jig and drilling a bunch of holes, I ordered brass plated shelf standards that will install quickly in shallow dadoes I cut in each of the carcass sides before assembly.
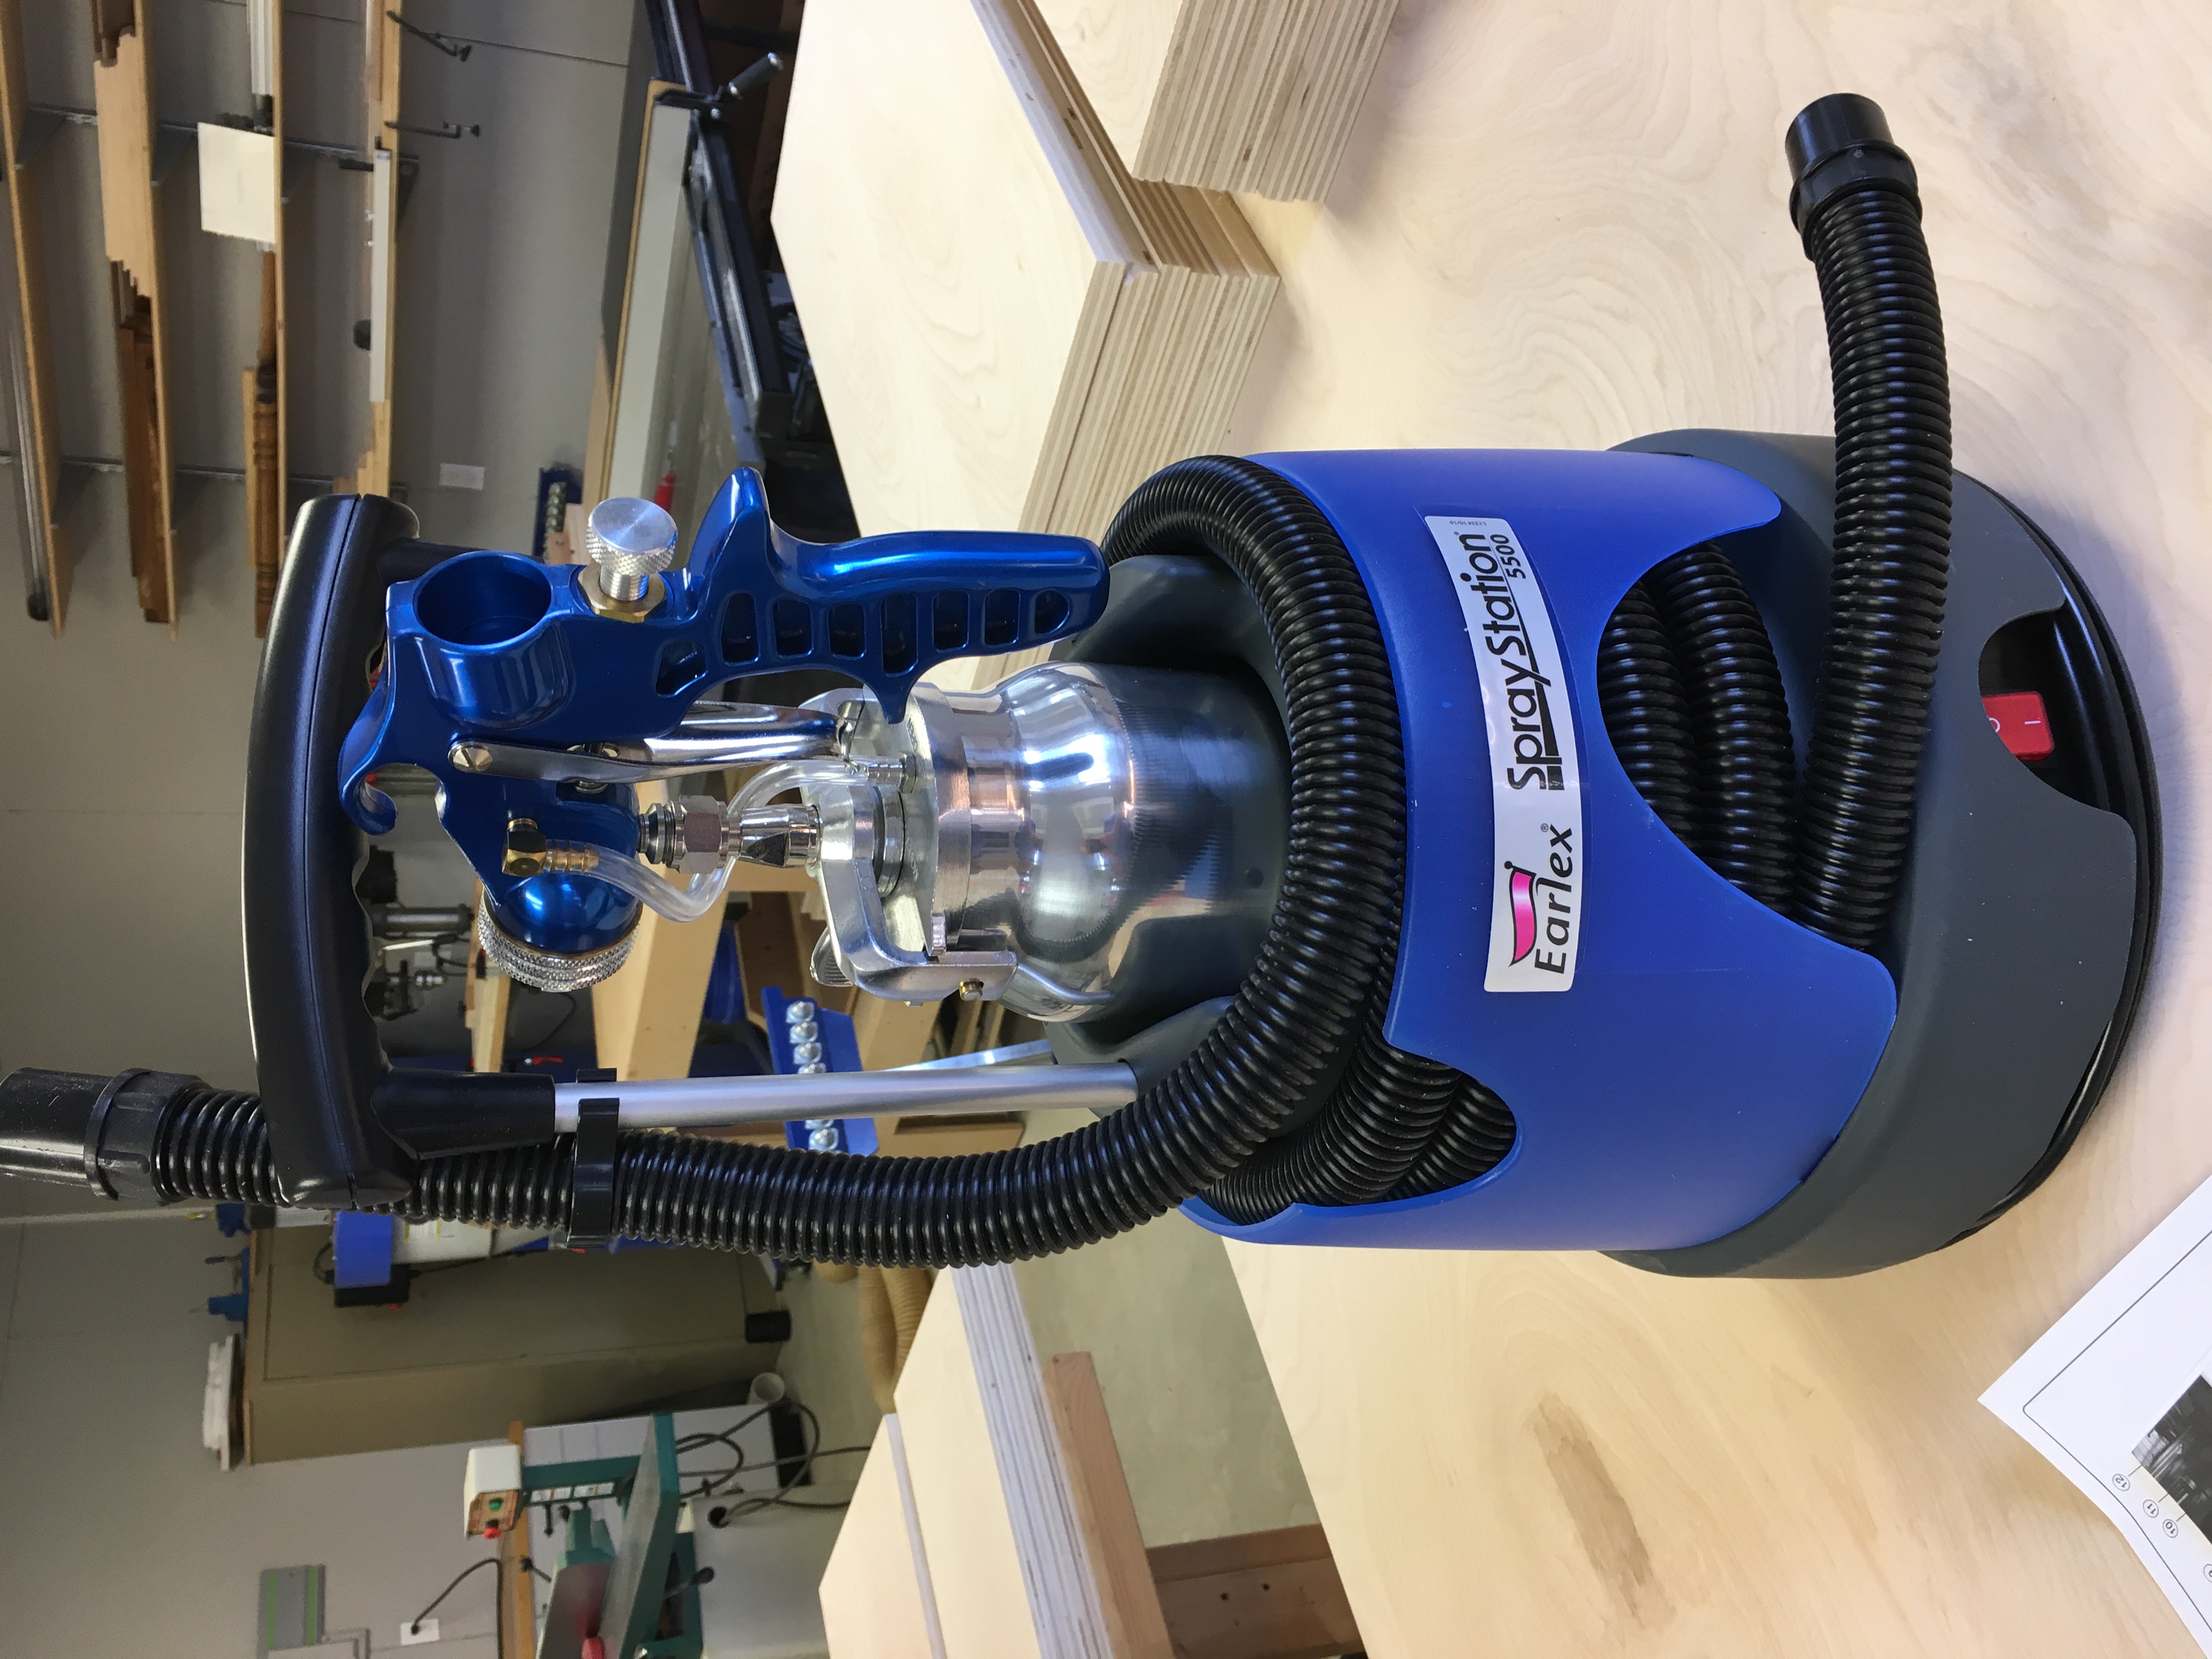
I always appreciate a project that gives rise to adding new tools or equipment to the workshop. Anticipating all that surface area (seven sheets of plywood!) of the carcasses and shelving, I’ve re-acquired an HVLP spray system, the single-stage turbine Earlex 5500. After quite a bit of research and some test samples, I’m going to spray a water-borne clear finish, MinWax Oil-Modified Poly. The water-borne finish brings much lower VOCs and soap-and-water cleanup to the party, and the oil-modified variation still adds some of the amber hue of solvent-based polyurethanes.
Every cabinetry project starts with a trip to Chelsea Lumber
Design done and plywood in the shop
Using my Festool track saw to break down the sheet goods according to the cutting diagrams in my design
Ripping plywood sections to final widths on the table saw
Using my shop made cross cut sled to break the long plywood sections into individual components
Most of the plywood components sized and ready for next operations
My new Earlex 5500 HVLP spray system
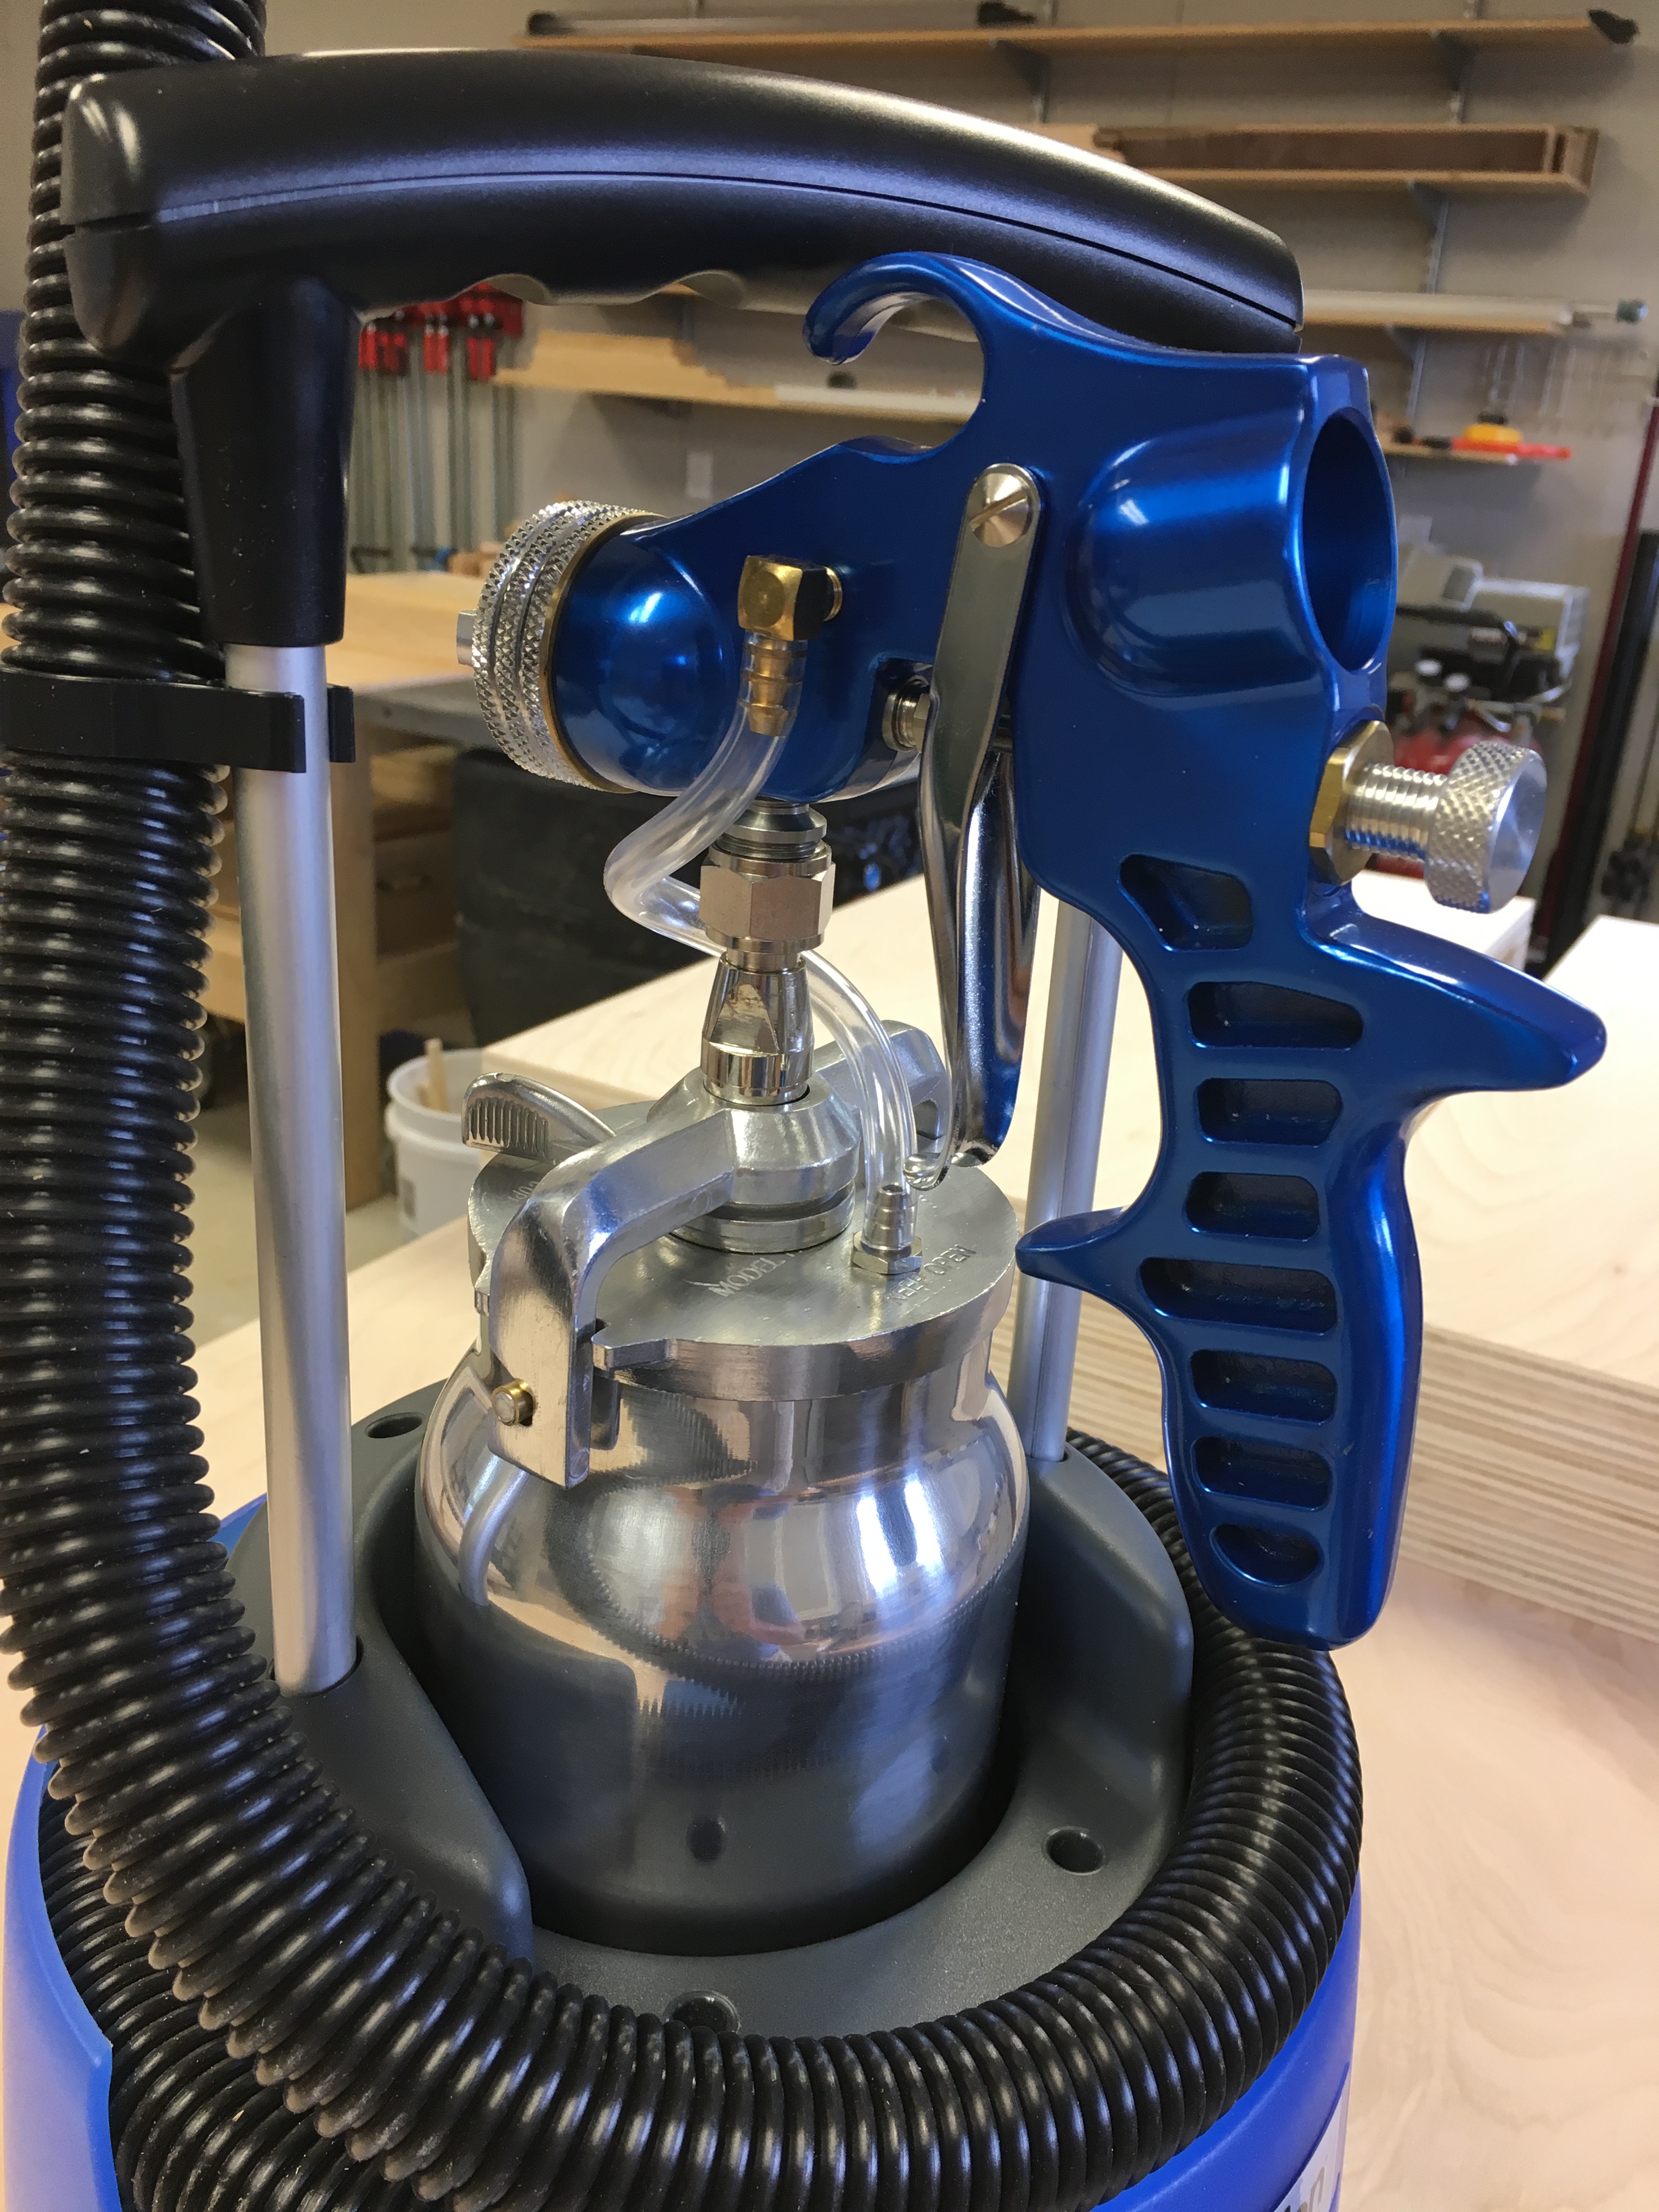
For a light duty HVLP system, the spray gun is high quality
Setting up the dado blade stack on the table saw
A set of these Kreg setup jigs, from 1/8″ to 1/2″ make quick and accurate work of setting cutting depths on the table saw
Another Kreg jig assists in adding pocket screw holes to cabinet components for attaching face frames
After making samples of both MinWax Polycrylic and Oil-Modified Polyurethane, the OMP product was much closer to the finish I was looking for
The slight amber hue from the OMP finish is evident
This birch plywood finishes well with one sanding at 150 grit
Carcass assembly with Titebond III and two-inch drywall screws
Test fit of the brass shelf standards that arrived the day I was assembling carcasses
The Rockler spec for these brass shelf standards was 3/16″ x 5/8″ but since I cut the dadoes before I had them in hand, I made the dadoes 3/16″ deep by 11/16″ wide, just in case
Assembling one of the bookcase carcass sides, top and bottom
The stacked units will be 92 inches tall, with just enough ceiling clearance to allow the top units to slide up and onto the bottom units at the required angle
Cross cutting the 1/2″ blywood backs a little long, to be match trimmed to the top of each cabinet
Lower units with backs installed
All four units with backs installed, ready for face frames
Maple stock rough sized for face frames and shelf edging
Shelf edging profile
Attaching shelf edging
Assembling one of the face frames with pocket screws
Attaching a face frame to a cabinet carcass with glue and pocket screws
A seven degree block guides a long drill bit to open the bottom of each pocket screw hole
Face frame vise grips hold rail and stile in perfect alignment for pocket screw connections
Blocks and quick clamps help straighten slightly bowed plywood sides
Using a self-centering DowlIt drill jig and drill bushings to add connection holes in face frame stiles
Cutting four shelf standards to length clamped between two pieces of 1/2″ plywood
Built up “T” section spacers will position bookcases directly in line with closet door openings
Lower cabinets with spacer and shelf dry fit in place
Four cabinets ready for finishing
MinWax Water-based Oil Modified Polyurethane (Satin) was the finish of choice to be applied with my new HVLP sprayer
Workshop ready for spray tent deployment
A 10′ x 10′ popup tent with three canvas sides provides a spray area and protects the rest of the workshop from overspray
Each cabinet received two coats of poly, with a 220 grit sanding in between
With the cabinets complete, saw horses provided support for all twelve shelves
Soap and water cleanup of the water-based (borne) polyurethane was really nice
An extra-duty lower shelf in place for spraying
Shelving laid out to dry and harden up for installation
Before shot of one side of my office closet, with wire shelving and a hodge podge of items
Office closet contents and wire shelving emptied out of the closet
Left side of new bookcases installed and partially filled
Right side of new bookcases installed and pretty full already
Everything reorganized and out of sight
Every large project finishes with scraps on the burning pile. This burn included some of the original office cabinetry that I don’t need anymore!


 was the finish of choice to be applied with my new HVLP sprayer")


 polyurethane was really nice")


